
|
|
|
|
|
|
||
|
|
||
 19th August 2011, 16:32
|
#1 |
|
This is my second home
2000 Wedgey Blue 2.5V6 Beauty Join Date: Jul 2007
Location: Bilston
Posts: 4,486
Thanks: 36
Thanked 29 Times in 16 Posts
|
In preperation for my Visit to Monk, to have my Message Centre unit fitted and given teh T4 treatment, I thought I would make a "How To" on removing the Instrument cluster.
It is fairly straightforward to do, with the right tools. Using a flat object, preferably a Trim Tool, gently lever the Dashboard from the bottom, I find it easiest doing it from teh following two locations: 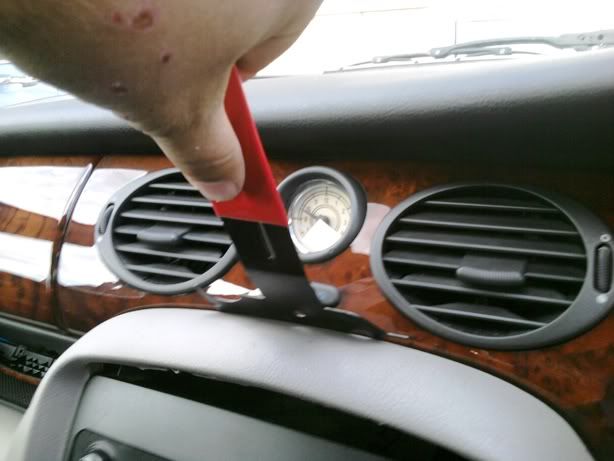  Once the Dashboard has moved from its clips, gently pull teh dashboard away with your fingers, I found it easiest to pull the Dash starting at teh Console, as pictured: 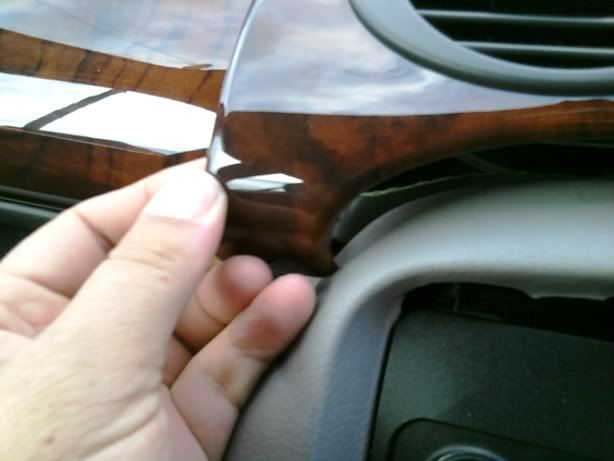 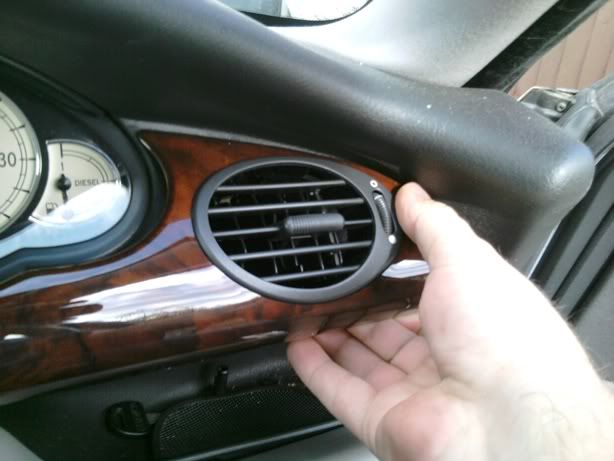 Once the Dashboard is loose, grab a screwdriver, Phillips, preferably one without a Sharp pointy end, use one with a flattened end. Undo the two Screws that hold up teh trim above the Instrument Panel, as seen in the pictures. Press firmly upwards to avoid the Screwdriver slipping and damaging the screw head. 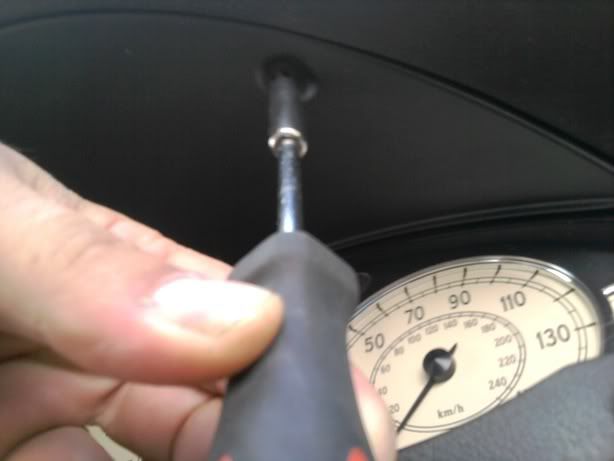 Once both screws are removed and stored safely, gently lever the trim downwards at the centre. Once it pops free, you will see it won't pull away cleanly, you need to hold the middle with one hand and gently push from the Right hand side inwards to "Bend" the trim, then it will pop out freely. 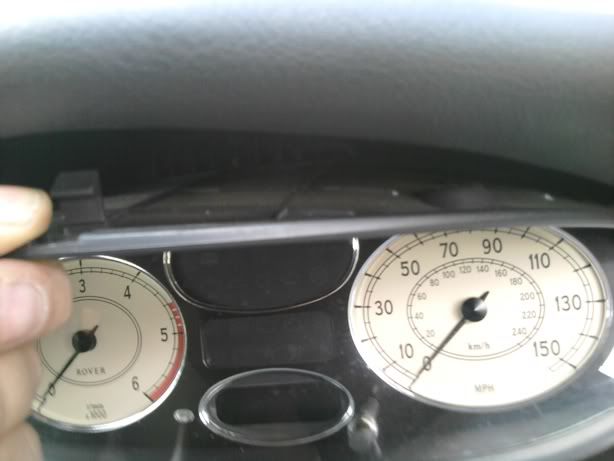 Once this trim is away, store it away and look inside the Cluster area, you will see central above the Cluster, a Screw. Simply unfasten this and store it safely. 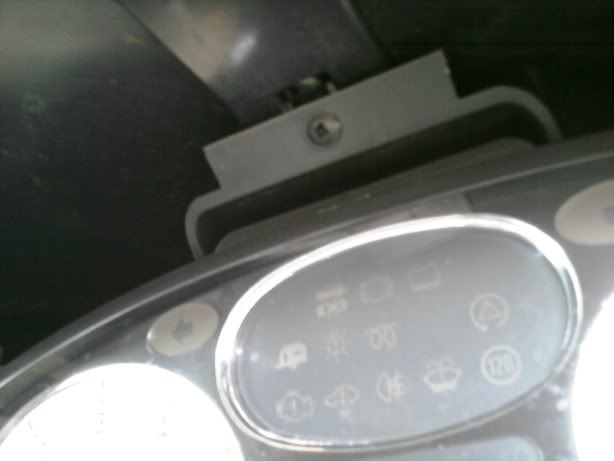 This is where you need to be patient. Once the Screw is removed, you have to work your hands behind the Dash at each side of the Cluster. The left side is easier as you can get your hand in behind the Cluster. The right side you can only just get one or two fingers behind the Cluster. When you are comfy with your hands position, push the Cluster firmly forwards. You will note straight away, that the Left side will pop out quicker, due to more fingers pushing  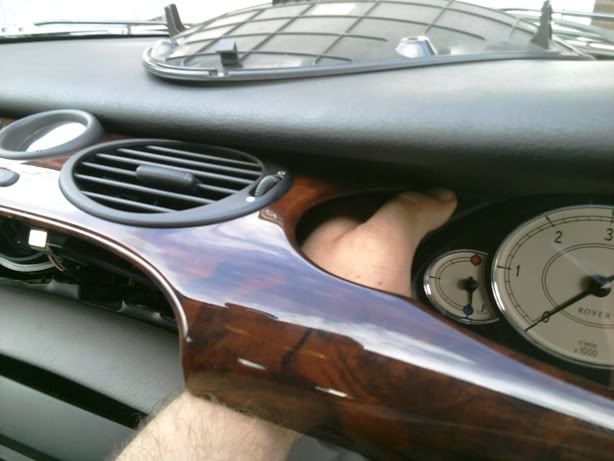 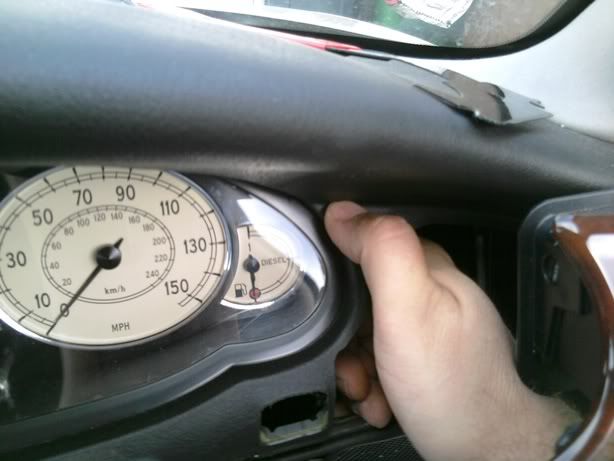 Once the Unit is free of its clips, you will find two plugs behind on each side of teh Cluster. I don't know the Techy name for these, but you need to push down on a clip and pull a lever over the top of that clip to release it. A bit tricky but fairly simple when you have done your first  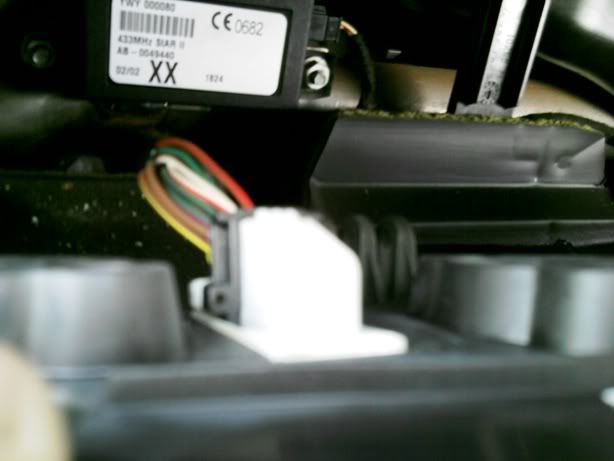 Once the Plugs are free, simply lift away the Cluster and you will be left with this: 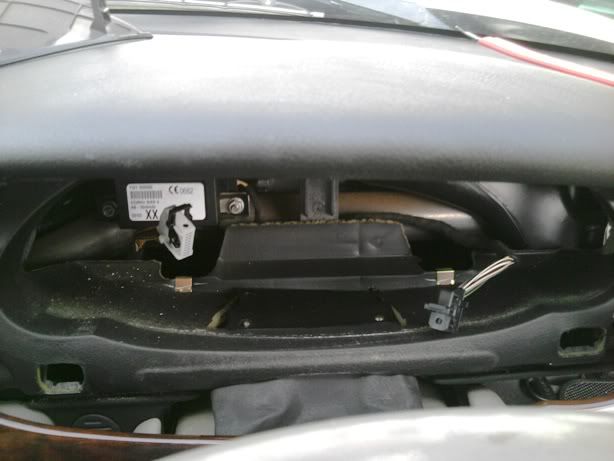 And your Cluster Unit is ready for replacing or whatever reason you needed to remove it for  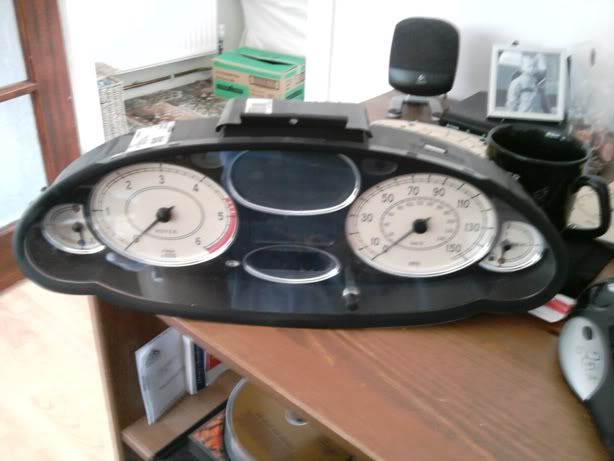 Refitting is reverse of removal, with the exception that you can refit your Dash at this point, it only needs removing to assist in pushing the Cluster out I hope that helps. I will be doing a "How To" Switch Dials from a Mph to a Kmh Cluster later to tie in with this how to The usual rules apply here, this post is just a guide and any work you carry out yourself, is at your own risk etc Disclaimer: You are responsible for any work or modifications carried out on your car and you undertake any such work at your own risk. The 75 and ZT Owners Club nor the original authors in this thread can be held liable for anything that may happen as a result of you following this thread's posts. Any modifications should be reported to your insurance company.
__________________
2.5V6 Auto: Work carried out so far: Crankcase Breather Pipe replaced, O/S CV Joint replaced, Starter Motor Repair Kit Fitted, Front Suspension Overhauled. Last edited by Dragrad; 20th August 2011 at 01:24.. Reason: Disclaimer added |

|

|
|
19th August 2011, 17:35
|
#2 |
|
Moderator

MG-ZTT Join Date: Mar 2007
Location: Ware, Herts
Posts: 19,798
Thanks: 161
Thanked 1,249 Times in 1,036 Posts
|
Carl
Great How to.... Just one thing, you don't need to remove the dash panels, you can simply undo the cover, remove the single screw and the IPK will squeeze out...
__________________
David  Impecunity is the mother of ingenuity Useful how to's for common problems Car Of The Month Jan 2014 [SatNav Power Down] [Coolant Level] [SatNav Repair] [Diesel Non Starting] [Paint Codes] [Rear Light Seals] [Reversing Light Switch] [Bleeding Brakes][Sunroof Drain] [Early ZT's][Instrument Pack Diagnostics][ATC Diagnostics] |
|
|
|
|
19th August 2011, 17:38
|
#3 | |
|
This is my second home
2000 Wedgey Blue 2.5V6 Beauty Join Date: Jul 2007
Location: Bilston
Posts: 4,486
Thanks: 36
Thanked 29 Times in 16 Posts
|
Quote:
Yep I tried that, but I found it awkward this way took no more than 10 minutes and was straight forward enough.
__________________
2.5V6 Auto: Work carried out so far: Crankcase Breather Pipe replaced, O/S CV Joint replaced, Starter Motor Repair Kit Fitted, Front Suspension Overhauled. |
|
|
|
|
|
19th August 2011, 17:43
|
#4 |
|
Moderator
MG-ZTT Join Date: Mar 2007
Location: Ware, Herts
Posts: 19,798
Thanks: 161
Thanked 1,249 Times in 1,036 Posts
|
Fair play.....
__________________
David Impecunity is the mother of ingenuity Useful how to's for common problems Car Of The Month Jan 2014 [SatNav Power Down] [Coolant Level] [SatNav Repair] [Diesel Non Starting] [Paint Codes] [Rear Light Seals] [Reversing Light Switch] [Bleeding Brakes][Sunroof Drain] [Early ZT's][Instrument Pack Diagnostics][ATC Diagnostics] |
|
|
|
 |
|
|


 Linear Mode

