
|
|
|
|
|
|
||
|
|
||
 19th April 2012, 12:11
|
#61 |
|
This is my second home
Rover less ! Join Date: Jun 2011
Location: Tarbolton
Posts: 3,442
Thanks: 393
Thanked 888 Times in 542 Posts
|
I've now got both undertrays finished and nicely painted up but forgot to upload photos but in the meantime on the V6 I've finished off painting the remainder of the front subframe. I painted most of it during my recent pre MOT check.
I had noticed a kink on the front stabiliser bar coming from the subframe to the chassis so I have removed them for sandblasting and re painting. Here they are showing the kink. 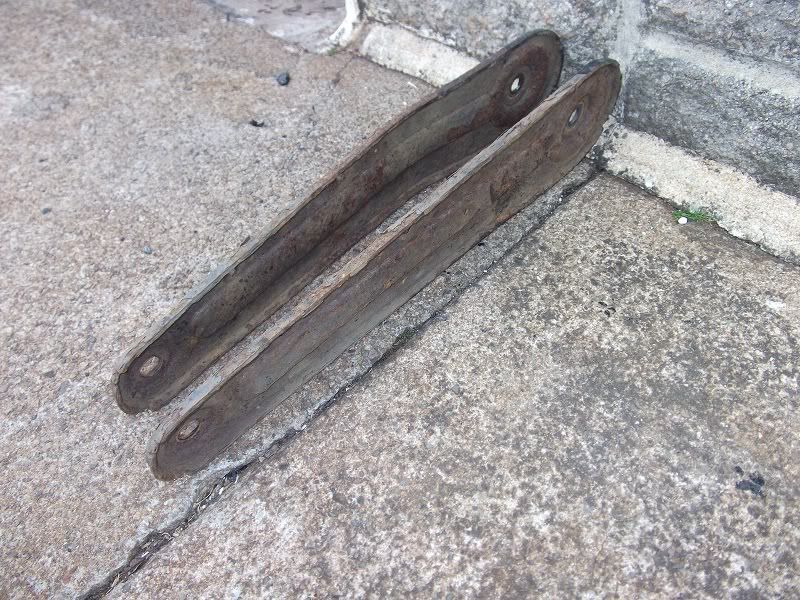 I used my new air gun in earnest for the first time, releasing the retaining studs in seconds. As I only use this car locally I will continue to drive it without the stabiliser bars on as I am going to strip the diesel's rear suspension this weekend and I will also remove its front stabilisers bars and get all the suspension components sandblasted at the same time. Look what arrived today. 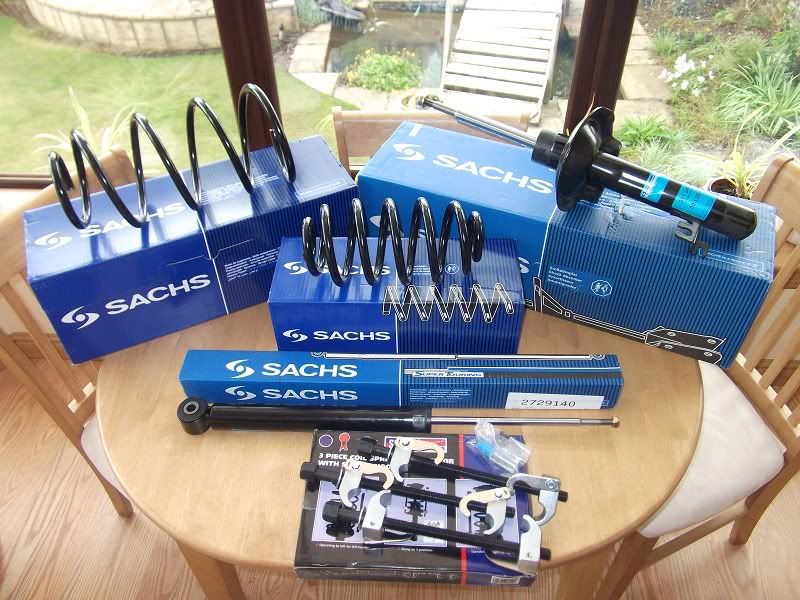 I'm going to be a busy boy with a full set of springs and shockers from Euro Car Parts. What a sterling service but now for the confession ! I ordered these parts independently 2 days ago then 1 hour later whilst on the forum I noticed that they offered a forum discount. What a numpty I was , but wait ! after contacting them by e-mail they first confirmed that, yes I was a numpty then gave me the discount all £124 odds. So again I say thank you, for not only an extremely generous discount but also a first class service in general right up to delivery this morning. Now I suppose it's off to work JYJ Last edited by Jim Jamieson; 16th January 2018 at 13:58.. |

|

|
|
19th April 2012, 12:18
|
#62 |
|
This is my second home
Rover less ! Join Date: Jun 2011
Location: Tarbolton
Posts: 3,442
Thanks: 393
Thanked 888 Times in 542 Posts
|
Before I log out of photobucket, here is a shot of the underside of the diesel taken when I was changing the auto box fluid.
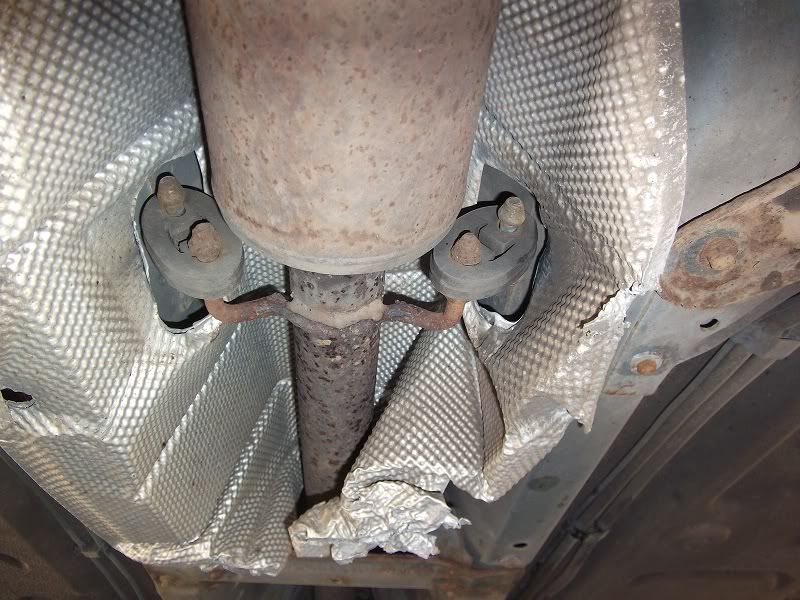 You will notice the exhaust heat sheild is crumpled but from the rear. I reckon this happened just last week when we visited our sons house. He was concerned that I had parked overlapping his neighbors driveway by about 2 inches so he moved the car into his own driveway. When I reversed out their was a srunching sound which I thought was just the undertray but obviously it was the heat shield so this has now been repaired by adding some stiffener bars along each side as shown below. 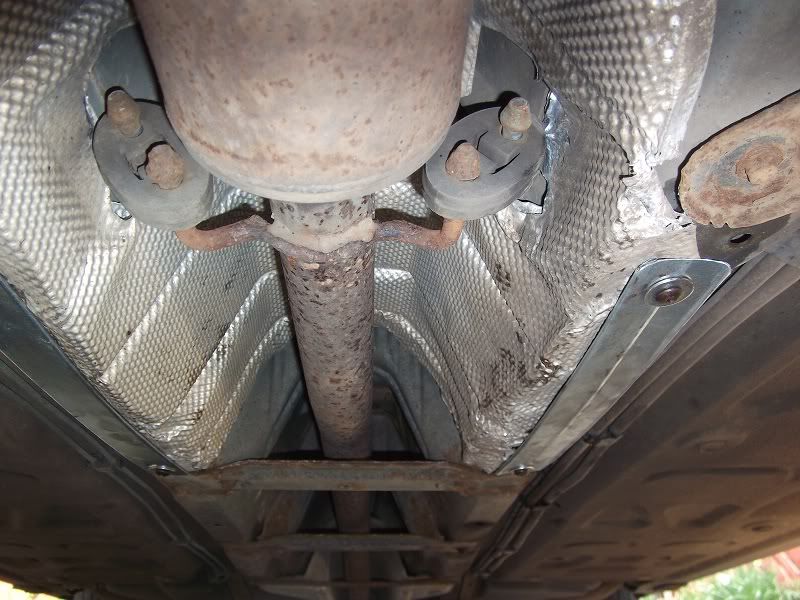 And now its off to work JYJ Last edited by Jim Jamieson; 16th January 2018 at 13:59.. |
|
|
|
|
20th April 2012, 16:29
|
#63 |
|
This is my second home
01 75 tourer cdt,1973 Rover 3500S,,1974 Rover 3500 Auto,1998 216 SE Coupe, 1968 Morris Minor 1000 Join Date: Jul 2010
Location: bangor/down
Posts: 4,839
Thanks: 62
Thanked 184 Times in 158 Posts
|
Thats a nice neat mod on the heat sheild,Should keep it safe.

__________________
Regards Neale [SIGPIC][/SIGPIC] 121st 75 Tourer to be made 15th 75 Tourer CDT Club SE to be made 36th 75 Tourer in Zircon Silver Metallic to be made Membership No 903 I was one of the 541 
|
|
|
|
|
19th June 2012, 21:52
|
#64 |
|
This is my second home
Rover less ! Join Date: Jun 2011
Location: Tarbolton
Posts: 3,442
Thanks: 393
Thanked 888 Times in 542 Posts
|
I'm almost finished the suspension makeover on the missus's diesel but already I've started on other things. The aircon evaporator is being replaced as when I was in the middle of doing the upgrade to a Kenlowe cooling fan it was evident the condensor was past its best.
I'm also fitting Viton seals to the intercooler pipes and have my eyes on the FBH, well I might as well refurb it when it's easy to get at. It was the Missus's birthday today and also our anniversary so with no expense spared I bought the good lady a nice gift. You know how the girls like to look their best so I bought her 1 litre of JFM royal blue base coat so her car will look its best.  As soon as I get out of the hospital getting my broken legs and fractured skull fixed I will go out and get her something more appreciated. OUCH ! JYJ |
|
|
|
|
19th June 2012, 22:29
|
#65 |
|
This is my second home
01 75 tourer cdt,1973 Rover 3500S,,1974 Rover 3500 Auto,1998 216 SE Coupe, 1968 Morris Minor 1000 Join Date: Jul 2010
Location: bangor/down
Posts: 4,839
Thanks: 62
Thanked 184 Times in 158 Posts
|
You know how to spoil her
__________________
Regards Neale [SIGPIC][/SIGPIC] 121st 75 Tourer to be made 15th 75 Tourer CDT Club SE to be made 36th 75 Tourer in Zircon Silver Metallic to be made Membership No 903 I was one of the 541
|
|
|
|
|
14th July 2012, 23:04
|
#66 |
|
This is my second home
Rover less ! Join Date: Jun 2011
Location: Tarbolton
Posts: 3,442
Thanks: 393
Thanked 888 Times in 542 Posts
|
Oh! how time flies.
My suspension refurb as detailed in another post is almost complete, just waiting on new brake back plates coming in from China. The aircon evaporator is fitted and the Kenlowe fan although it is all wired up etc, I have still to fit it to the car. It's been almost a month since doing anything seriously with the car as we had a planned refurbishment of our bedrooms at home and I really thought I would be finished with the car work before our new bedroom units arrived. It'a true saying "The best laid plans O mice and men gang aft aglee" Robert Burns On top of that we had a family bereavement, the missus's mother passed away on June 27th so car work was the last thing on my mind. Having said that I did venture out to the workshop today just for some therapy and stripped out the bonnet locks. I was really surprised just how rusty they were, even with me giving them regular greasing. I will post some photos of my work which as usual is OTT, meantime it's back to the decorating  JYJ |
|
|
|
|
29th July 2012, 21:52
|
#67 |
|
This is my second home
Rover less ! Join Date: Jun 2011
Location: Tarbolton
Posts: 3,442
Thanks: 393
Thanked 888 Times in 542 Posts
|
Here are some photos of the additional work I've carried out on the diesel.
The FBH fuel supply pump was corroded quite bad with the small support bracket completely rotted through. This is the finished job after removing all the rust with a multi tool then several coats of paint and a modified fixing using a wide tie wrap bolted on using stainless screws. The pump has been tested and primed right up to the FBH, I also used new hose clamps as the originals were corroded through. 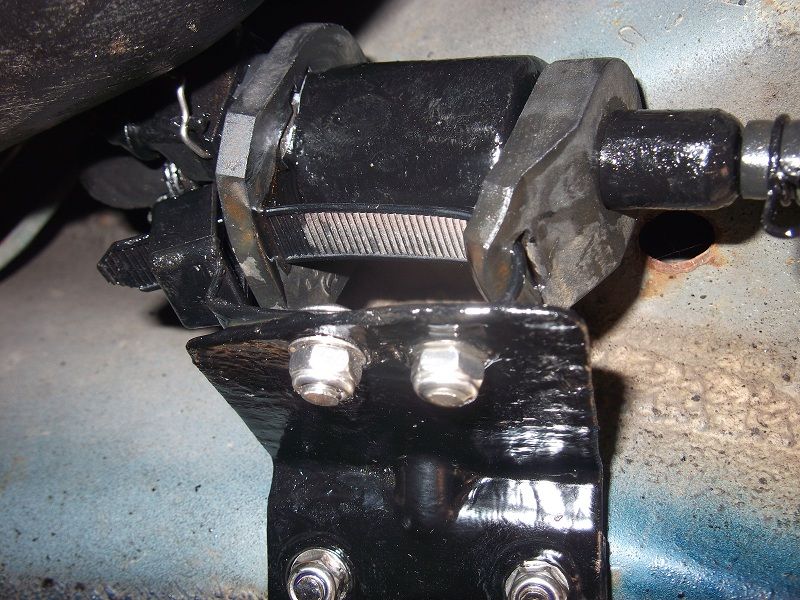 The front wings have now been removed for re painting and I was pleasantly surprised just how good the inner wing area was after 10 years. 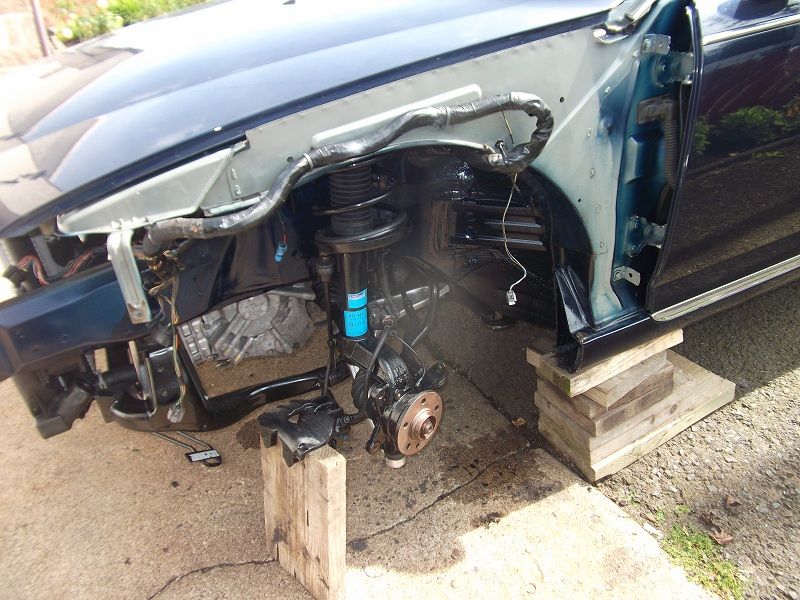 I had to get the exhaust pipe welded back up where I cut it remove the rear suspension so I had to remove the seat from the V6 to get it to the welder. 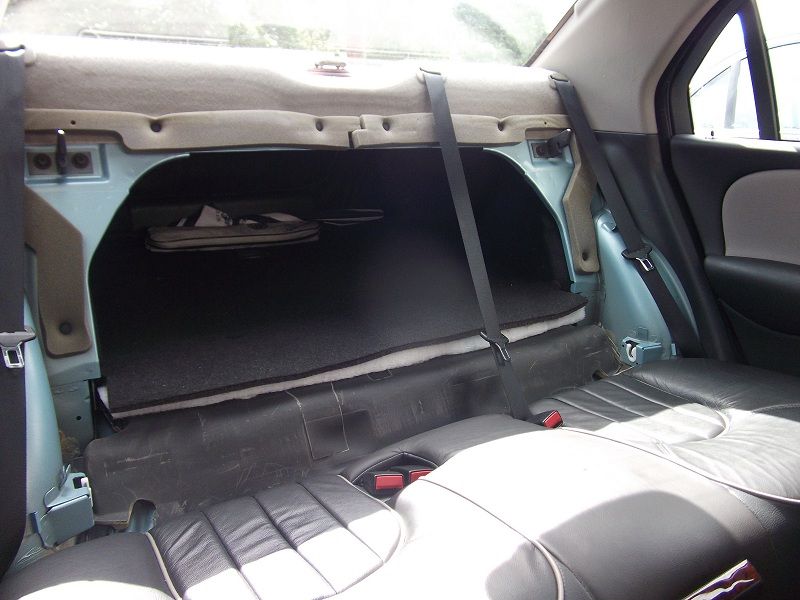 And just for info this shot shows the release straps which secure the seat. 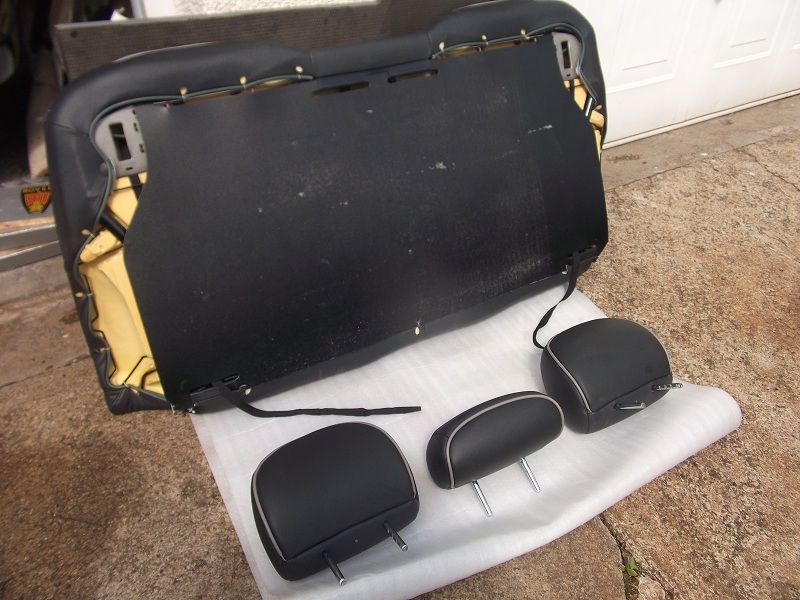 On the diesel it has the proper release catches on top of the seat which folds down very easily and also secures back into place with a simple push. However on my V6 I have given up trying to secure it back into place. The seat back came out within a minute but on re fitting even with the swivel pins secured into the plastic seat the back will not secure back onto its catch so for now the seatbelts will have to hold it until I have a second attempt. I've shown this shot not only to show how long the exhaust was, but also you will note my foam lying board has a large piece missing. I cut two pieces out of it to replace the foam on the underside of the radiator and aircon evaporator. The original was well past it, also the foam packing at the top of the radiator was replaced. 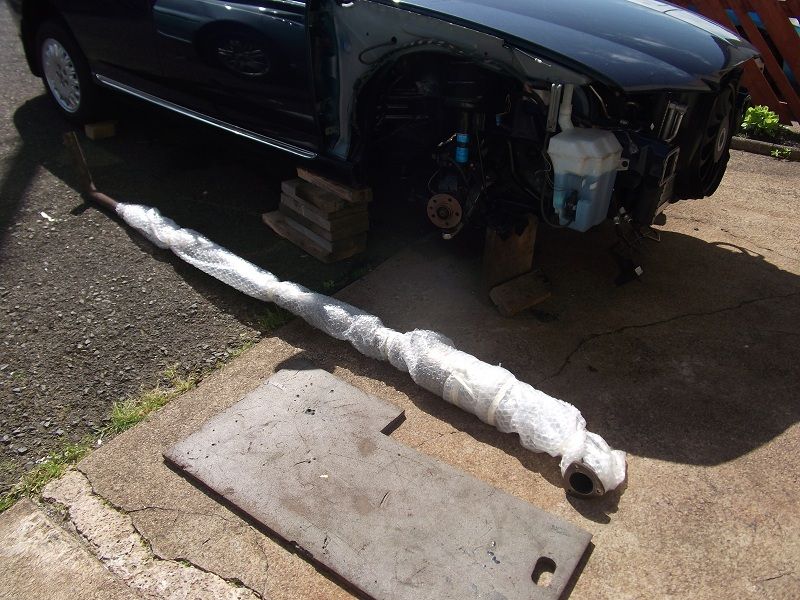 This is where I'm at today with the front panel refurbished and re fitted. I stripped down the bonnet catches and refurbished them as well and will upload photos of them later. 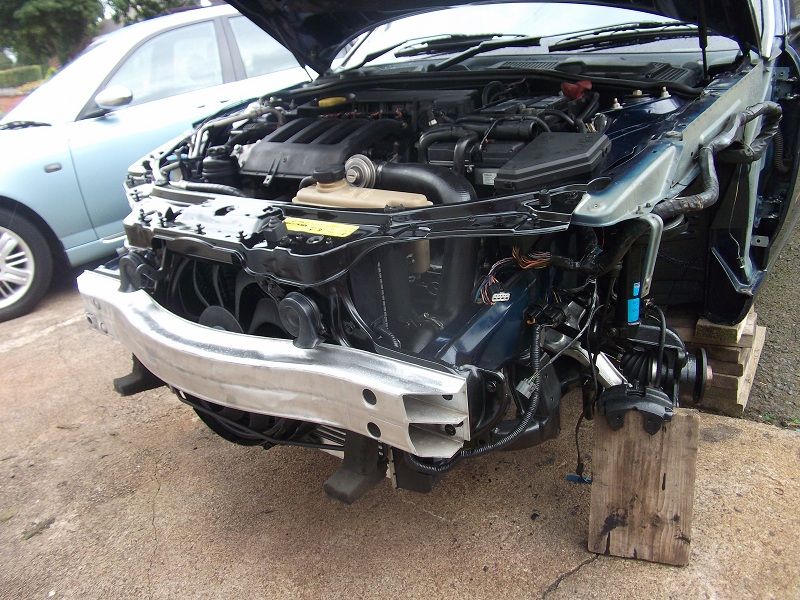 JYJ Last edited by Jim Jamieson; 16th January 2018 at 14:01.. |
|
|
|
|
29th July 2012, 22:25
|
#68 |
|
Posted a thing or two
ZT 190 ZTT 180 Join Date: Mar 2008
Location: Lanarkshire
Posts: 1,486
Thanks: 87
Thanked 146 Times in 101 Posts
|
Fantastic work!, going to look almost Brand new!!
__________________
LIFE'S TOO SHORT NOT TO Home to multiple MG and Rover cars. MG5 Exclusive Moonshine ZS 180 Twilight ZT 190 SE Atmosphere ZT-T CDTI Horizon ZT-T 190SE Dark Fantasy 75 Contemporary SE CDTI Tourer Chatsworth 75 Contemporary SE V6 Tourer Passat 3.2 SEL Estate |
|
|
|
|
29th July 2012, 22:54
|
#69 |
|
This is my second home
Rover less ! Join Date: Jun 2011
Location: Tarbolton
Posts: 3,442
Thanks: 393
Thanked 888 Times in 542 Posts
|
As promise earlier the photos of the bonnet locks, they somehow managed to get lost in an earlier file but here they are.
I have maintained my car well and have lubricated the bonnet release catches regularly and some time ago carried out the bonnet release "Mod". However I was really surprised just how rustry they were underneath when carrying out my recent refurbishments to the car. Now bearing in mind I already have the slam panel removed from the car which can be done in appox 1- 2 hours work so here are the bonnet release catches just after they were removed from the slam panel. 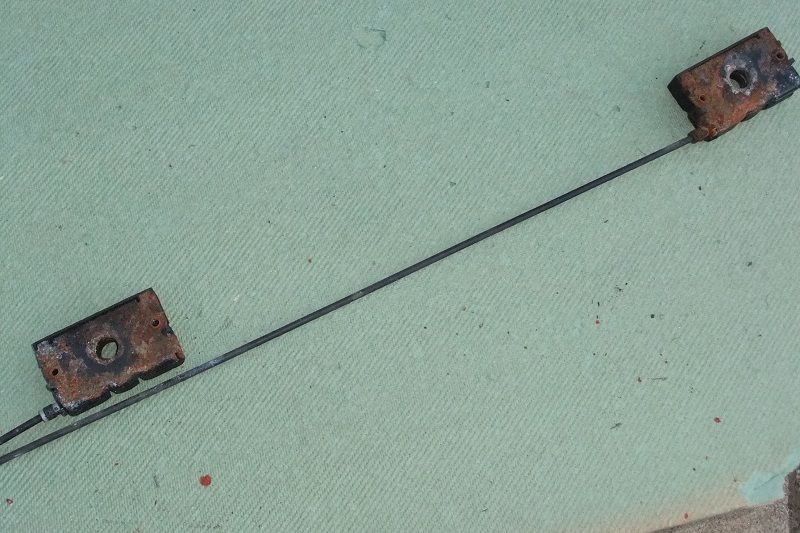 To strip down the locks it is just a simple case of releasing the plastic clips on the casing to reveal thus. 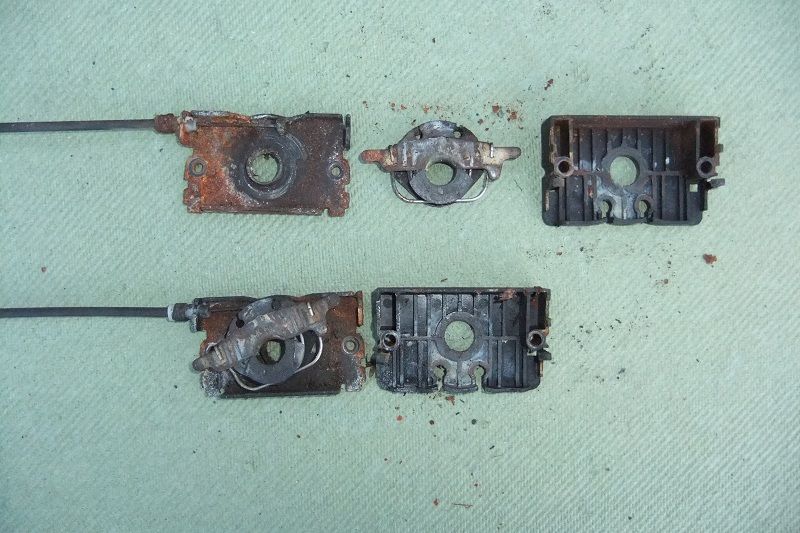 I first washed out all the debris then removed the rust before painting all the components. At first I thought the inner catch would be fine but even after cleaning with gunk I could still feel it to be very stiff so I stripped the inner catch down completely by pulling the metal catch out of its spring taking note the orinentation. 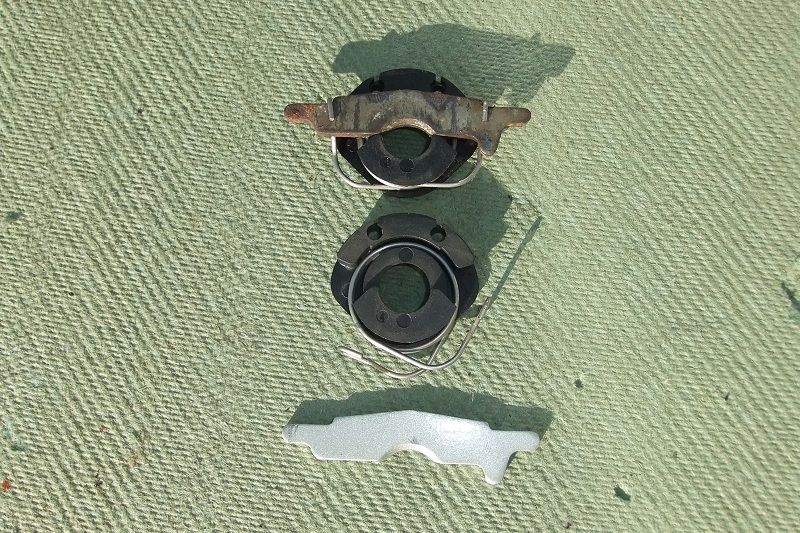 Tip It may be best to do one at a time so you can compare with the other when re assembling. It is actually quite easy as it just clips back into the position as shown. All the components were first primed then finished in gloss. I use a piece of wire to suspend the various parts when carrying out the paint process. 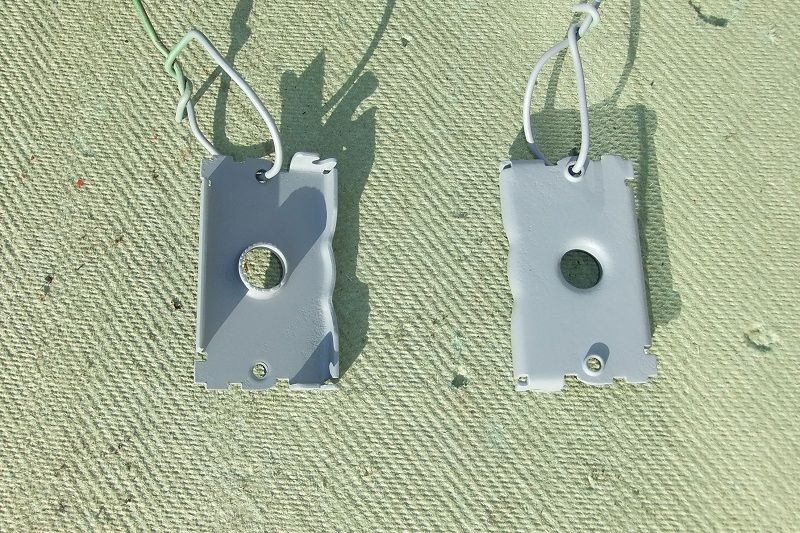 I also use a heat gun to assist with drying but be careful not to overdo the use of heat. Finally I re assembled the catch after applying a liberal coat of grease. I also worked some grease into the cable to protect it from any future corrosion. 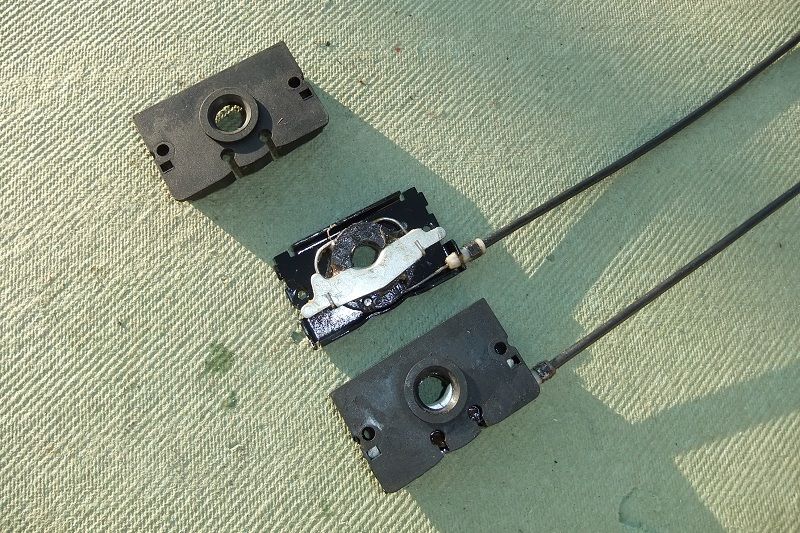 My cables were in very good condition with no corrosion but I do have a full set of the three cables new in my parts collection which I intend to keep for the future. I then linked the two cables together and tested the catches by pulling them by hand. They worked with ease. Finally I stripped down the safety catch, even the small springs, de rusted and re painted them in the same manner, the finished job is shown below. 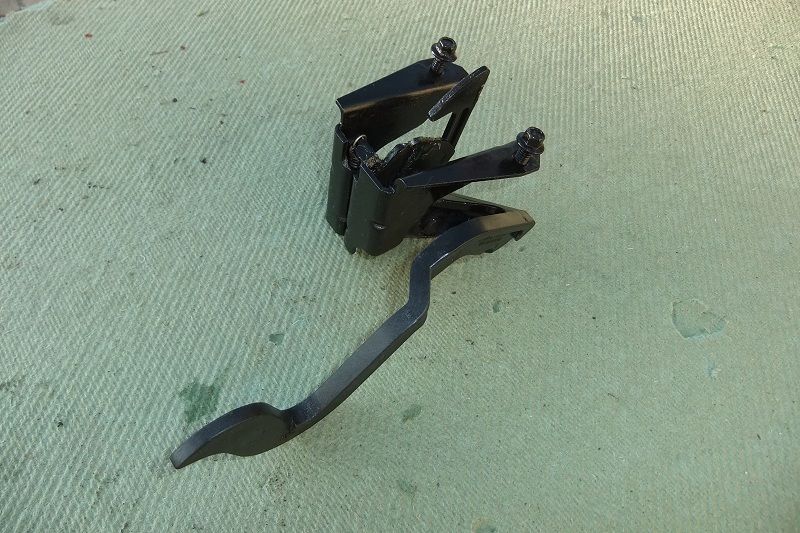 My task next week is to get the paintwork carried out to the front wings, bumper and bonnet, part of which has already been done. JYJ Last edited by Jim Jamieson; 16th January 2018 at 14:05.. |
|
|
|
|
4th August 2012, 18:16
|
#70 |
|
This is my second home
Rover less ! Join Date: Jun 2011
Location: Tarbolton
Posts: 3,442
Thanks: 393
Thanked 888 Times in 542 Posts
|
Today I was looking forward to getting the front bumper and wings re painted by my son Chris.
But I've failed his quality control check  Seems the panels need a little more rubbing down as there are still some miniscule marks on them, Ah well it's a 75 after all and it should be perfect so he is returning tommorow (I hope) to help his old man out. Now I know what to expect with the bonnet as it has dozens of stone chip marks on it. JYJ |
|
|
|
 |
|
|


 Linear Mode

