
|
|
|
|
|
|
||
|
|
||
 19th March 2013, 09:14
|
#1 |
|
This is my second home

Audi Q3 TDI S-Line Quattro Join Date: Jul 2007
Location: Clacton On Sea/On the boat somewhere
Posts: 51,164
Thanks: 9,890
Thanked 12,235 Times in 8,232 Posts
|
This is a small guide on how to wire a freeview receiver (dvb) to the double din radios.
This is a quick and easy way for installation, if you are more capable then I would suggest hard wiring the dvb power cables independantly of the double dins wiring. This guide uses scotch locks ( I know, what a lot of people think of those but they can be used if care is taken, if you have a soldering iron and can solder well please do so  There are two different dvb receivers that Sean (Radioguy) supplies so make a note of which one you have. 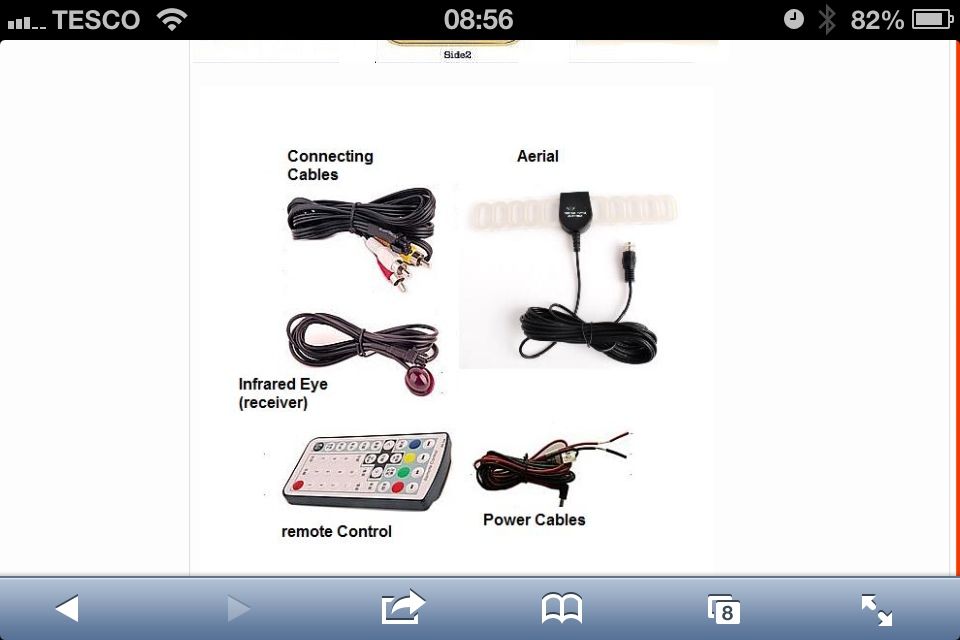 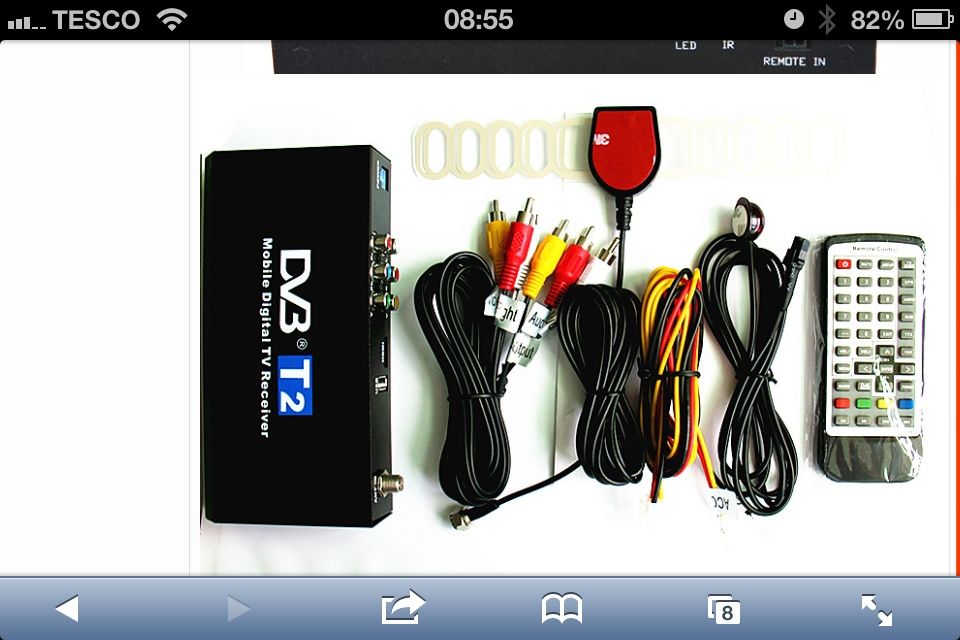 Don't worry if its neither of these as the guide is applicable to any 12 volt dvb receiver  O.k this is the quick and easy way to connect the power to the receivers. It is by no means the only way but should be easy for those not confident in electrical wiring At the back of your double din head unit you will find the iso connections usually one is brown and one black. I have highlighted the three wires you need to connect the dvb too. I have shown the red, yellow and black wires from the head unit. I suggest you tap into the corrosponding wires on the car loom NOT the head unit. If your dvb unit only has red and black wires then wire up the same minus the yellow cable. The Red wire shown here is the switched live (ignition power wire) 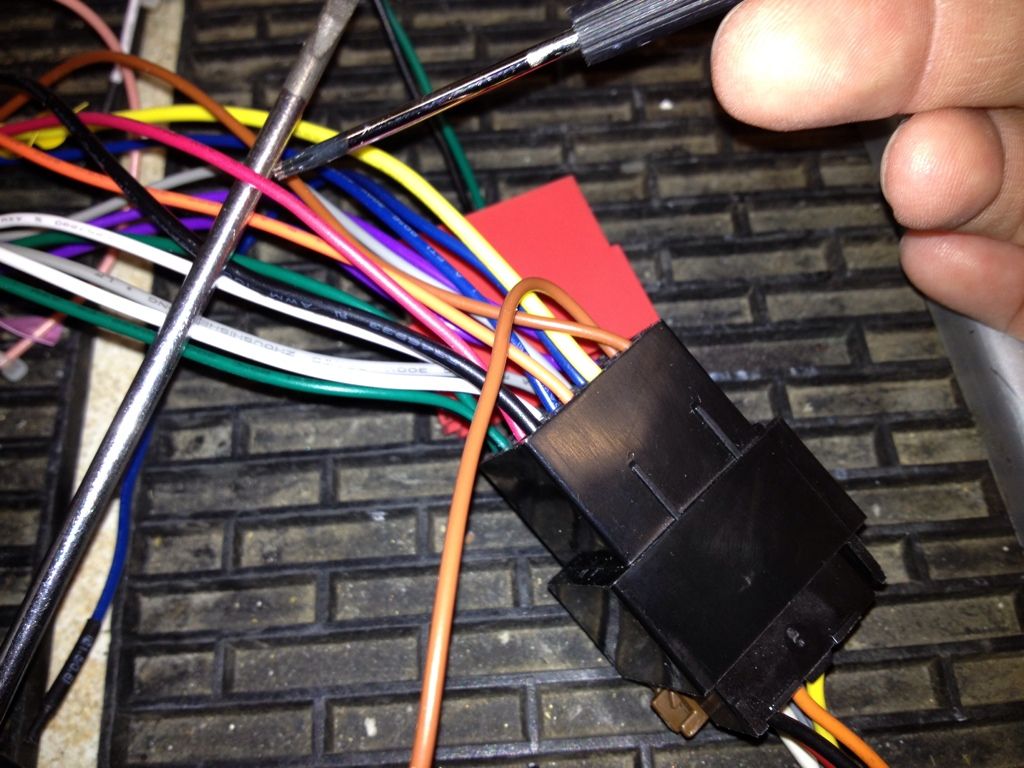 The Yellow wire shown here is the permenant live (power from battery) 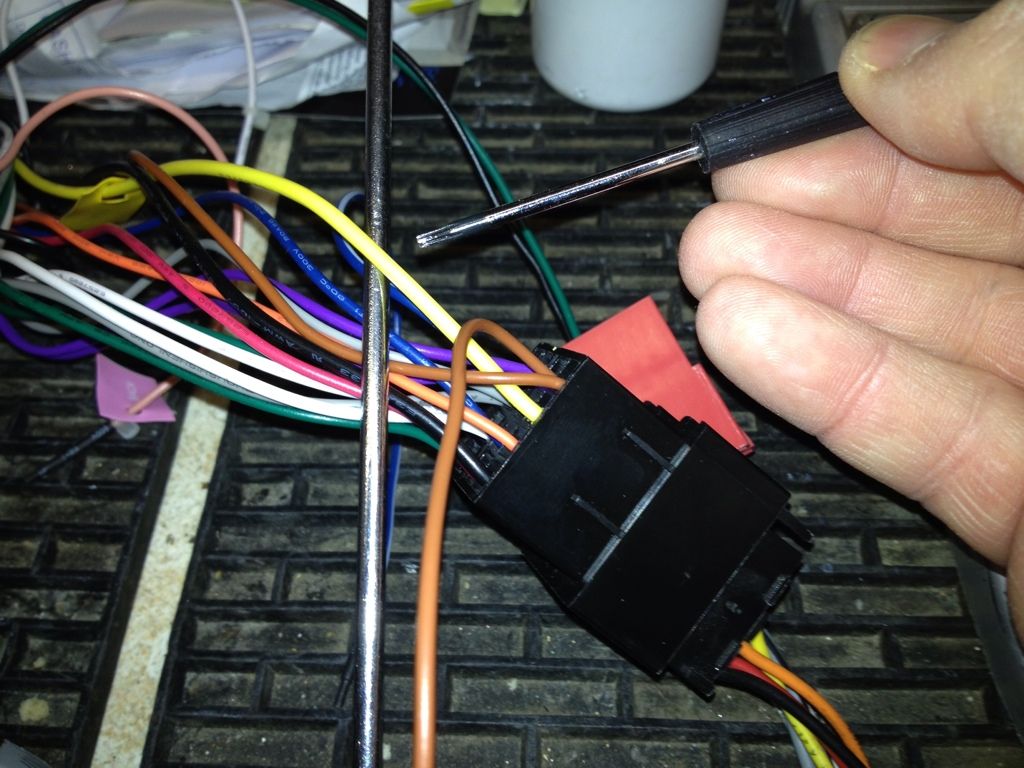 The Black wire shown here is the ground or earth wire 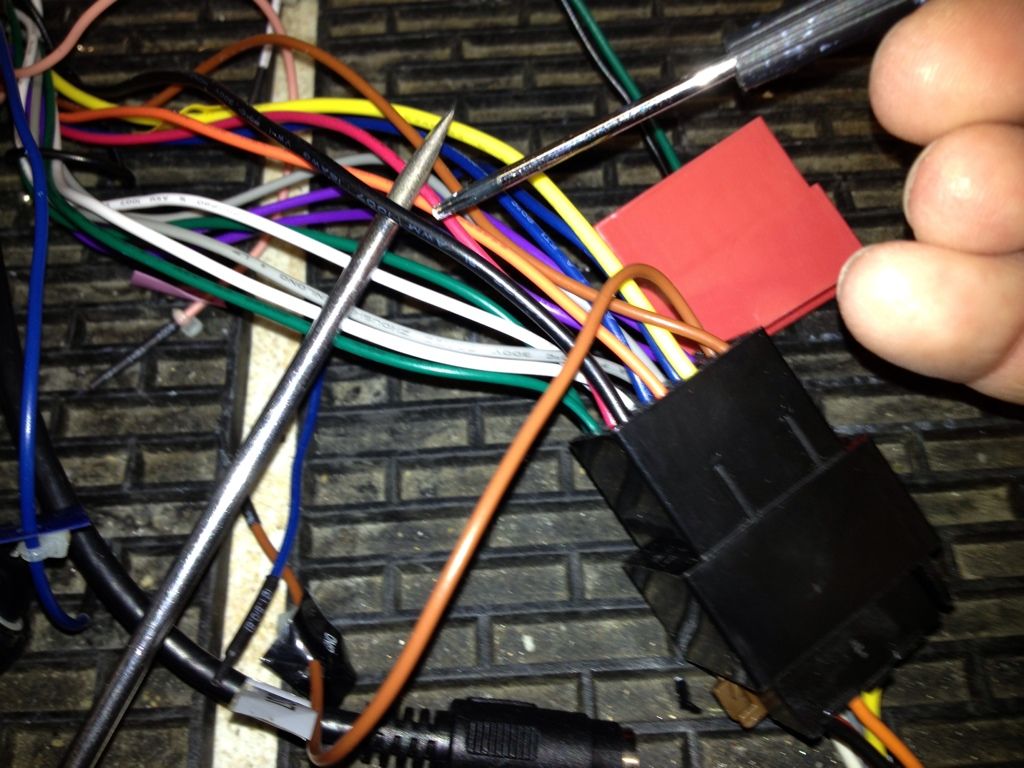 If you follow these wires into the car side of the plug you will see they are the same colours, this is the side I suggest you tap into. O.k, these are the connectors you will need, known as scotch locks or tap in connectors. These are available from any good Motor Factors or Electrical shop 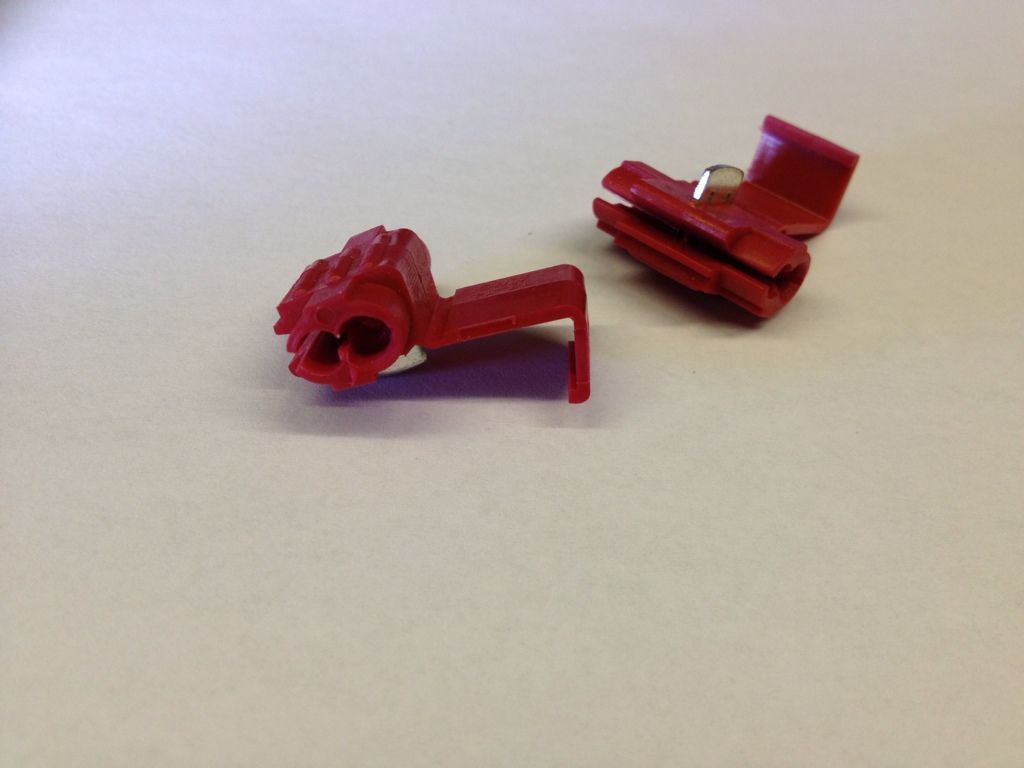 They come in different colours which denotes the cable size they are suitable for. You will need the red ones for our size of wiring The next procedure needs to be done for all three wires one after the other. You will need to open the connector up and push over the original car wire ' Do not cut any insulation back on either the car wire or the wire from the dvb' Then put the dvb wire into the connection, this does not need to come out the other side. 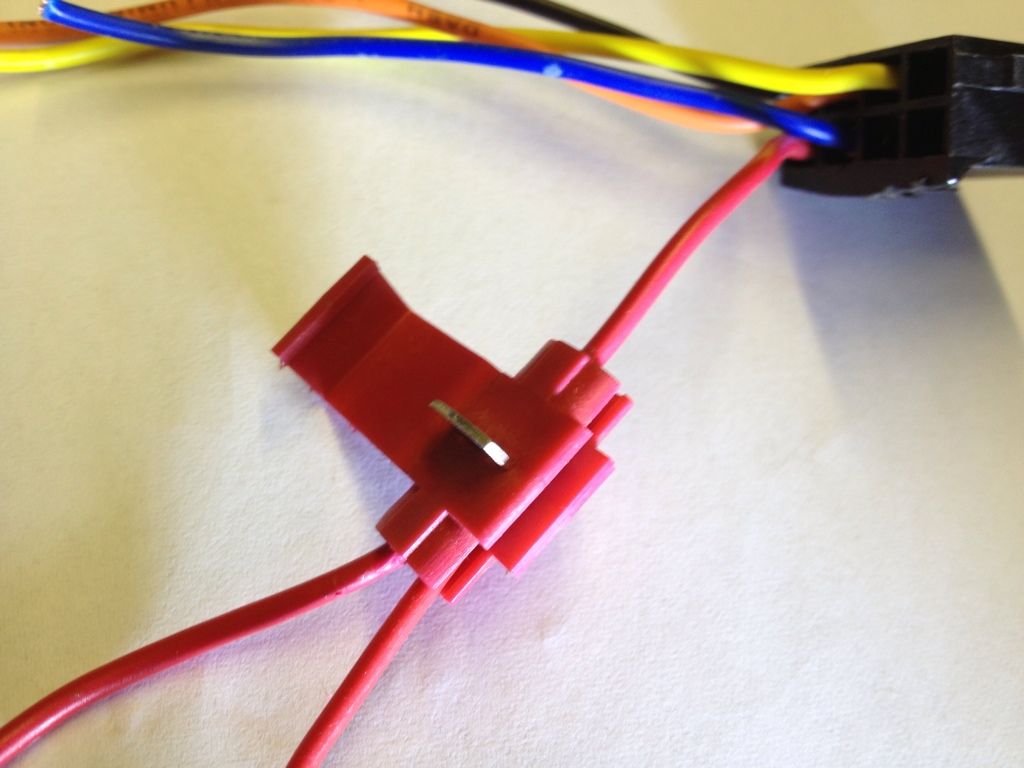 When this is done you need to crimp/splice the wires with a pair of pliers. 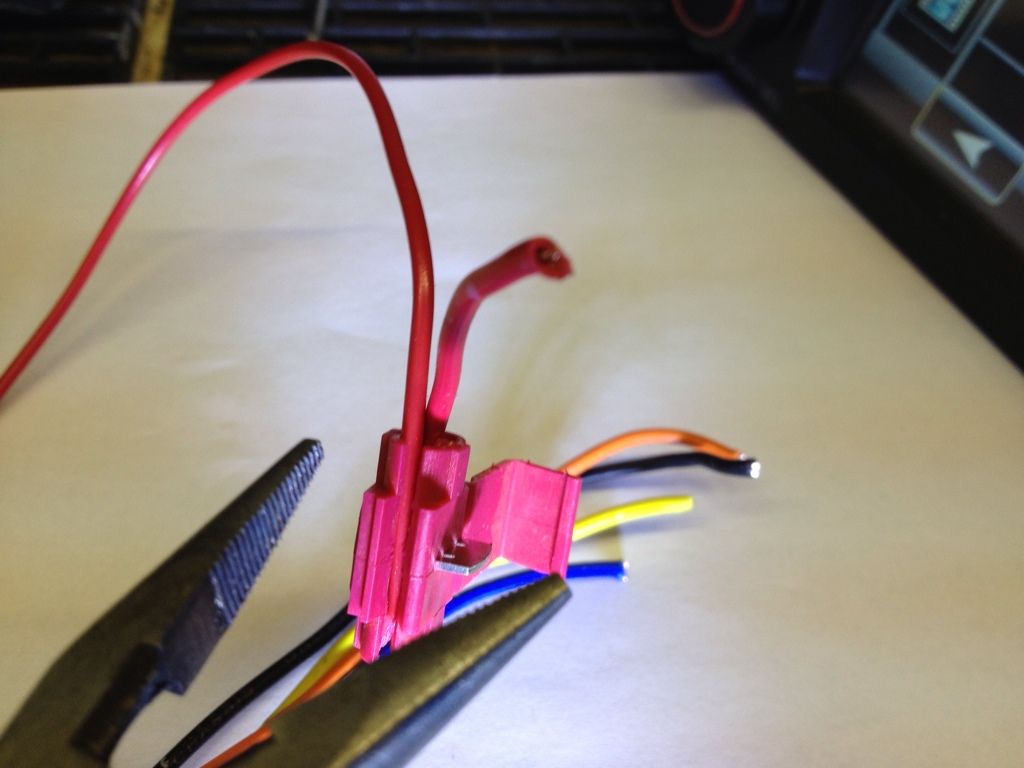 Squeeze the pliers down on the metal bridge this should bite into the insulation of both wires making a connection. 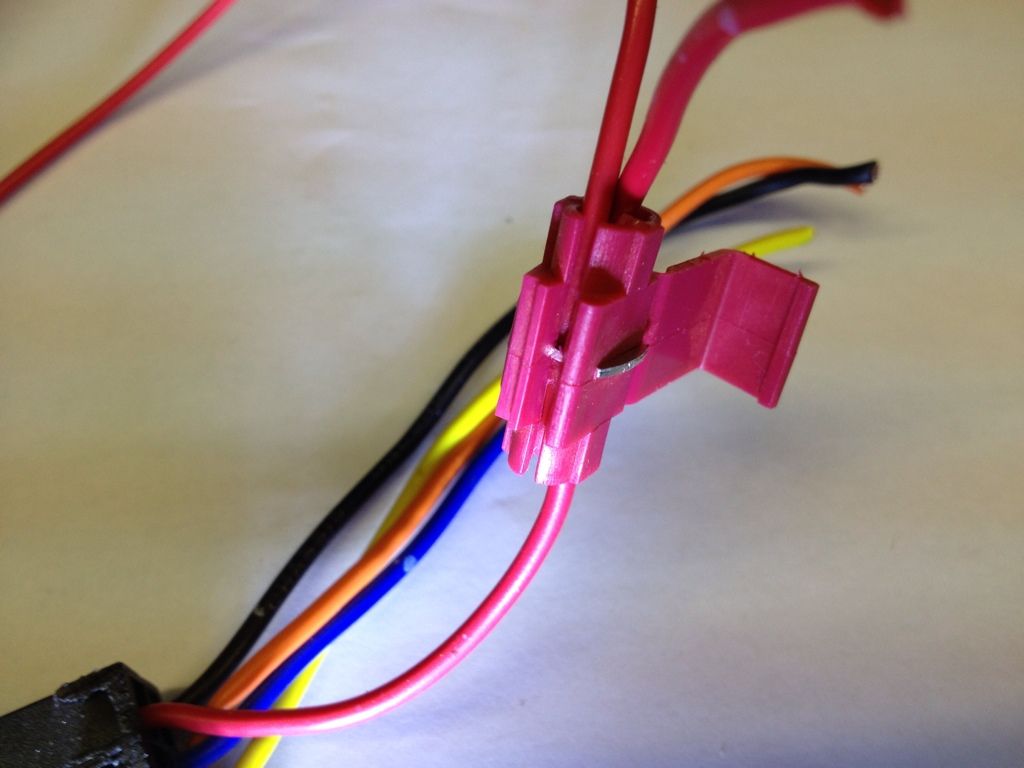 Then you need to snap the cover over the top. 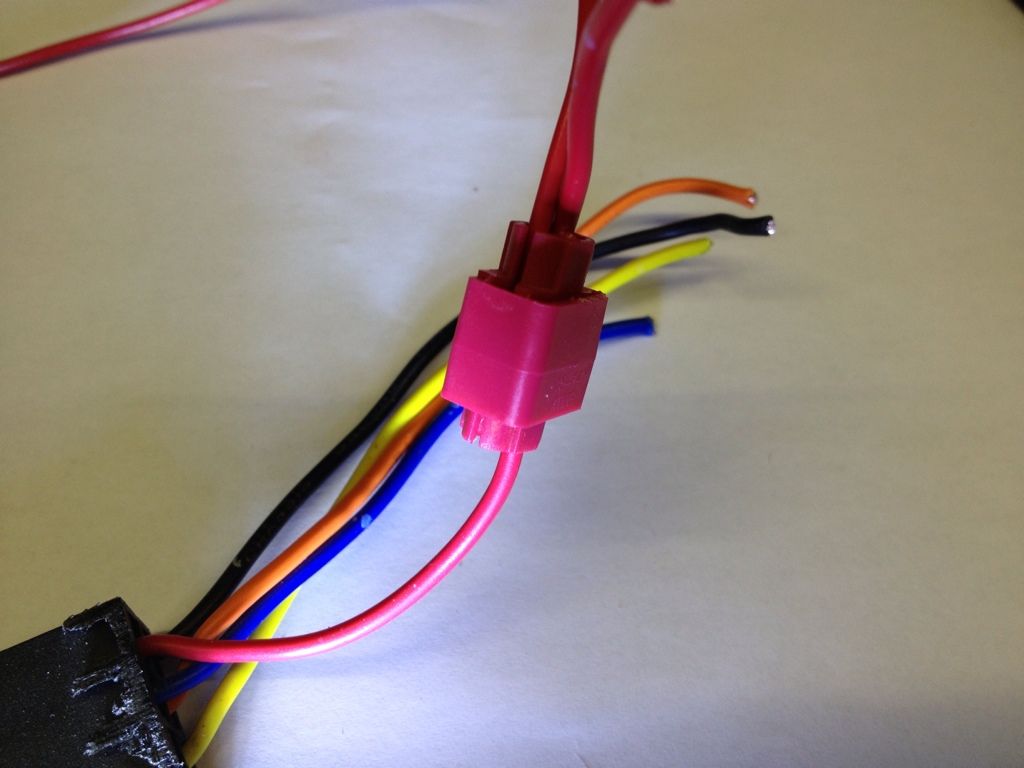 Repeat this procedure for the yellow and black wires. That's it, you can now switch your ignition on and you should have power to your dvb unit. You now have to connect the aerials and find a location to mount the dvb and run the remote sensor. Finally you need to plug the yellow, red and white phono plugs into the double din here... 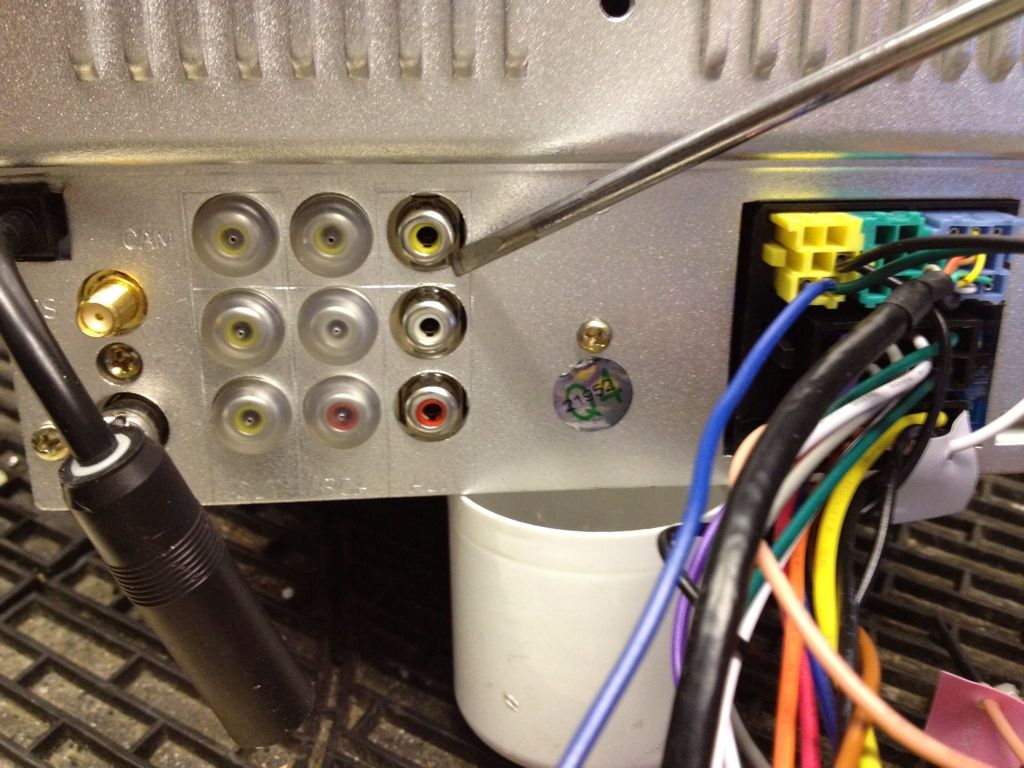 I will add photo's on aerial placement etc later. Be aware that if you can wire the cables direct to the battery and ignition this is still the best way to do this. Please be aware you do this wiring at your own risk and I accept no liability in respect of any information contained in this help thread
__________________
Jeff.  Last edited by coolcat; 19th March 2013 at 12:50.. |

|

|
|
|


 Threaded Mode