

|
||
|
|
||
|
|
||
|
|
|
|
#1 |
|
This is my second home
Jaguar 3.2 Executive Join Date: Feb 2011
Location: Buckhurst Hil
Posts: 3,269
Thanks: 508
Thanked 154 Times in 116 Posts
|
I only have a drill. Is it possible ?
__________________
Current cars V8 Petrol Range Rover Kia Sportage Hybrid Triumph Street Triple R |
|
|

|
|
|
#2 |
|
This is my second home
Jaguar 3.2 Executive Join Date: Feb 2011
Location: Buckhurst Hil
Posts: 3,269
Thanks: 508
Thanked 154 Times in 116 Posts
|
OK .. I have bout the 3M headlight restoration kit that fits on your drill..I'll be doing it over the next week so will post before and after pictures and do a review if anyone is interested.
__________________
Current cars V8 Petrol Range Rover Kia Sportage Hybrid Triumph Street Triple R |
|
|

|
|
|
#3 | |
|
Gets stuck in
Rover 75 Tourer Join Date: Aug 2011
Location: Lancaster
Posts: 988
Thanks: 112
Thanked 51 Times in 36 Posts
|
Quote:
|
|
|
|

|
|
|
#4 |
|
This is my second home
MG ZT+ 135 Join Date: Jan 2011
Location: Exeter
Posts: 3,626
Thanks: 9
Thanked 42 Times in 26 Posts
|
Pretty much any heavy polish/compound will do with a drill polishing head. I did mine by hand, hard work, but still possible. Wet sand and buff out, then maybe use a fine polish to finish for the best clarity. The key thing is to wax or preferably seal the lenses afterwards with something like a synthetic sealant or rain repellent. It will make them not only look clearer, but will protect the newly exposed plastic.
__________________
[SIGPIC][/SIGPIC]
|
|
|

|
|
|
#5 |
|
Gets stuck in
MG ZT190+ Solar Red Commission No: 396 Join Date: Feb 2008
Location: Very North Cotswolds
Posts: 702
Thanks: 17
Thanked 4 Times in 4 Posts
|
I spent quite a while reading about this because mine look terrible. I was thinking about having them polished at the same time the bodywork was being mopped.
My understanding is that polishing will remove the surface protection so by rights they will then get cloudy quicker (maybe this has happened on mine). I was debating getting them coated with something following the polish. This assumes of course that our cars have a coating as they are far worse that my wife's Toyota which almost look new still (her car is the same age as mine).
__________________
Dave D. Vell, He'z Juzt Ziz Guy Y'Know? |
|
|

|
|
|
#6 | |
|
Premium Trader
Rover 75 Join Date: Nov 2010
Location: Devon
Posts: 33,807
Thanks: 8,837
Thanked 14,831 Times in 8,030 Posts
|
Quote:
There is no coating on our headlights, the dulling / yellowing is due to the UV over time which gives the impression that its a harder surface than the newly polished light.
__________________
Lest we forget..
|
|
|
|

|
|
|
#7 | |
|
This is my second home
75 Contemporary SE Mk II 2004 Man. Sal. CDTi 135ps, FBH on red diesel, WinCE6 DD Join Date: May 2010
Location: Leeds
Posts: 17,273
Thanks: 2,160
Thanked 2,061 Times in 1,586 Posts
|
Quote:
Abrasion generates heat - if you use a powertool be very gentle with it or you may soften and melt the lenses.
__________________
Harry How To's and items I offer for free, or just to cover the cost of my expenses... http://www.the75andztclub.co.uk/foru...40#post1764540 Fix a poor handbrake; DIY ABS diagnostic unit; Loan of the spanner needed to change the CDT belts; free OBD diagnostics +MAF; Correct Bosch MAF cheap; DVB-T install in an ex-hi-line system; DD install with a HK amp; FBH servicing. I've taken a vow of poverty. To annoy me, send money. |
|
|
|

|
|
|
#8 |
|
This is my second home
All Trophy Blue ,ZT260#50 , ZT CDTI Auto, ZR105+ and 1.8T Firefrost spoiling the Set . Join Date: Nov 2006
Location: Nr Sherborne But in Somerset..
Posts: 6,084
Thanks: 916
Thanked 1,214 Times in 768 Posts
|
Used a 3m kit , got it for 9.99 via groupon..
Used a battery drill so not too fast, but make sure you mask up well around the paintwork. Took about 10 mins per side.. and still lots of stuff ( pads/cream etc) left. I did seal them a bit with few coats of polish after just in case ? . the 3m kit works very well and over last few wintery weeks the lights still look good. C.
__________________
 The Three Bloo's Wifey's Zr105, MY CDTI & 260 #50 and Number One sons 1.8T in Firefrost When I were a lad Zero to 142 in 10.25 secs at the Pod on my Blown Norton. 210 Kart Champ in 70's |
|
|

|
|
|
#9 |
|
Posted a thing or two
ROVER 75 CONNOISSEUR SE HIGHLINE TOURER MANUAL 2.5 V6 Join Date: Dec 2011
Location: Midhurst
Posts: 1,680
Thanks: 679
Thanked 735 Times in 530 Posts
|
I did mine today and took some pics
I used wet & dry 600, 1200, 2000 & 2500 I used Meguiar's One Step Headlight Restoration Kit I tried using the Meguiar's One Step Headlight Restoration Kit straight out of the box but I think my lights were to far gone and did not get great results. I then went and bought sheets of wet & dry as above. I started with the coarsest grade wet & dry and worked my way through the grades finishing with the finest. I used lots of water and kept the bucket of water clean and the lights pretty wet. I guess I rubbed for 5 min max on each light with each grade of wet & dry. The Meguiar's kit did a great job of the final polishing. I used a varying speed drill so I could control the rpm of the mop. (did not want to go fast and build up heat) I applied some car wax when finished. ( not sure if that is a good idea or not) I dropped the front bumper for easy access. I think it is nearly as quick as taping around the 4 lights. I am very pleased Nearside before and after 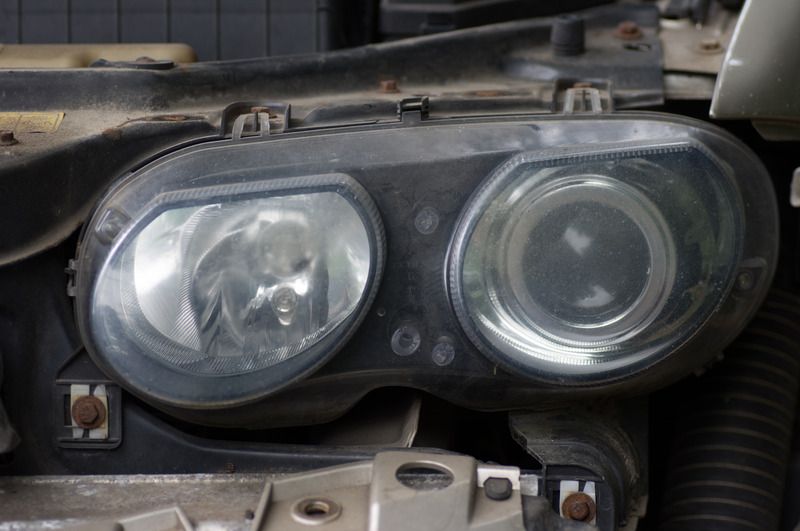 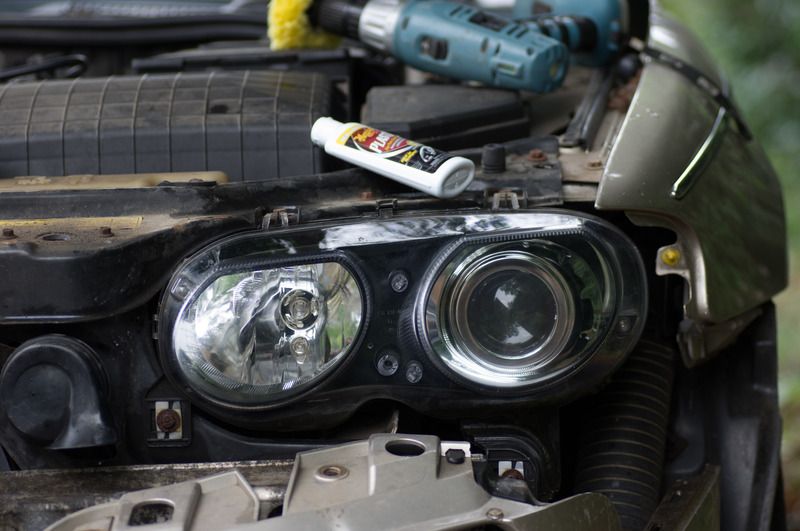 Nearside before and after with lights on 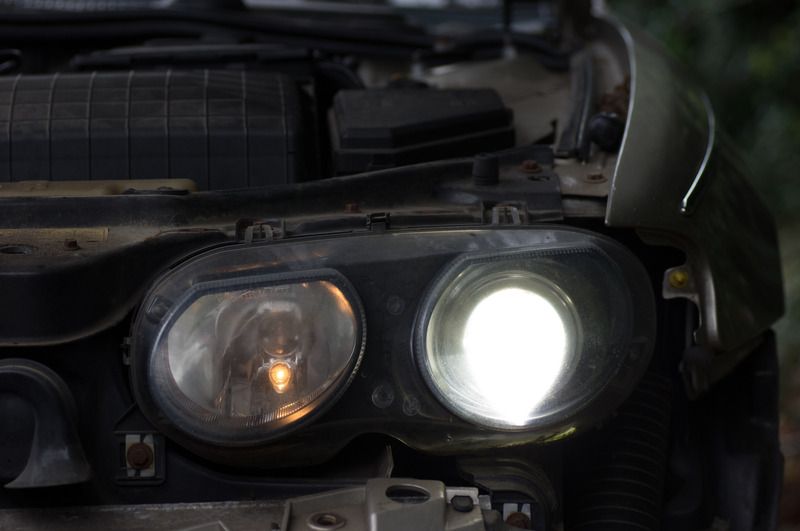 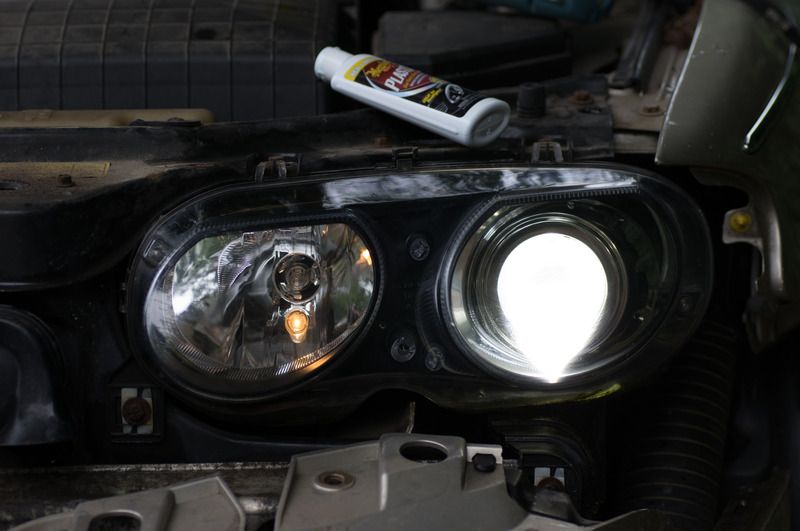 How lights look after wet and dry sanding but before polishing. All the discoloration is rubbed away but the lights have the light scratch marks of the fine wet & dry. 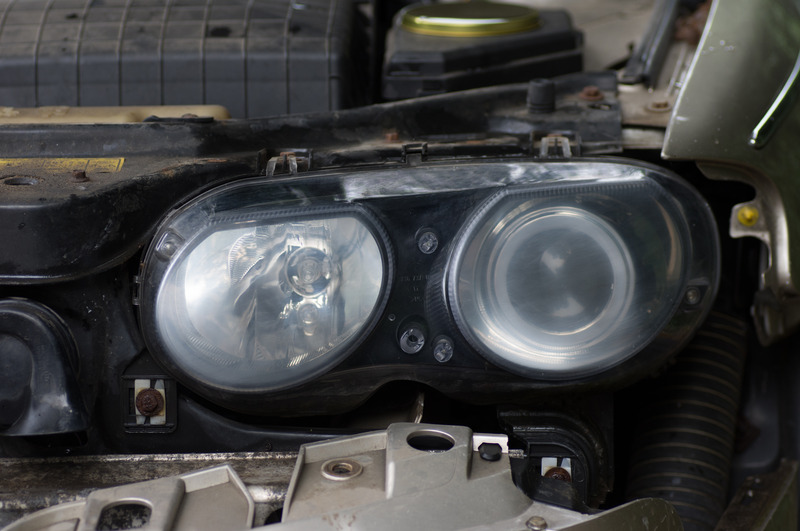 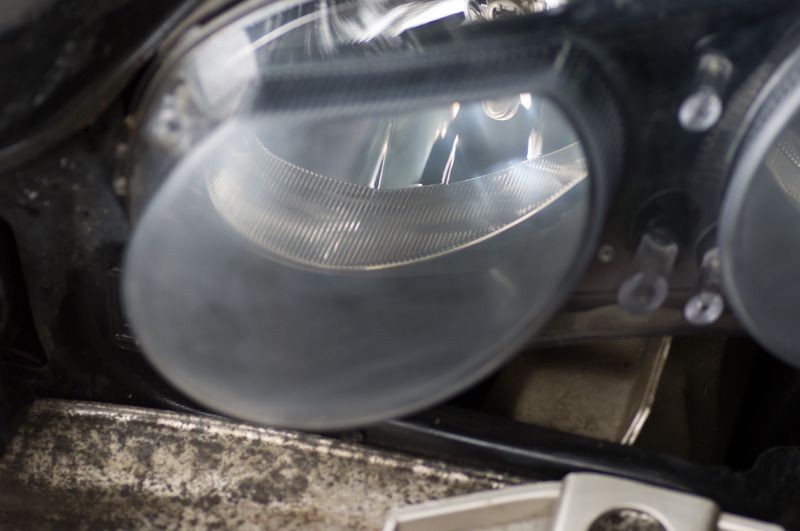 I used the mop supplied in the Meguiar's One Step Headlight Restoration Kit attached to an old drill 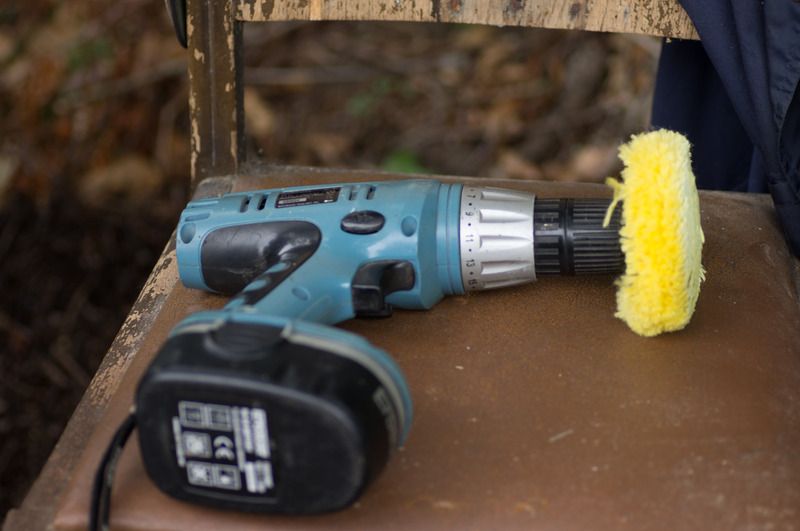 The polish comes with the Meguiar's 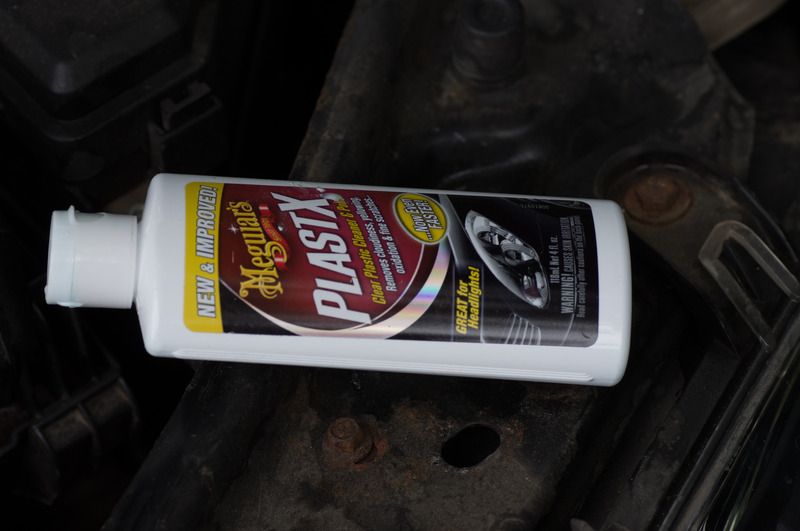 A closeup before and after 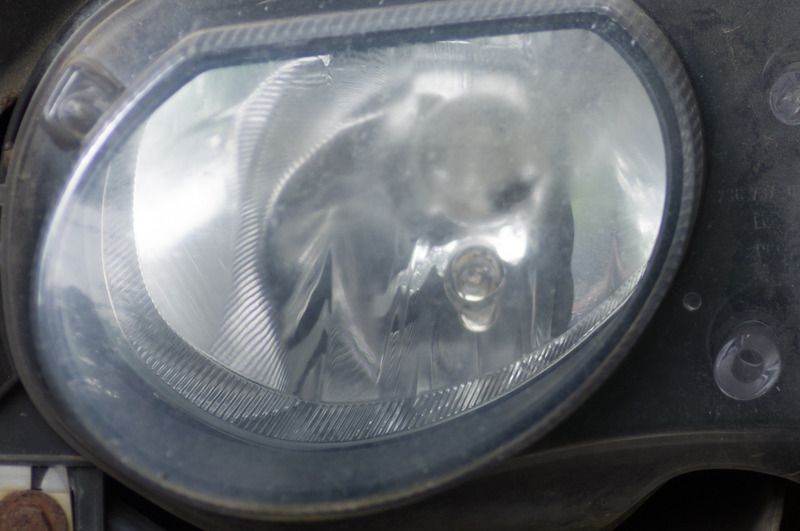 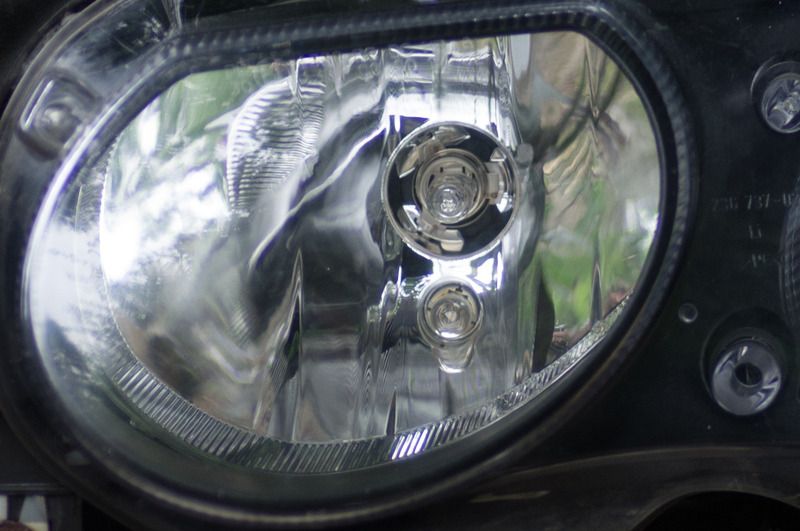 Last edited by Rocket; 11th August 2015 at 15:13.. |
|
|

|
|
|
#10 |
|
This is my second home
Rover 75 saloon x2, Rover 75 Tourer x2, Rover 220 Coupe Turbo Join Date: Aug 2010
Location: Kirkcaldy, Fife
Posts: 9,038
Thanks: 2,278
Thanked 2,852 Times in 1,718 Posts
|
What a difference.
|
|
|

|
 |
|
|