
|
|
|
|
|
|
||
|
|
||
 16th August 2011, 14:53
|
#1 |
|
I really should get out more.......

75 V8 Connoisseur SE Saloon: 75 V8 Contemporary SE Saloon and others!!! Join Date: Feb 2009
Location: Warwick
Posts: 2,320
Thanks: 1
Thanked 180 Times in 77 Posts
|
Those of us with Premium Bumper cars (using the original Rover bumper) will be aware that, over time, the bright finish shell - the irreplaceable bit - begins to detach from the bumper.
The original epoxy glue used to bond the fixings on to the shell seems to have deteriorated with age, and one by one the fixings come away from the shell. In addition, the original fixings were mild steel, and the bolts will often shear if any attempt is made to unscrew the nuts on the rear of the bumper. The first signs of this process happening are usually visible in the bottom corners of the grille, and along the top either side of the Rover badge. Here you can see the shell beginning to separate in these two locations.   If left to its own devices, eventually all the fixings will fail and the shell will fall off - leaving you with the rather unpleasant consequences of that happening! If yours is loose, it is better to bite the bullet and remove it completely to prevent damage or loss. The key to a potential refit is patience! This is not a job that can be done in an hour, so it is better to use the car without the shell for a while, until you can allocate sufficient time to do the job properly. Because each fixing must be installed individually, and the adhesive must be allowed to go off before moving on to the next one, I was only really able to do four in a day before leaving the adhesive to cure overnight. First step is to remove the bumper, and I suggest you read Devilish's 'How To' here if you have not done this before: http://www.the75andztclub.co.uk/foru...ad.php?t=38392 Having got the bumper off, the reverse will show all of the (corroded) fixings which hold the shell and other items in place. Here is a photo of a damaged centre section of the bumper, showing the fixing locations. Ignore the ones shown in the centre horizontal section of the bumper as they do not relate to the chrome shell.  The first problem is to remove all the fixings which hold the shell. Give them a good soak in penetrating oil first. The threaded sections are long, so a small deep socket is the best tool, because when in-situ on a complete bumper there is not much room to use a spanner. You will also need to hold the fixing on the front face to prevent it turning. Take care that rotation of the front part of the fixing does not damage the paint on the bumper. Inevitably, corrosion of the threads mean that some of the threaded portions will shear off, and you may need something like a Dremel with a mini cutting disc to cut the remainder off. Once they are all removed the front of the bumper should look like this: 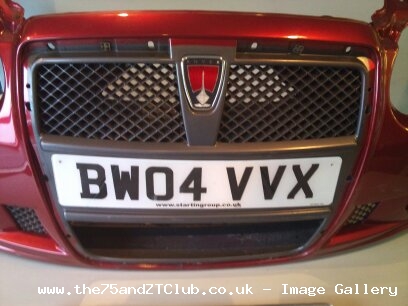 You will also need to remove any fixings and/or old adhesive from the metal shell itself. It is vital that the back of the shell is clean and degreased, so that the new fixings will bond succesfully. I used thinners to clean the rear surface, so it should look like this:  IMPORTANT - SEE RECOMMENDATION BELOW Now - the adhesive. I do not recommend the use of a hot glue gun. The adhesive will set hard, and eventually vibration and ageing will cause the bonds to fail again. Some element of movement is necessary to absorb the stresses imposed by the bumper flexing slightly in use. I have used Dow Corning 781 silicon adhesive/sealant:  This is available from Screwfix at around £5 per tube. It has good 'grab', allows you to reposition the fixings within the first few minutes, and sets to a slightly flexible bond. There are fifteen fasteners of three different types. If you have broken some of yours, don't worry because I have sets available in 316 stainless steel, which should solve the corrosion problem for the foreseable future! Here is a full set:  The four 'stirrup' type fixings are for the top of the shell, the two small square ones are for the bottom corners, and the remainder go up the sides. They are laid out as follows:  The fiddley bit is next! Look carefully at the inside of the shell. You will probably see some evidence of where the old fasteners mounted. Holding one of the new fixings in that place, offer the shell up to the bumper to check that the fixing shaft passes through the correct hole. I would suggest you start with the two outside top 'stirrup' fixings. Mark the edge of the shell with a marker pen to show where the stud should sit. Turn the shell over and apply a generous dollop of silicon in the correct position:  Press the fixing firmly into the adhesive so that it surrounds the fixing base:  Use a flat edge to smooth the glue over the fixing:  Allow a couple of minutes for the glue to begin to skin over, then offer the shell up to the bumper to make sure the threaded portion will pass cleanly through the fixing hole. You can reposition slightly if necessary, but ensure that the base is pushed firmly back into the adhesive again. This is where patience is necessary! Do not try to do more than about two fixings at a time! If you do, they will move out of line or come away completely as you try to fix further ones in place. Do two, leave to set for a couple of hours, then try a couple more. Leave again. I suggest you do the top four first, then the three along the bottom when they have set (preferably overnight), then the sides, and finally the two small square ones in the bottom corners as they can be the most difficult to position and may be under slight tension when the shell is in-situ. Check each time you offer the shell up, check that all the previous fixings pass through their holes. When they are all finished, leave again overnight before re-attaching the shell finally to the bumper using the washers and nuts. There should be no need to overtighten the nuts - simply enough to ensure they pull the surround into the bumper without leaving a gap. For ultimate peace of mind, a little loctite can be applied to the fastener threads. That should be it, except to re-attach the bumper, making sure it is aligned to your satisfaction, clean off any surplus adhesive which may have stuck where you don't want it, and polish the paintwork! Now - this is not a sales ploy - but if anyone needs a set of fasteners because theirs have stripped or sheared, I have had sets specially made, and can supply them at £30.00 per set including postage. The full set is shown in the photo above and includes the nuts and washers in stainless as well. They are exactly as the original Rover items, other than the material upgrade. I have about 25 sets available as at August 2011. IMPORTANT - CHANGE OF ADHESIVE RECOMMENDATION The Dow Corning adhesive shown above is not proving resilient in use, and if the shell is not perfectly clean, adhesion is not good. I therefore recommend the following alternative, which, although more expensive, gives better adhesion. Wacker Elastosil E43 clear Available either as a tube or cartridge from here: http://www.silmid.com/Products/Silic...LAST43C31.aspx
__________________
Best regards, Jeremy. Last edited by Jezzer 1; 13th January 2012 at 10:44.. Reason: Change of Adhesive |

|

|
|
17th August 2011, 09:09
|
#2 |
|
Newbie
75 V8 saloon Join Date: Nov 2006
Location: Esher
Posts: 20
Thanks: 0
Thanked 0 Times in 0 Posts
|
Jeremy
Thanks! That's a great help. Mine started to come off just as you've described. Hopefully I'll now be able to refix it properly. Email sent re buying a set of fixings. |
|
|
|
|
17th August 2011, 09:27
|
#3 |
|
Posted a thing or two
Rover 75 V8 Plus Others Join Date: Jul 2011
Location: Swadlincote
Posts: 1,603
Thanks: 18
Thanked 163 Times in 81 Posts
|
Fantastic Thanks for that, at the moment mine is fine but as you say it will come loose in time so better to prep for when it does
|
|
|
|
|
19th August 2011, 18:06
|
#4 |
|
Owners Club Director

Rover 75 Conn SE V6 / MG ZT 260 SE V8 / MG ZT 180 SE V6 Join Date: Feb 2007
Location: Southampton
Posts: 20,935
Thanks: 645
Thanked 6,851 Times in 2,537 Posts
|
Excellent How-To Jeremy, which I've added to the 'How-To: Bodywork' archive for future reference
  How to re-attach the chrome shell on a Premium Bumper How to re-attach the chrome shell on a Premium Bumper |
|
|
|
|
15th December 2014, 12:45
|
#5 | |
|
Newbie
Rover 75 saloon Join Date: Dec 2014
Location: St. Albans
Posts: 15
Thanks: 1
Thanked 1 Time in 1 Post
|
Thanks for that informative article Jeremy. I now need to attempt to fix mine. Working on cars gets harder when you reach 70 with back/neck problems,but I'll give it a go. Have you any sets of clips left? How do I contact you to purchase if you have. Freddie.
Quote:
|
|
|
|
|
|
15th July 2015, 19:45
|
#6 |
|
This is my second home
ZT 260 SE Twilight and 10 other 75 ZT's :O Join Date: Jan 2007
Location: Conwy NORTH WALES
Posts: 11,094
Thanks: 512
Thanked 1,116 Times in 763 Posts
|
Thread revival !!
Evening Jeremy excellent Howto BTW. I've seen some real bodges with folk trying to fix premium trims back on. It's a bumper off job for sure to get it right. Have you per chance got any more of those stainless clip kits left? I use Tiger Seal for similar jobs as it doesn't set hard but tends to give a stronger bond than most silicone based products. Jules
__________________
[SIGPIC][/SIGPIC] Newbies do now!! 1. Plenum drains..all 3 or 4 year dependent 2. Cooling fan..All speeds functioning 3. Bonnet cable divider block |
|
|
|
|
15th July 2015, 21:12
|
#7 |
|
Discount MG Rover Spares

Rover 75 CDTi, 2x MG ZS180 Join Date: Jun 2011
Location: Hythe, Southampton
Posts: 11,320
Thanks: 456
Thanked 3,377 Times in 2,027 Posts
|
Tiger Seal is amazing stuff - used it to re-bond the bodykit on a previous ZS, and it worked wonders.
__________________
 Your trusted MG Rover specialist! Tel: 02380 001133 / Email: [email protected] We now have a 'chat' function on our site for even quicker replies. Give it a try! Remember - discount code FORUM5 for 5% off  |
|
|
|
|
16th July 2015, 00:12
|
#8 |
|
Loves to post

75 Contempery SE Tourer in Moonshine/220 Coupe's/ 216 Coupe's 420GSI Tourer Join Date: Jan 2011
Location: Cambridge
Posts: 283
Thanks: 21
Thanked 11 Times in 10 Posts
|
I could do with a set as well

__________________
Proud owner of one off the last Moonshine Rover 75 CDTI Tourer ever made. Indeed the last MG ROVER in Moonshine and also one off the first 15! |
|
|
|
|
16th July 2015, 12:46
|
#9 |
|
Posted a thing or two
Rover 75 Saloon 2.0 CDTi Conn Se Join Date: Nov 2006
Location: Ashford Kent
Posts: 1,560
Thanks: 17
Thanked 29 Times in 21 Posts
|
I've had 10 years of keep fixing my grill. In the end I drilled right through it, counter sunk the screw and filled and painted my gill surround and gill black.
It come to a point where every single screw had rusty and snapped as I removed it. It's been solid for the last 3 years. |
|
|
|
|
26th May 2017, 08:09
|
#10 | |
|
Loves to post
75 Contempery SE Tourer in Moonshine/220 Coupe's/ 216 Coupe's 420GSI Tourer Join Date: Jan 2011
Location: Cambridge
Posts: 283
Thanks: 21
Thanked 11 Times in 10 Posts
|
Quote:
After going for a little drive yesterday I now urgently need one Of these sets and . Last time I looked at my grill 3 or 4 clips at the bottom had failed and just looking at the car this morning the chrom is now only held on on one side with and at least 10 clips have failed and two off the small bottom ones have got lost. I asked someone ( not on here) two years ago to let me know when they could help me get this job done and it never happened. I would like to go to them today and say it needs doing now before I loose my chrom and have to buy a MG7 bumper because I doubt anyone has a Chrom for sale then buy some Moonshine Paint and get it sprayed or some may say the hole car would have to be done  I am not going to use the car until this is resolved as the risk is to high/ costly Help. Are these repair sets still available? Is the Anyone near Cambridge/ Huntingdon A14 that has done this job before and could help?
__________________
Proud owner of one off the last Moonshine Rover 75 CDTI Tourer ever made. Indeed the last MG ROVER in Moonshine and also one off the first 15! |
|
|
|
|
 |
| Thread Tools | |
| Display Modes | |
|
|


 Linear Mode

