
|
|
|
|
|
|
||
|
|
||
 22nd March 2016, 20:14
|
#121 |
|
Posted a thing or two
MG ZT 190 + and MKIV Supra Join Date: Jan 2009
Location: Plymouth
Posts: 1,551
Thanks: 224
Thanked 493 Times in 359 Posts
|
I have been working on the engine on and off recently but not achieved a lot due to work
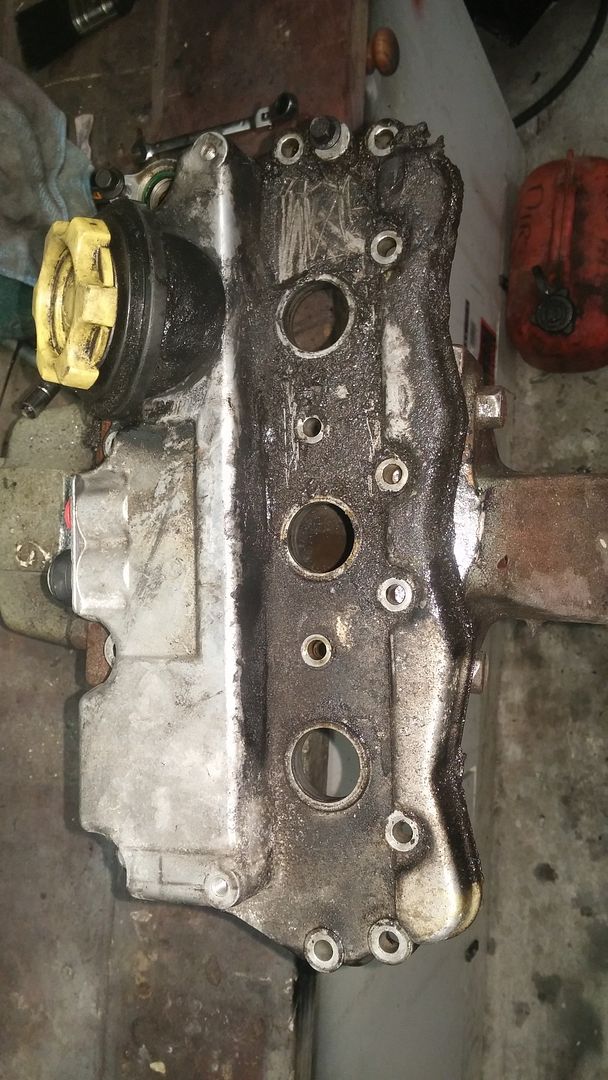
 Firstly with the cover away a quick picture of the engine as it was. 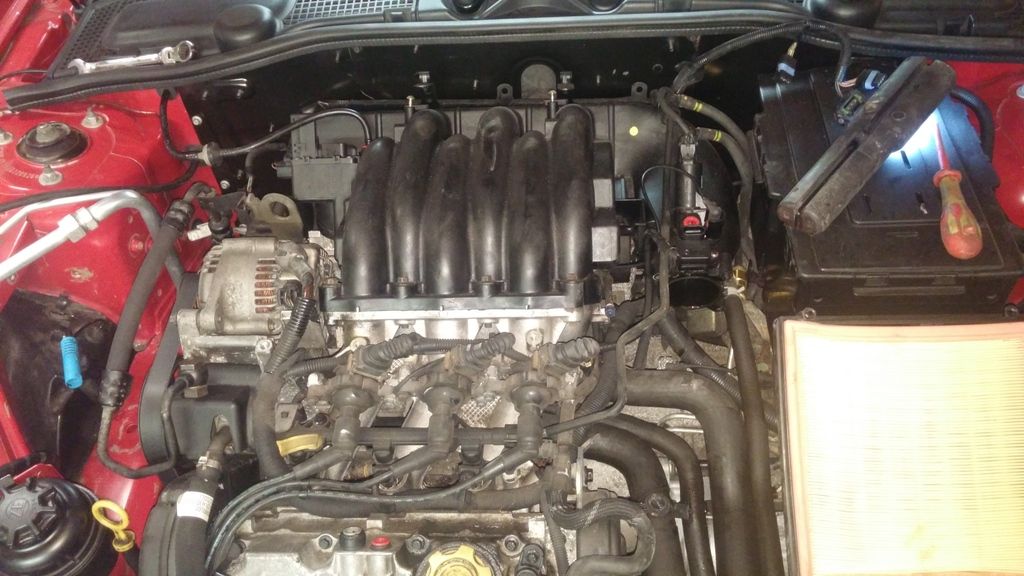 All the engine plastics etc have been degreased and gone for hydro dipping  and the throttle body removed  Next up inlet manifold electrics and vacuum pipes removed 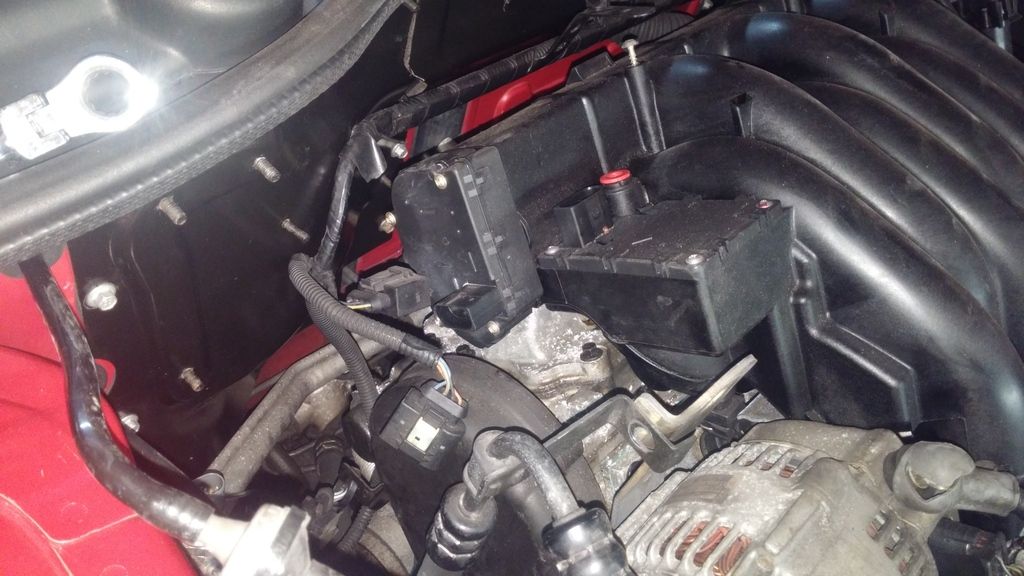 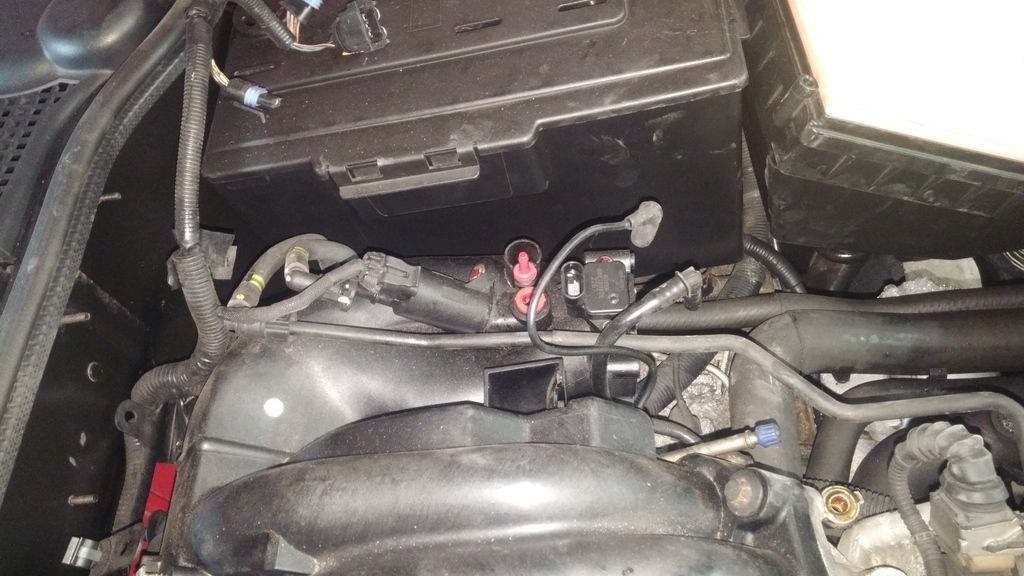 Once all this is done there are 6 bolts to remove. 4 along the front  and two on the back which are difficult to see. I removed the rear bulkhead plates for ease of access. 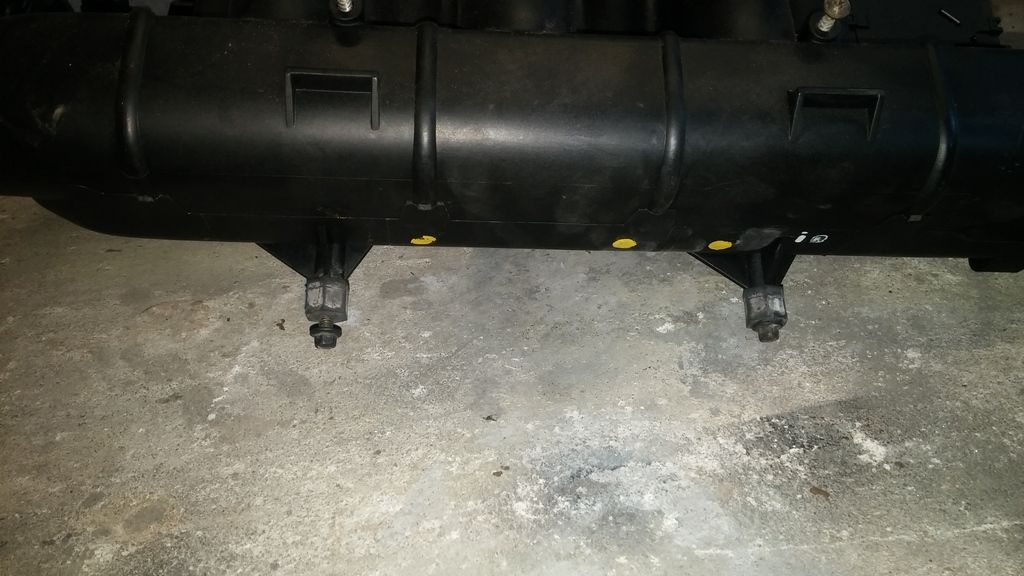 I then eased the manifold off. As it was fitted last year brand new it came off the O seals on the inlet castings very easily  I do have replacements ready to fit in place. I do have replacements ready to fit in place.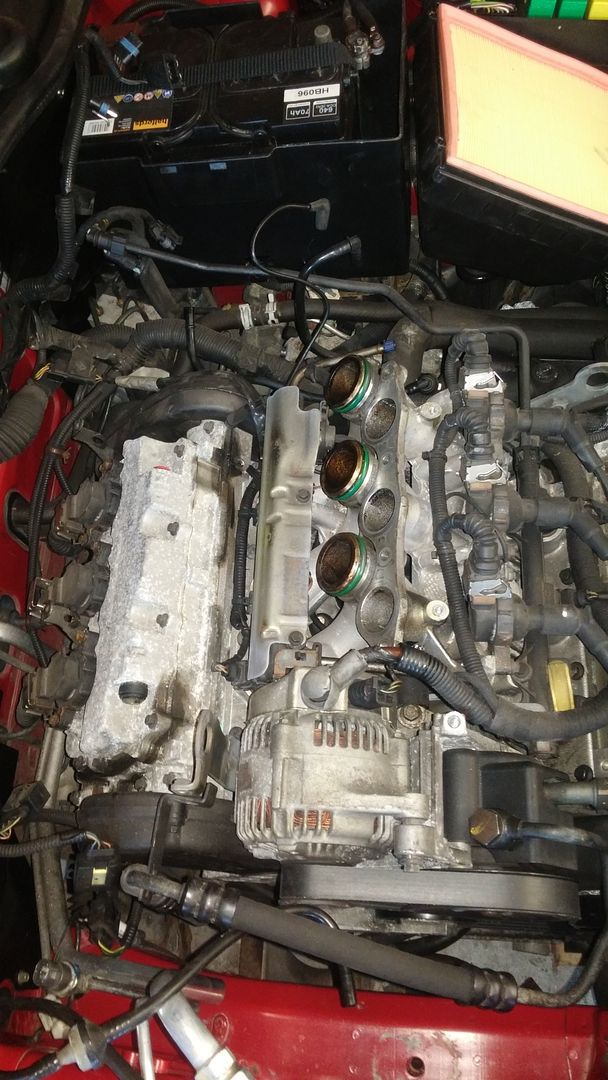 Once off I noticed the coil on No.4 had only been put on with 1 x bolt. Obviously a spark plug change in the past was as struggle  Next up the wiring loom was removed out the way. This meant disconnecting the injectors, coils and various sensors. I placed the wiring loom over to the passenger side out of the way. Next up I undid the fuel rail and removed it totally 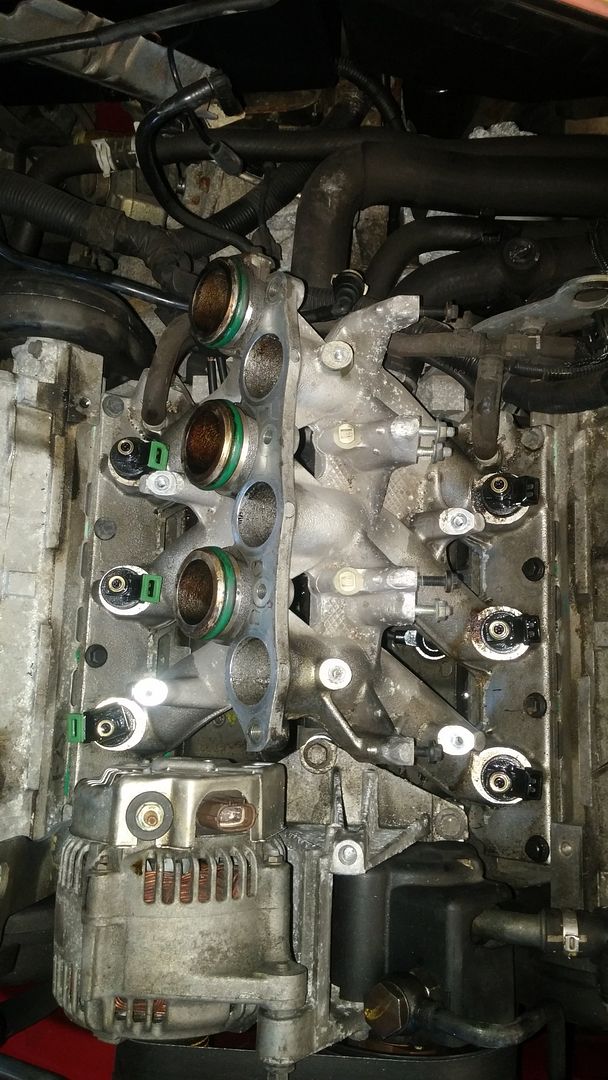 Now the extant of the lub oil weeps and 15 years of crud could be seen on the rocker covers 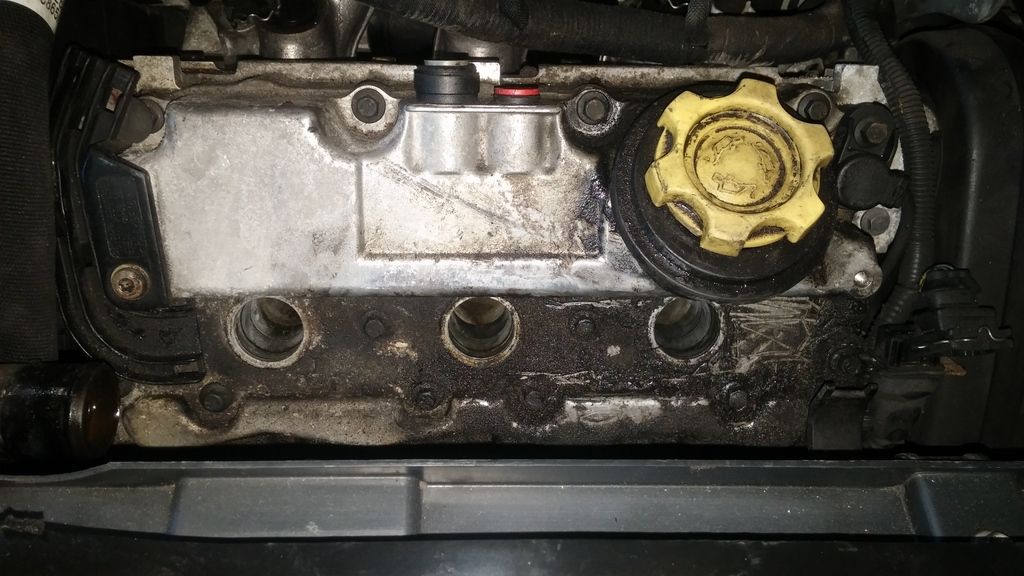 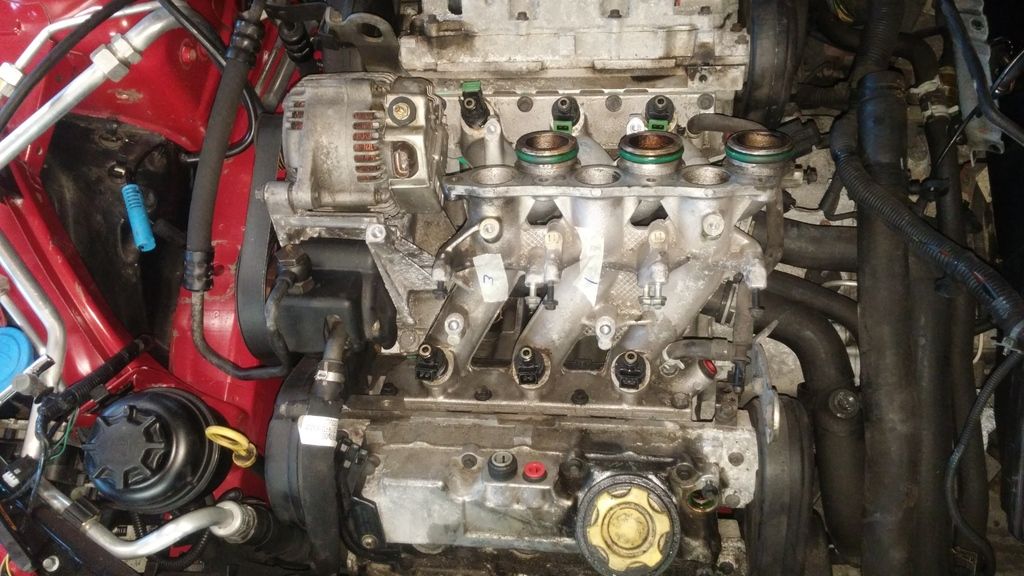 Now the coolant was drained through the Engine drain plug and lower coolant hose on the radiator. I did capture it as the garage had only just filled it when I had them do the timing belts and water pump. https://www.the75andztclub.co.uk/for...ad.php?t=54248 I then removed the inlet castings. These are held on with 7 x bolts on each casting. 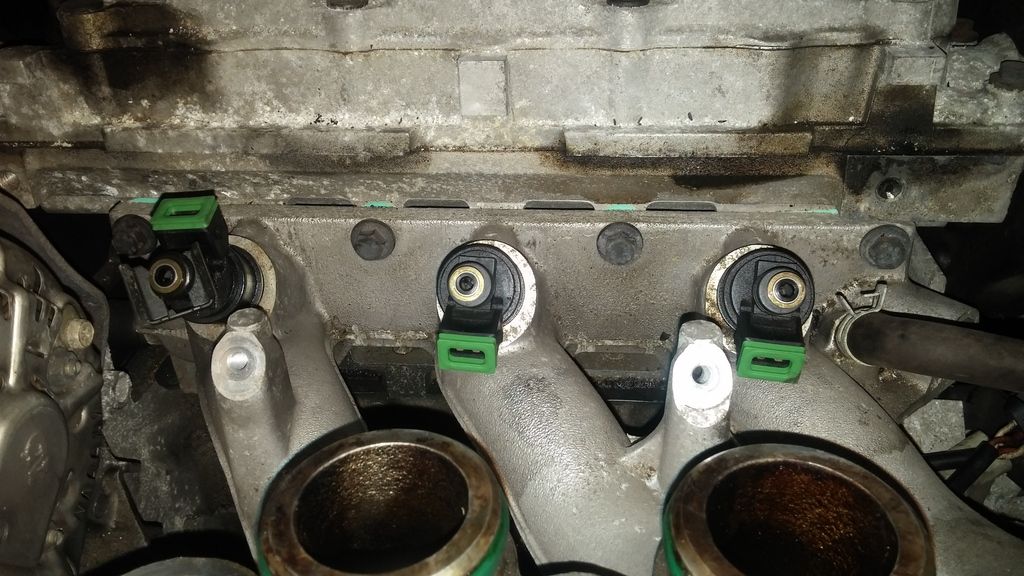 Once both intake castings were removed the extant of the leak on the thermostat could be seen and the crud in the V. 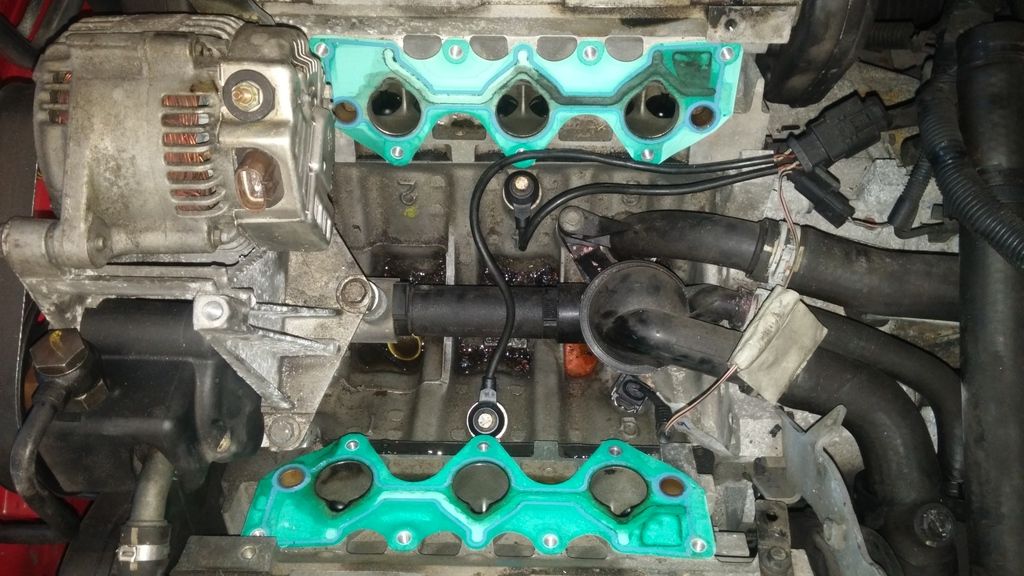 I then removed the thermostat and pipes. In true V6 fashion the plastic 90 degree bend had to be broken to get it out Every Thermostat I have changed I have done this way. I would not want to do it through the key hole method as I would get too frustrated 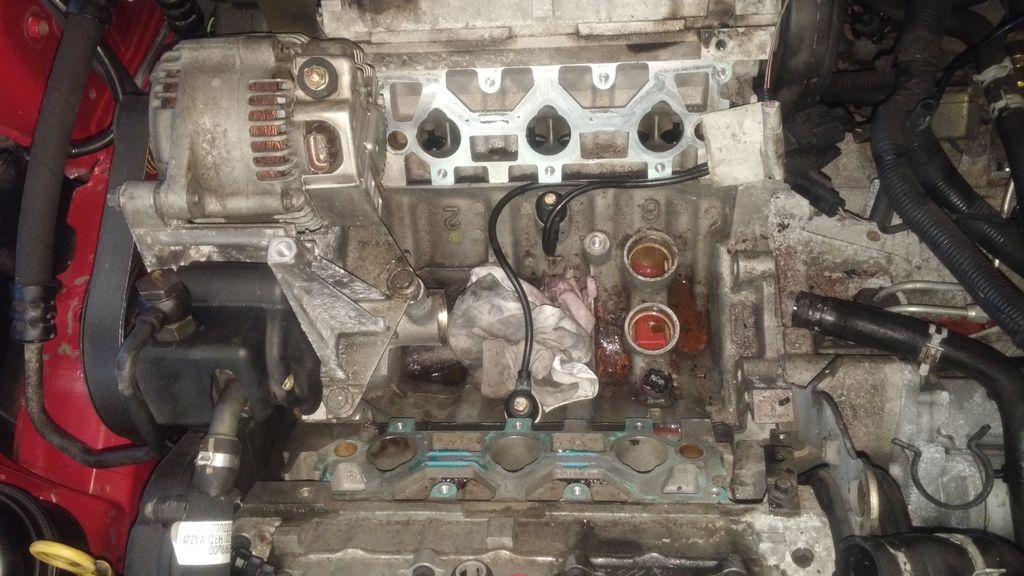 I then cleaned the V out.  the injectors have gone for ultrasonic cleaning and I have now removed the cam covers and started cleaning them
__________________
Jon C Living the dream  MK IV VVTI Tiptronic TT Toyota Supra MG ZT 190+
BornTuesday, 10th July 2001 @ 09:01:10 259th ZT to run off the production line, out of 18,894 252nd ZT 190 + to be made out of 4,023 101st ZT in Solar Red (code: CEU) to be made out of 1,888 Last edited by jonc3725; 20th August 2017 at 21:41.. |

|

|
|
22nd March 2016, 21:11
|
#122 |
|
This is my second home
Rover 75 launch car x2, Rover 800 Vitesse Join Date: Jan 2009
Location: Plymouth Devon
Posts: 8,463
Thanks: 1,115
Thanked 1,083 Times in 653 Posts
|
Very nice Jon. I'm going to have to do that to my new launch car soon as the manifold is noisy.
Your car is going to look better than new soon |
|
|
|
|
23rd March 2016, 07:34
|
#123 |
|
This is my second home
1979 Capri 1.6L, 1982 Capri 1.6L, 2016 Dacia Stepway Join Date: Jun 2009
Location: Dorset
Posts: 8,595
Thanks: 3,496
Thanked 3,397 Times in 2,218 Posts
|
Great work Jon
 so thats what the 'V' section looks like when everything has been taken off. so thats what the 'V' section looks like when everything has been taken off. You fancy doing my thermostat Jon? |
|
|
|
|
24th March 2016, 10:46
|
#124 | ||
|
Posted a thing or two
MG ZT 190 + and MKIV Supra Join Date: Jan 2009
Location: Plymouth
Posts: 1,551
Thanks: 224
Thanked 493 Times in 359 Posts
|
Quote:
She will never be as good as new but once finished she should be ready for another 15 years. . As I have said loads of times she was a really good base of a car for a project like this and the previous owner always paid to have the correct maintenance done Give me a shout if you need a hand when you get around to your manifold. Quote:
yea it does seem a bit daunting doesnt it but its only nuts bolts and wiring As I said I wouldnt do it the key hole way as my hands are quite large so I like access and I have the luxury of not rushing
__________________
Jon C Living the dream MK IV VVTI Tiptronic TT Toyota Supra MG ZT 190+
BornTuesday, 10th July 2001 @ 09:01:10 259th ZT to run off the production line, out of 18,894 252nd ZT 190 + to be made out of 4,023 101st ZT in Solar Red (code: CEU) to be made out of 1,888 |
||
|
|
|
|
24th March 2016, 10:53
|
#125 |
|
This is my second home
Rover 75 launch car x2, Rover 800 Vitesse Join Date: Jan 2009
Location: Plymouth Devon
Posts: 8,463
Thanks: 1,115
Thanked 1,083 Times in 653 Posts
|
Thanks Jon will do
|
|
|
|
|
27th March 2016, 23:35
|
#126 |
|
Posted a thing or two
MG ZT 190 + and MKIV Supra Join Date: Jan 2009
Location: Plymouth
Posts: 1,551
Thanks: 224
Thanked 493 Times in 359 Posts
|
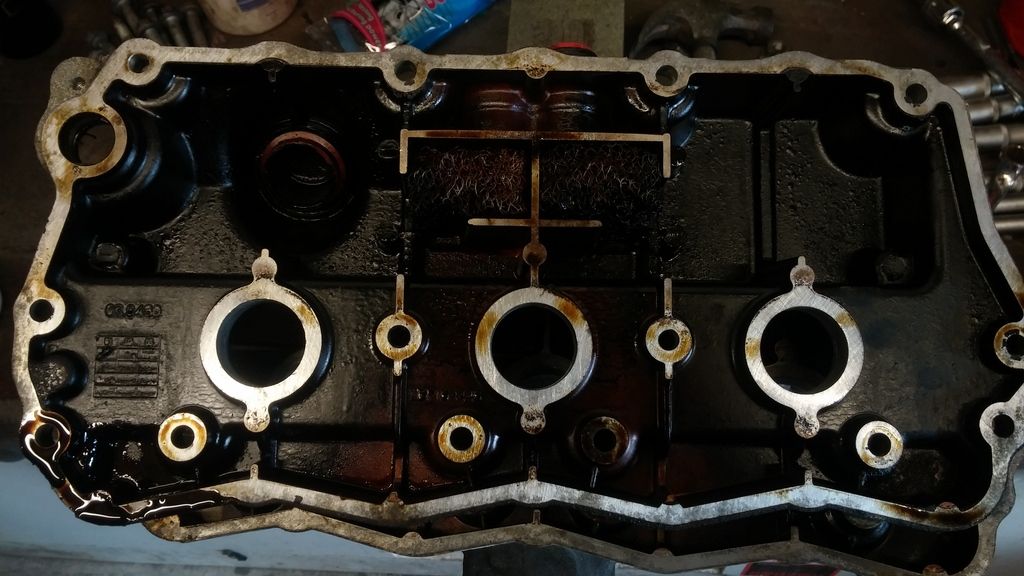
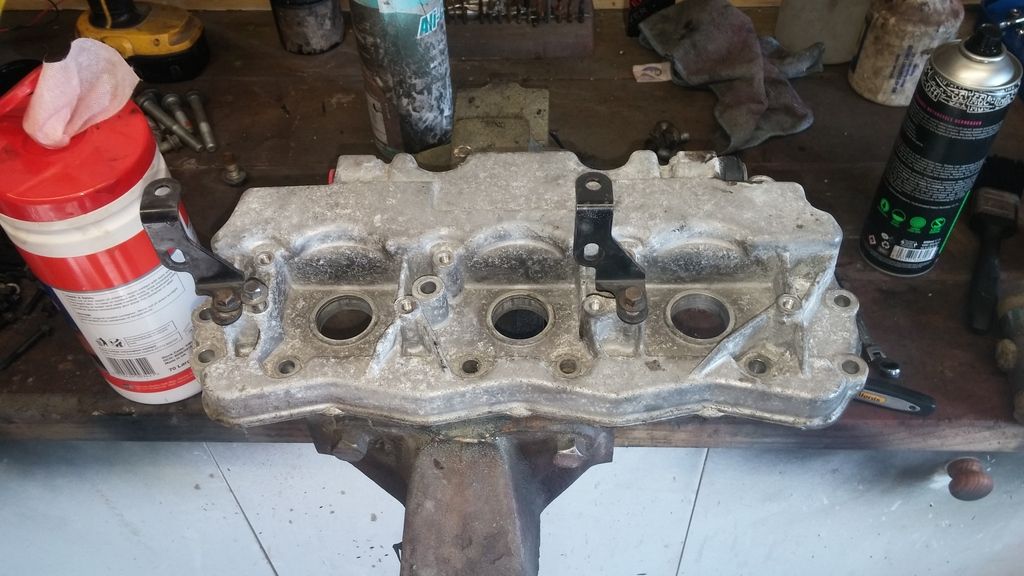
next job was to remove the cam covers, clean them and fit new gaskets and breather mesh.
   the smaller breather holes weer both blocked on both covers 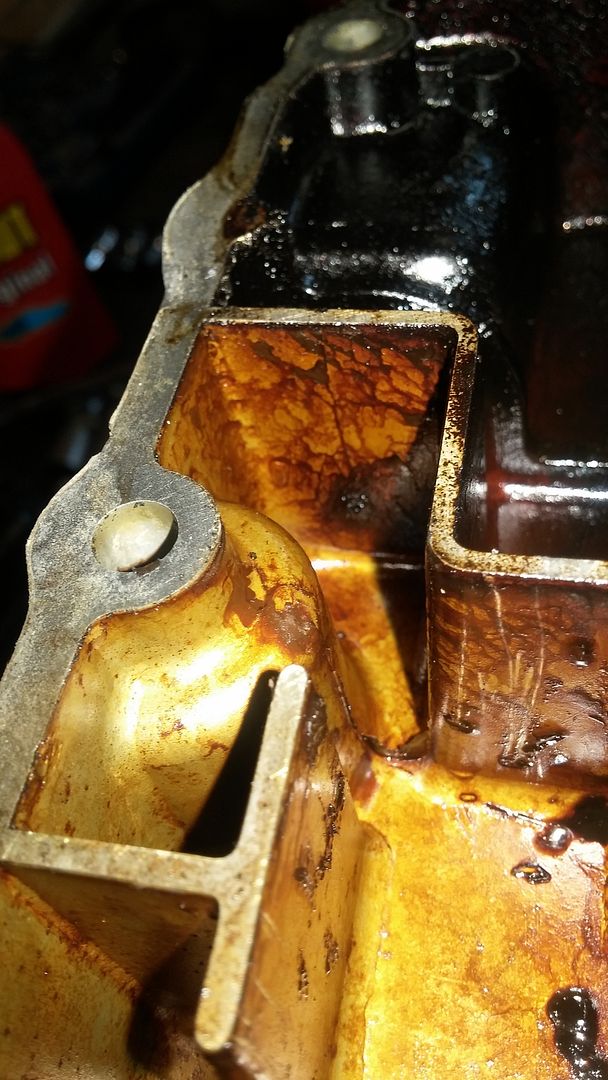 cleaning process using degreaser and water 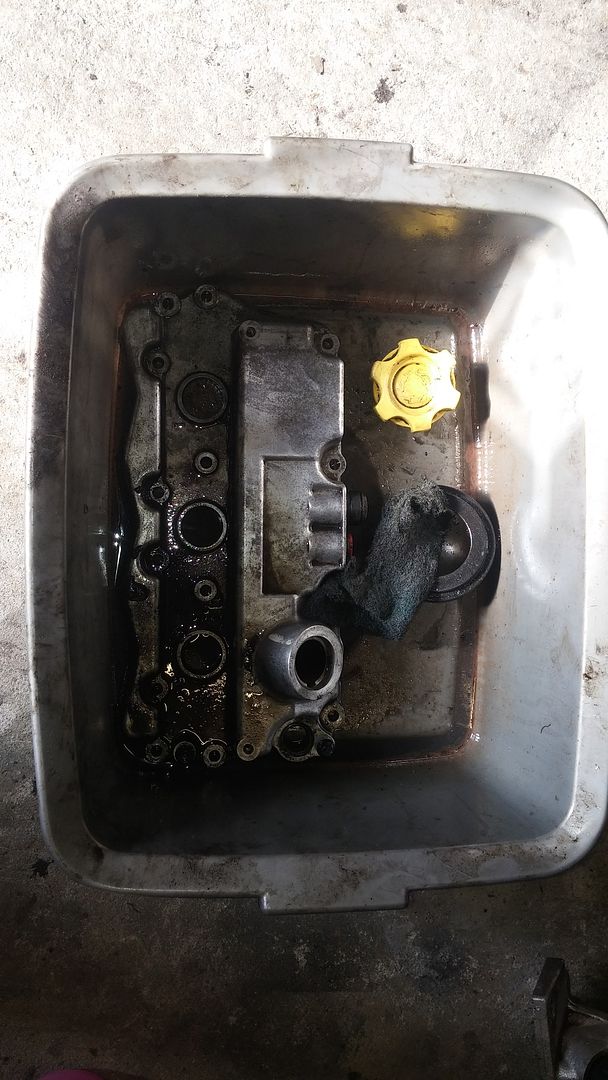 and the finished products. I'm not a fan of polished bling in the engine bays so decided to leave them natural 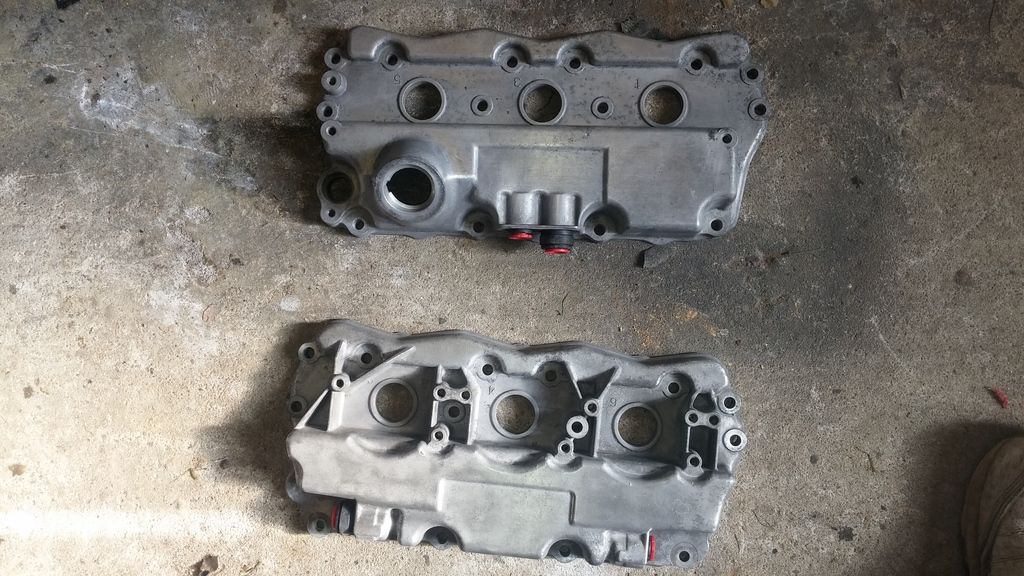 Replacement meshes bought for the breathers 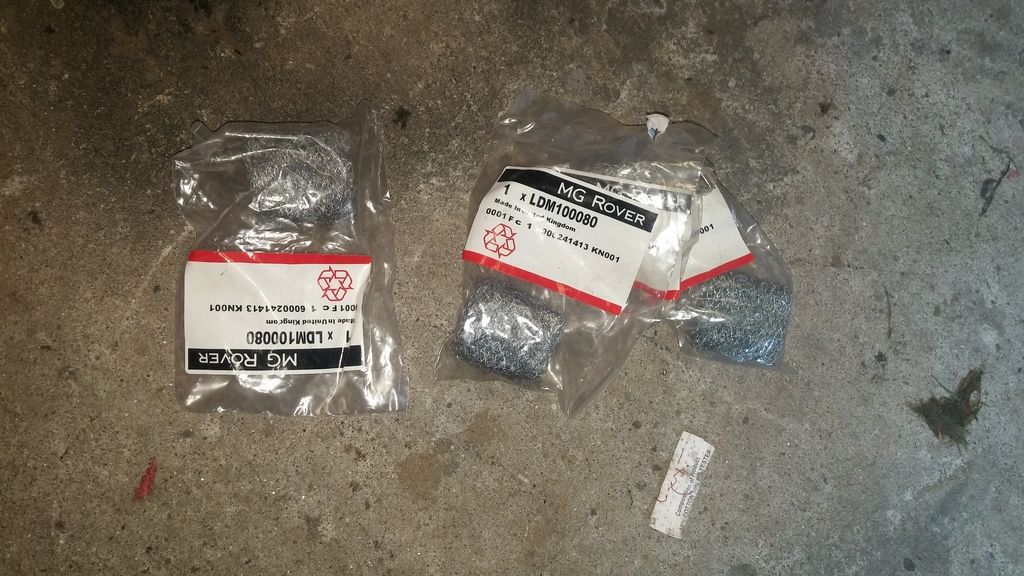 the holes unblocked 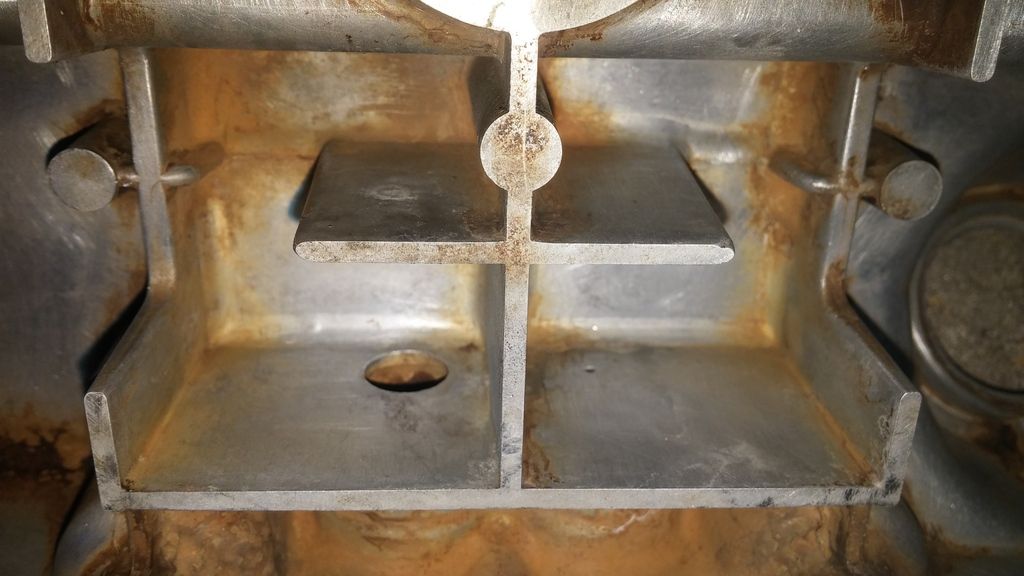 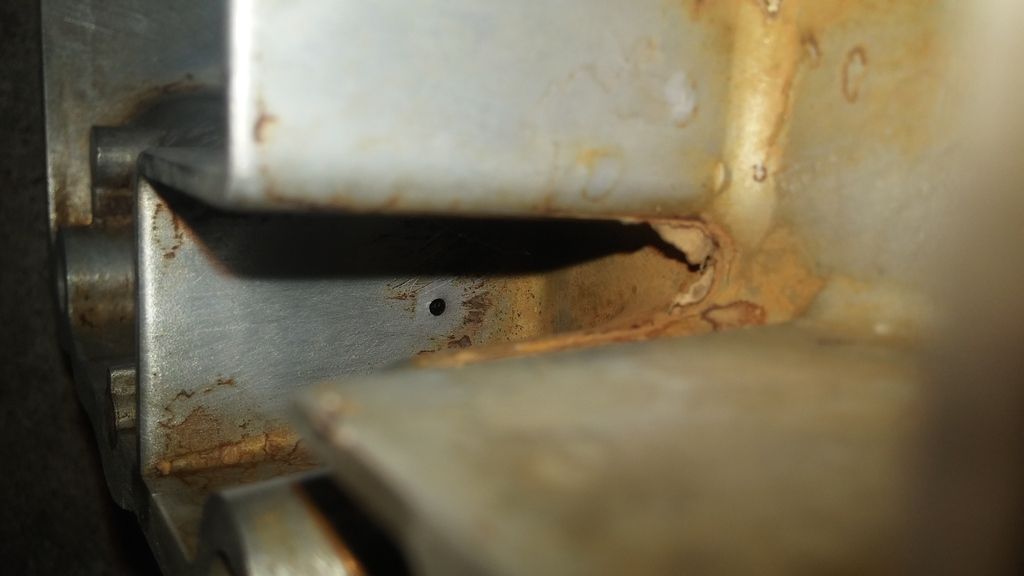 and the mesh fitted. 4 are needed in two pairs for each cam cover 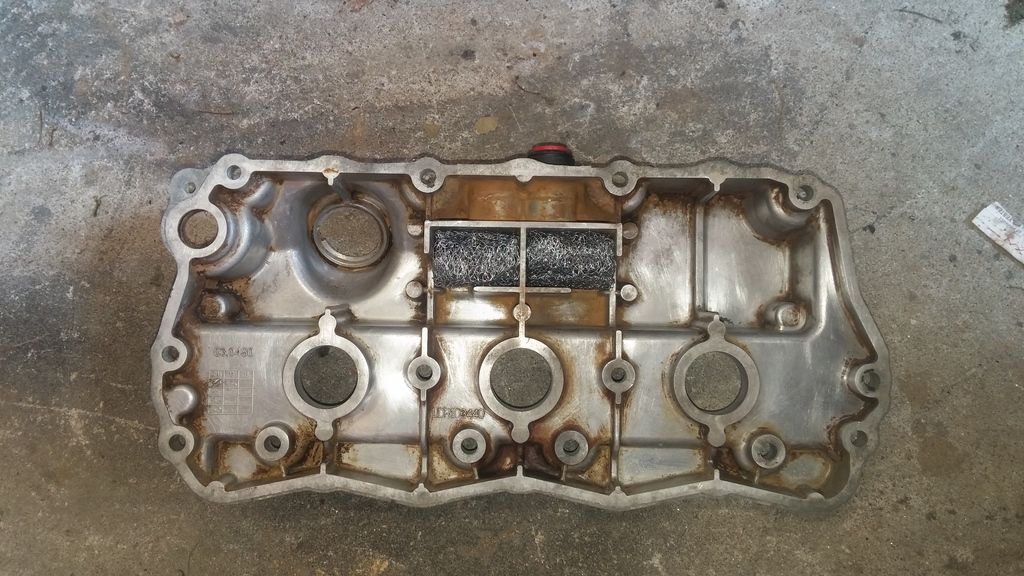 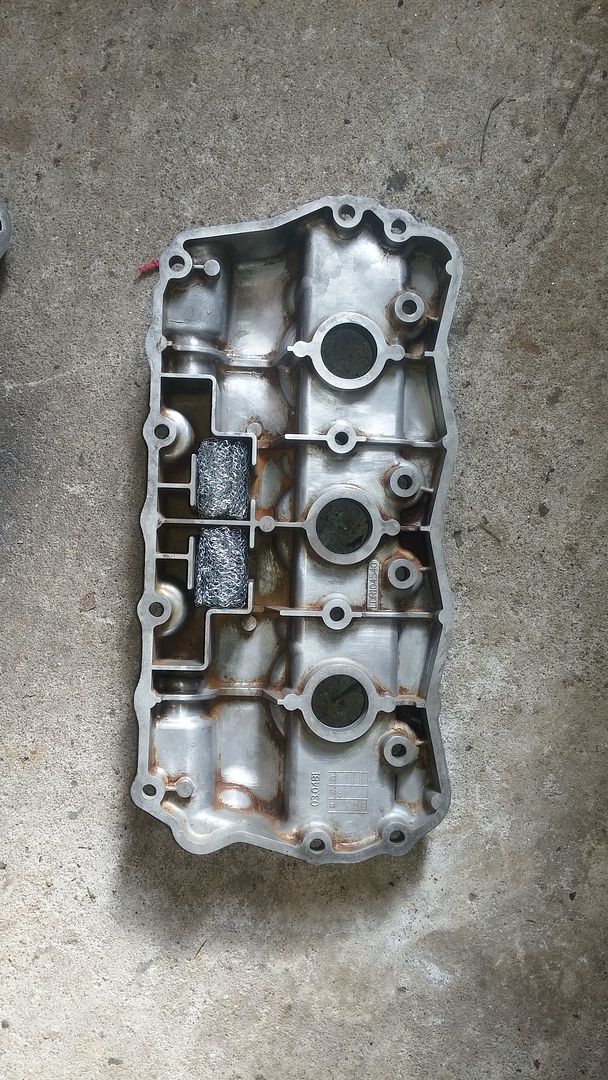 I had a complete engine gasket set already in the garage after picking it up as a complete package with loads of other stuff from an old member on here 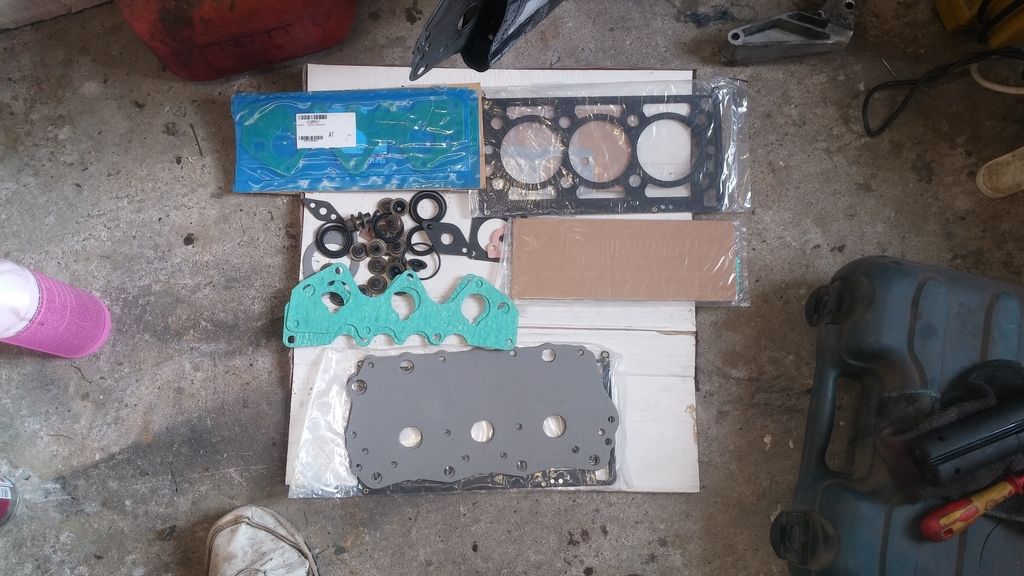 Covers fitted and bolts torques down to 10Nm in accordance with the tightening pattern 7. 6. 3. 14. 8. 1. 2. 13. 9. 10. 4. 5. 11. 12. 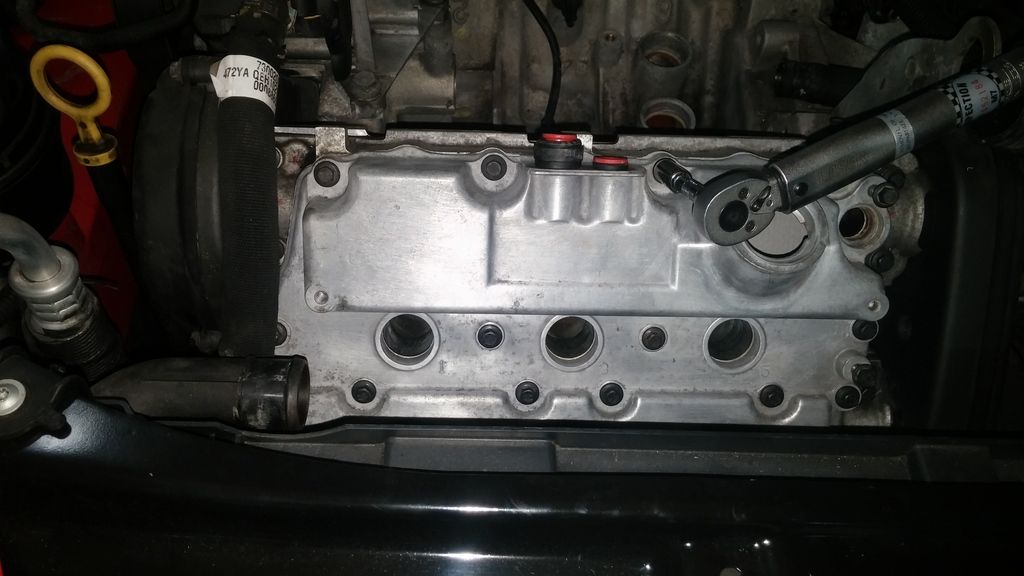 some of the brackets attached the covers taken back to bare and sprayed 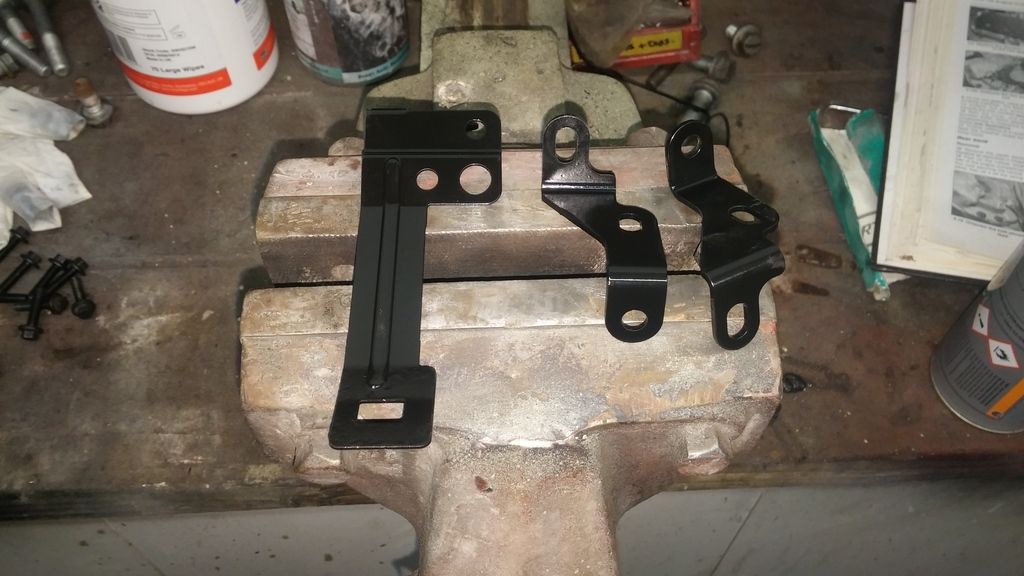 The covers torqued in place ready for the next stage 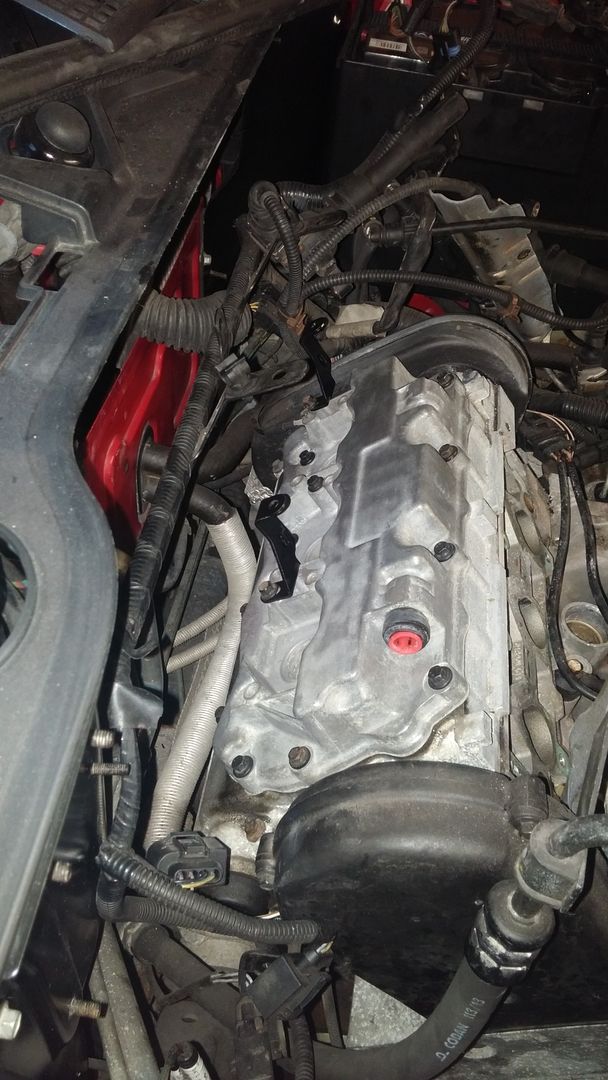 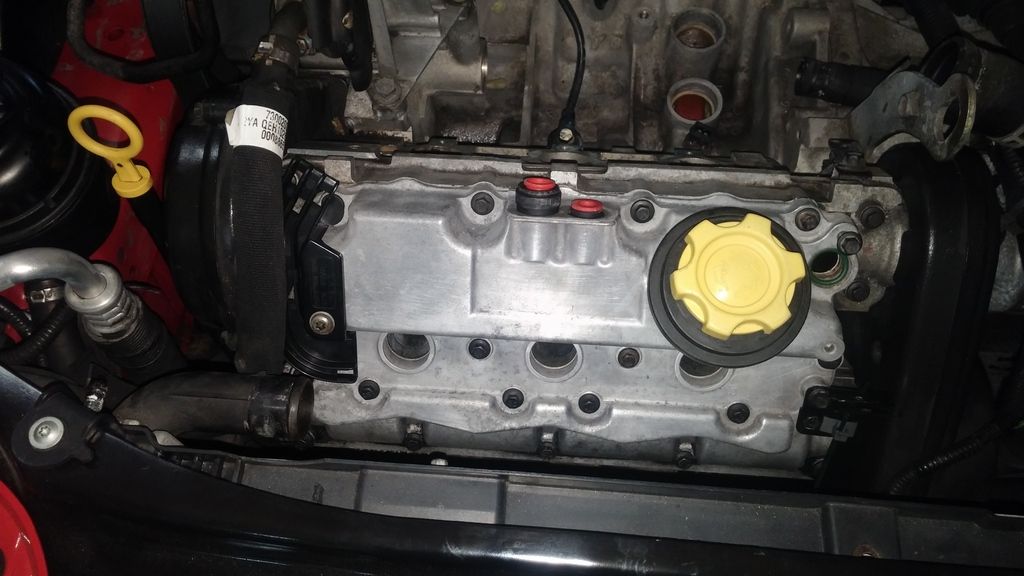 Next up was the fitting of the replacement thermostat and pipes. I applied a little silicon grease to the O seals to aid fitting but still pinched the 90 degree bend seal and had to replace it I also connected the 3 x coolant hoses at this point as access would be limited after the intake castings went back on and my fingers are too big 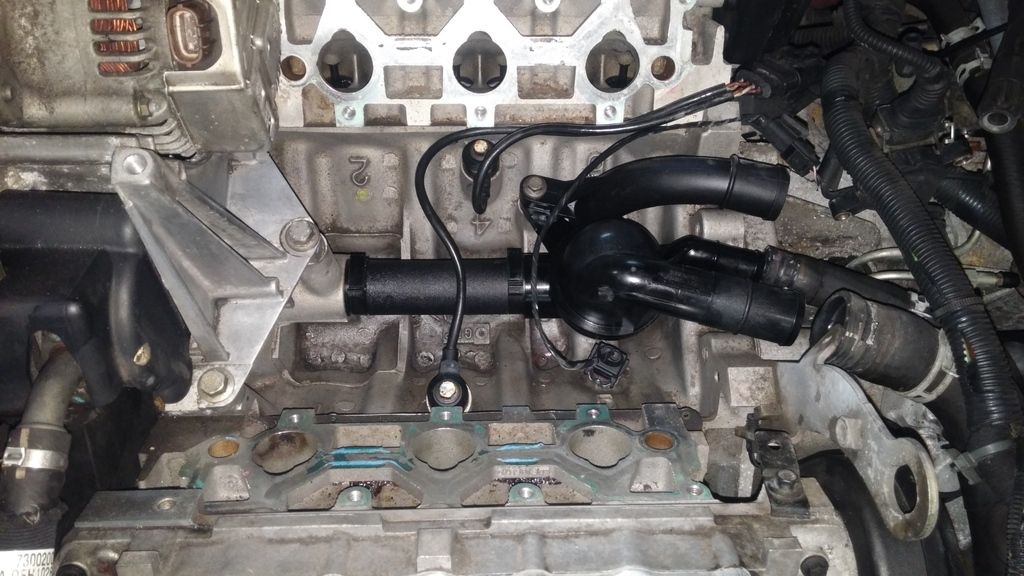 Whilst the engine was stripped and the rear bank was easy to get to I changed these bad boys as well. These are NGKs 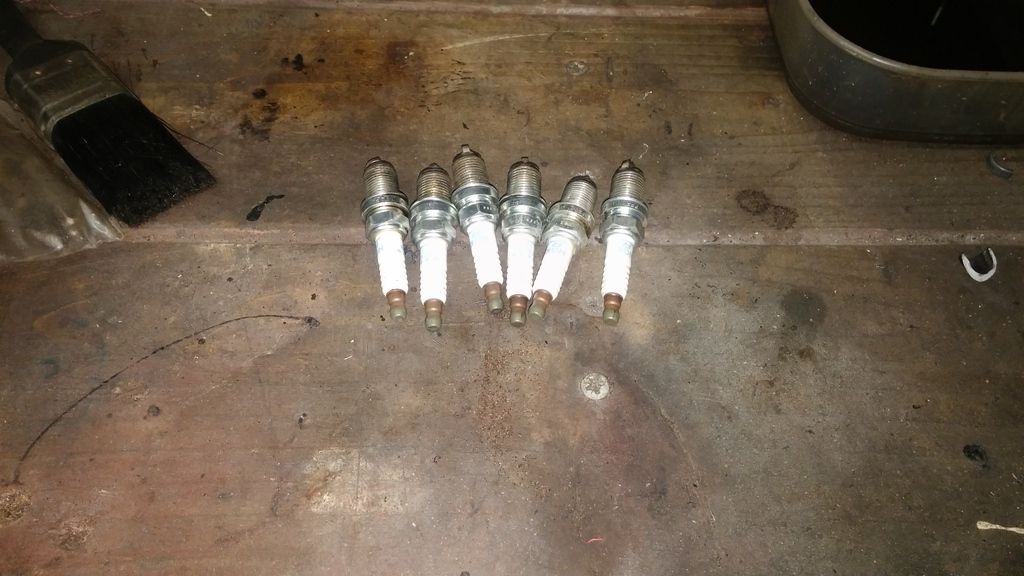 Next up I decided to give the alternator a bit of a clean. Again not into shiny bling I just cleaned the aluminium to clear it of the grease, 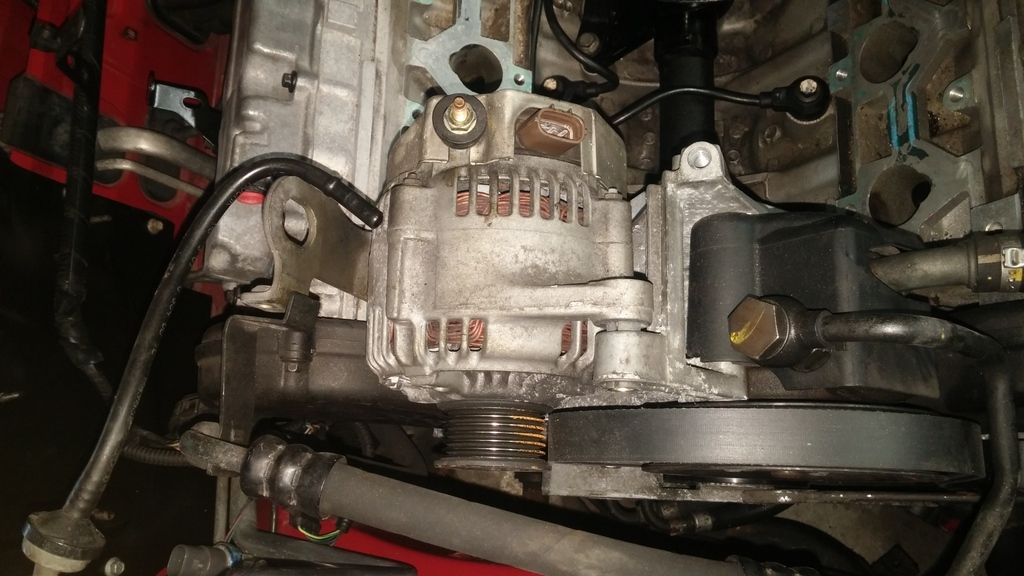 An easy job of releasing the tensioner to remove the belt and then 2 x bolts and the alternator lifts out 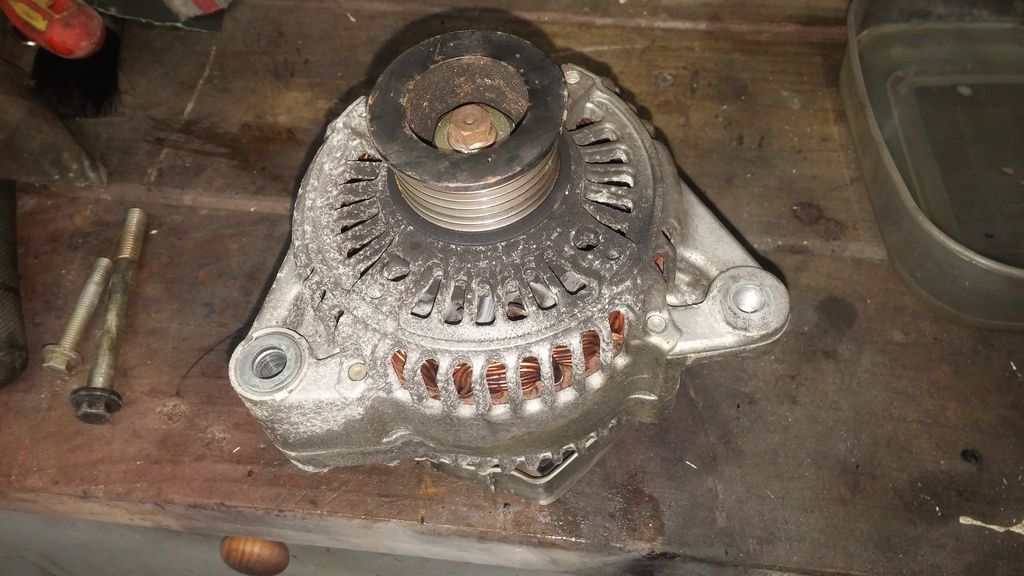 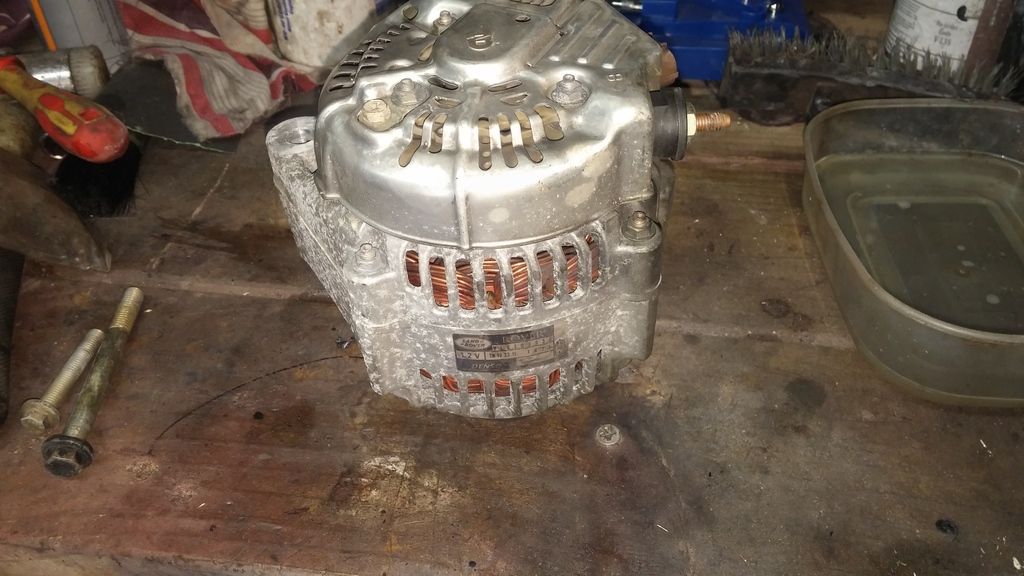 and cleaned 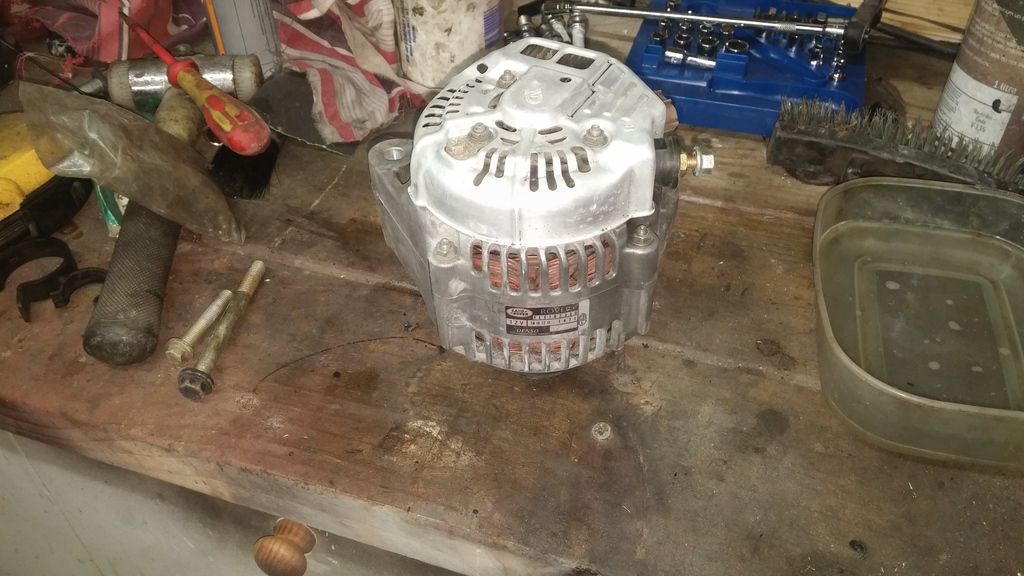 and back in the car 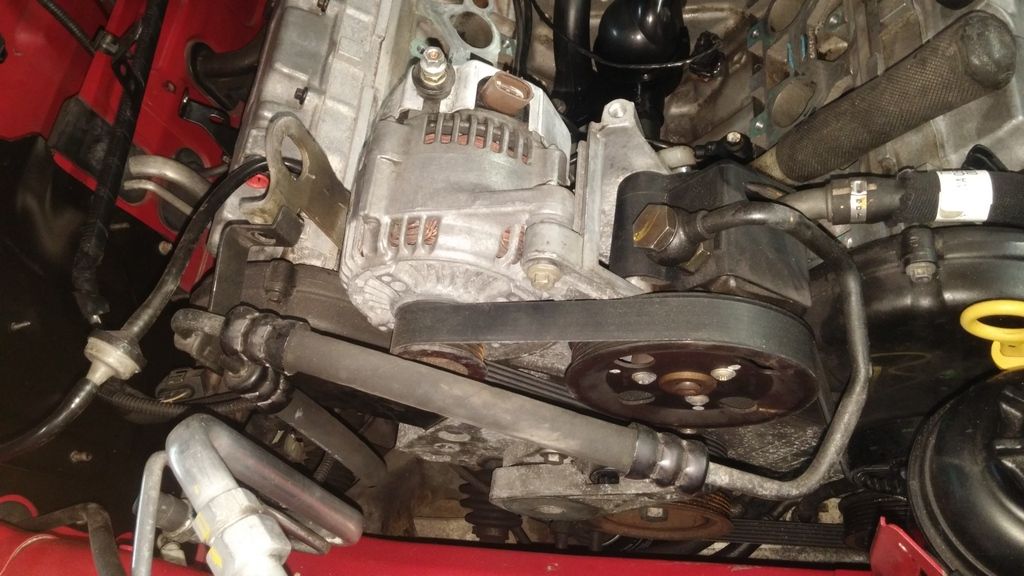 Next up was to clean and degrease the intake castings and fit the injectors. All ready to fit with new gaskets 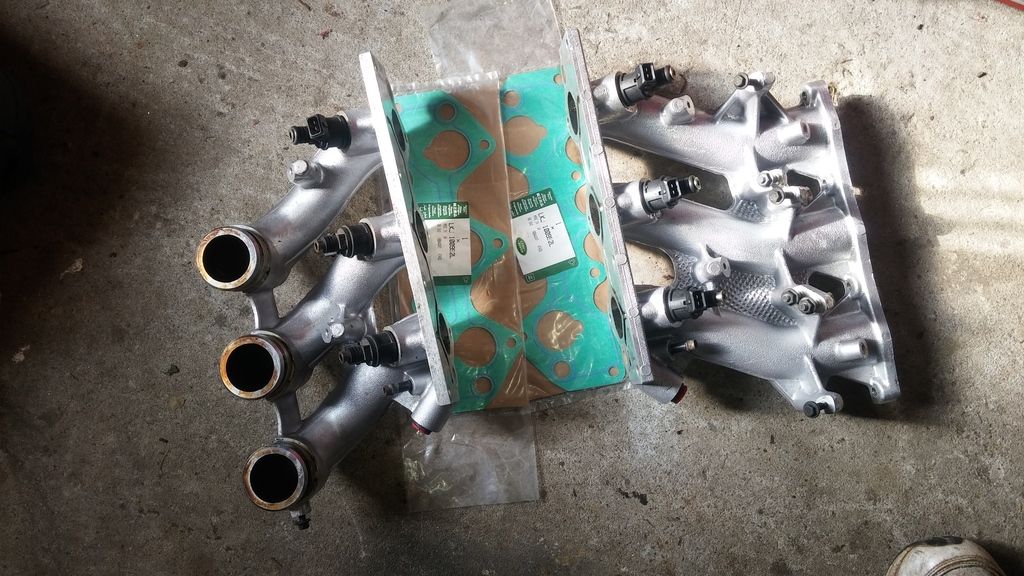 Fitting up is farily easy. Fit the aft set first and torque up the bolts to 25Nm and then fit the fwd set and torque up 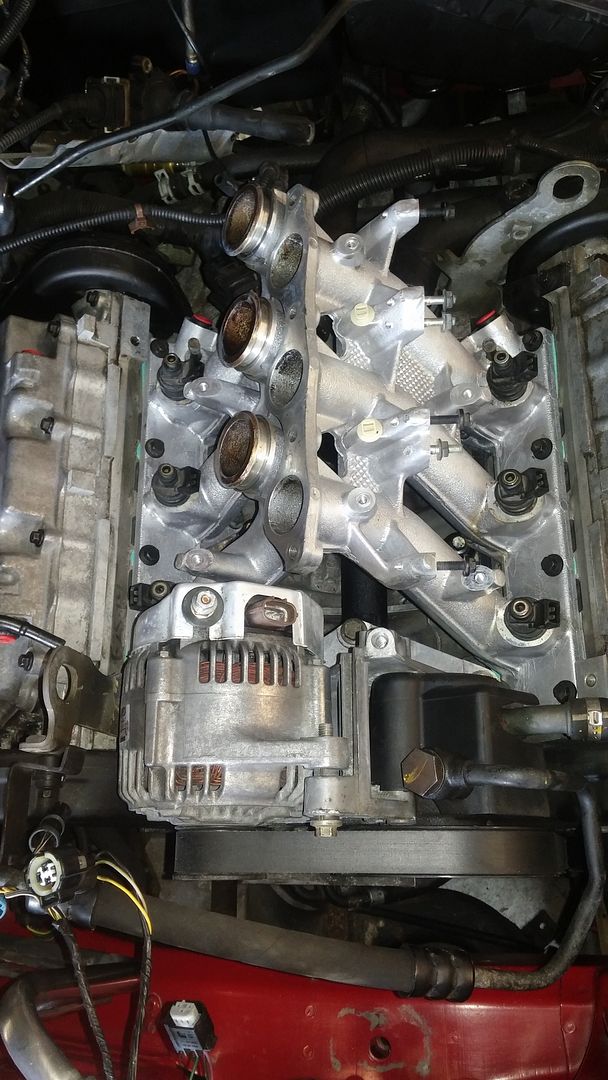 Next up was to fit the fuel rail. I removed this in one piece so fitted it back in one as well. I put a little silicon on the 6 injector O seals and pushed the rail over the seals (took a bit of effort because they were tight 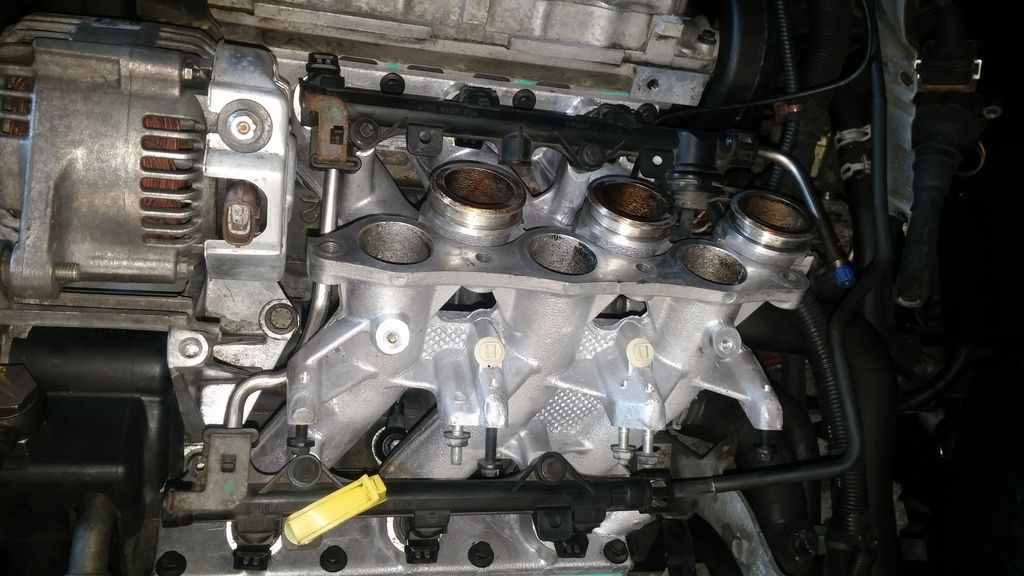 once all the connections are pushed onto the injectors there are 6 clips to clip the injectors and the rail together  and 4 M6 bolts (2 x each side) 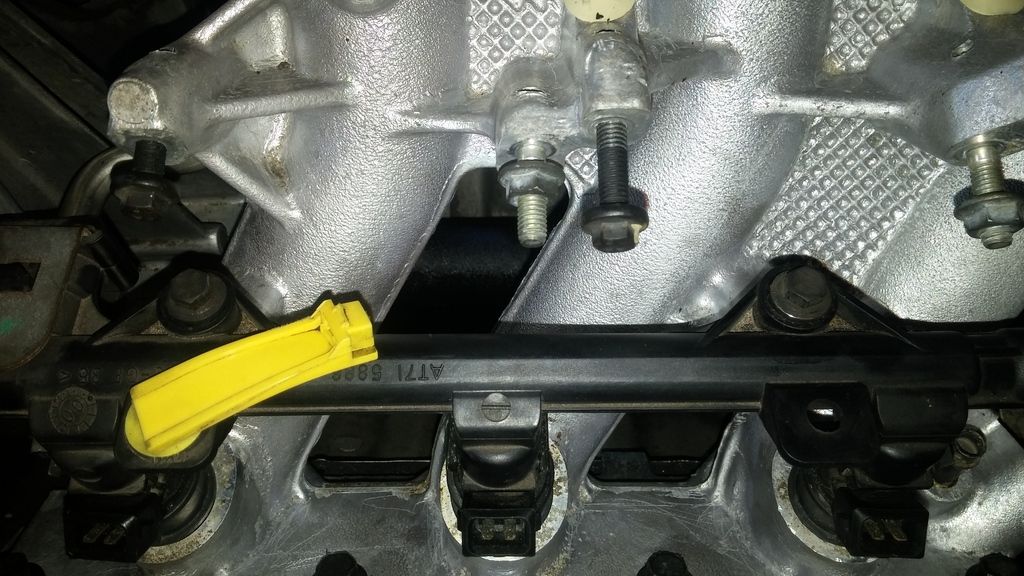 Next up is the electrics and ignition system followed by the vacuum pipes and build up the cooling systems
__________________
Jon C Living the dream MK IV VVTI Tiptronic TT Toyota Supra MG ZT 190+
BornTuesday, 10th July 2001 @ 09:01:10 259th ZT to run off the production line, out of 18,894 252nd ZT 190 + to be made out of 4,023 101st ZT in Solar Red (code: CEU) to be made out of 1,888 Last edited by jonc3725; 20th August 2017 at 21:43.. |
|
|
|
|
28th March 2016, 06:25
|
#127 |
|
This is my second home
ZT 260 SE Twilight and 10 other 75 ZT's :O Join Date: Jan 2007
Location: Conwy NORTH WALES
Posts: 11,094
Thanks: 512
Thanked 1,116 Times in 763 Posts
|
Great work Jon
Interestingly we check all KV6 breathers now on a service especially the small ones. A 1.5mm drill bit works fine and offers instant pressure relief for a completely blocked system which either pushes the dipstick out mid journey resulting in complete oil loss. (Similar problem on diesels as we all know !) If dipstick doesn't get pushed out the pressure tends to blow the crank seal at the flywheel end. Usually the above problems happen after the 100k mark
__________________
[SIGPIC][/SIGPIC] Newbies do now!! 1. Plenum drains..all 3 or 4 year dependent 2. Cooling fan..All speeds functioning 3. Bonnet cable divider block |
|
|
|
|
28th March 2016, 10:05
|
#128 | |
|
Posted a thing or two
MG ZT 190 + and MKIV Supra Join Date: Jan 2009
Location: Plymouth
Posts: 1,551
Thanks: 224
Thanked 493 Times in 359 Posts
|
Quote:
Yea this engine has 90K on it and regularly serviced all its life but the small holes were blocked. I am surprised it wasnt something like a 5A to take out the breather mesh and clean/replace as well as checking the holes are clear. Obviously due to forums like this we know about these sort of things I think a lot of the gunk on the front camcover was coming from the filler cap. The seal was brittle and flat so I can imagine was passing oil.
__________________
Jon C Living the dream MK IV VVTI Tiptronic TT Toyota Supra MG ZT 190+
BornTuesday, 10th July 2001 @ 09:01:10 259th ZT to run off the production line, out of 18,894 252nd ZT 190 + to be made out of 4,023 101st ZT in Solar Red (code: CEU) to be made out of 1,888 |
|
|
|
|
|
28th March 2016, 13:16
|
#129 |
|
This is my second home
ZT 260 SE Twilight and 10 other 75 ZT's :O Join Date: Jan 2007
Location: Conwy NORTH WALES
Posts: 11,094
Thanks: 512
Thanked 1,116 Times in 763 Posts
|
__________________
[SIGPIC][/SIGPIC] Newbies do now!! 1. Plenum drains..all 3 or 4 year dependent 2. Cooling fan..All speeds functioning 3. Bonnet cable divider block |
|
|
|
|
28th March 2016, 22:55
|
#130 | |
|
Posted a thing or two
MG ZT 190 + and MKIV Supra Join Date: Jan 2009
Location: Plymouth
Posts: 1,551
Thanks: 224
Thanked 493 Times in 359 Posts
|
Quote:
ooh nice car and an early example. Red ZT's with straights are just sooo common
__________________
Jon C Living the dream MK IV VVTI Tiptronic TT Toyota Supra MG ZT 190+
BornTuesday, 10th July 2001 @ 09:01:10 259th ZT to run off the production line, out of 18,894 252nd ZT 190 + to be made out of 4,023 101st ZT in Solar Red (code: CEU) to be made out of 1,888 |
|
|
|
|
 |
|
|


 Linear Mode

