
|
|
|
|
|
|
||
|
|
||
 31st October 2016, 21:05
|
#11 |
|
This is my second home
Mg Zt 190 Join Date: Apr 2012
Location: The FIRST Garden City....Letchworth.
Posts: 6,778
Thanks: 1,243
Thanked 920 Times in 698 Posts
|
I have to do it Trebors way..........Because i tried to rectify it "Through the keyhole" type thing...........and managed to snap the bottom off the button you press down
 So......I have a replacement button section and ready to go. My question is..........Where do you get the zip thingy to rezip the zip after mending ????? Any links ?? |

|

|
|
31st October 2016, 21:12
|
#12 |
|
Moderator

MG-ZTT Join Date: Mar 2007
Location: Ware, Herts
Posts: 19,798
Thanks: 161
Thanked 1,249 Times in 1,036 Posts
|
Paul
You just need a slider off the same pitch zip
__________________
David  Impecunity is the mother of ingenuity Useful how to's for common problems Car Of The Month Jan 2014 [SatNav Power Down] [Coolant Level] [SatNav Repair] [Diesel Non Starting] [Paint Codes] [Rear Light Seals] [Reversing Light Switch] [Bleeding Brakes][Sunroof Drain] [Early ZT's][Instrument Pack Diagnostics][ATC Diagnostics] |
|
|
|
|
31st October 2016, 21:22
|
#13 |
|
This is my second home
Mg Zt 190 Join Date: Apr 2012
Location: The FIRST Garden City....Letchworth.
Posts: 6,778
Thanks: 1,243
Thanked 920 Times in 698 Posts
|
I will have to dismember a pair of Brandons trousers ! LOL
|
|
|
|
|
31st October 2016, 21:24
|
#14 |
|
Moderator
MG-ZTT Join Date: Mar 2007
Location: Ware, Herts
Posts: 19,798
Thanks: 161
Thanked 1,249 Times in 1,036 Posts
|
I've got one in the lock up, no idea which box though

__________________
David Impecunity is the mother of ingenuity Useful how to's for common problems Car Of The Month Jan 2014 [SatNav Power Down] [Coolant Level] [SatNav Repair] [Diesel Non Starting] [Paint Codes] [Rear Light Seals] [Reversing Light Switch] [Bleeding Brakes][Sunroof Drain] [Early ZT's][Instrument Pack Diagnostics][ATC Diagnostics] |
|
|
|
|
31st October 2016, 21:25
|
#15 | |
|
This is my second home
Mg Zt 190 Join Date: Apr 2012
Location: The FIRST Garden City....Letchworth.
Posts: 6,778
Thanks: 1,243
Thanked 920 Times in 698 Posts
|
Quote:
 |
|
|
|
|
|
12th December 2016, 19:36
|
#16 | |
|
Posted a thing or two
MG ZT cdti Join Date: Jun 2010
Location: Northants / Bucks border
Posts: 1,815
Thanks: 260
Thanked 204 Times in 182 Posts
|
Quote:

__________________
now with ZT Diesel power after killing the connie and the zt180 combusting |
|
|
|
|
|
8th January 2017, 10:26
|
#17 |
|
This is my second home

Rover 75 CDTi Connoisseur SE & MG ZT Saloon 190 Join Date: Jun 2007
Location: Coven
Posts: 12,530
Thanks: 526
Thanked 1,877 Times in 885 Posts
|
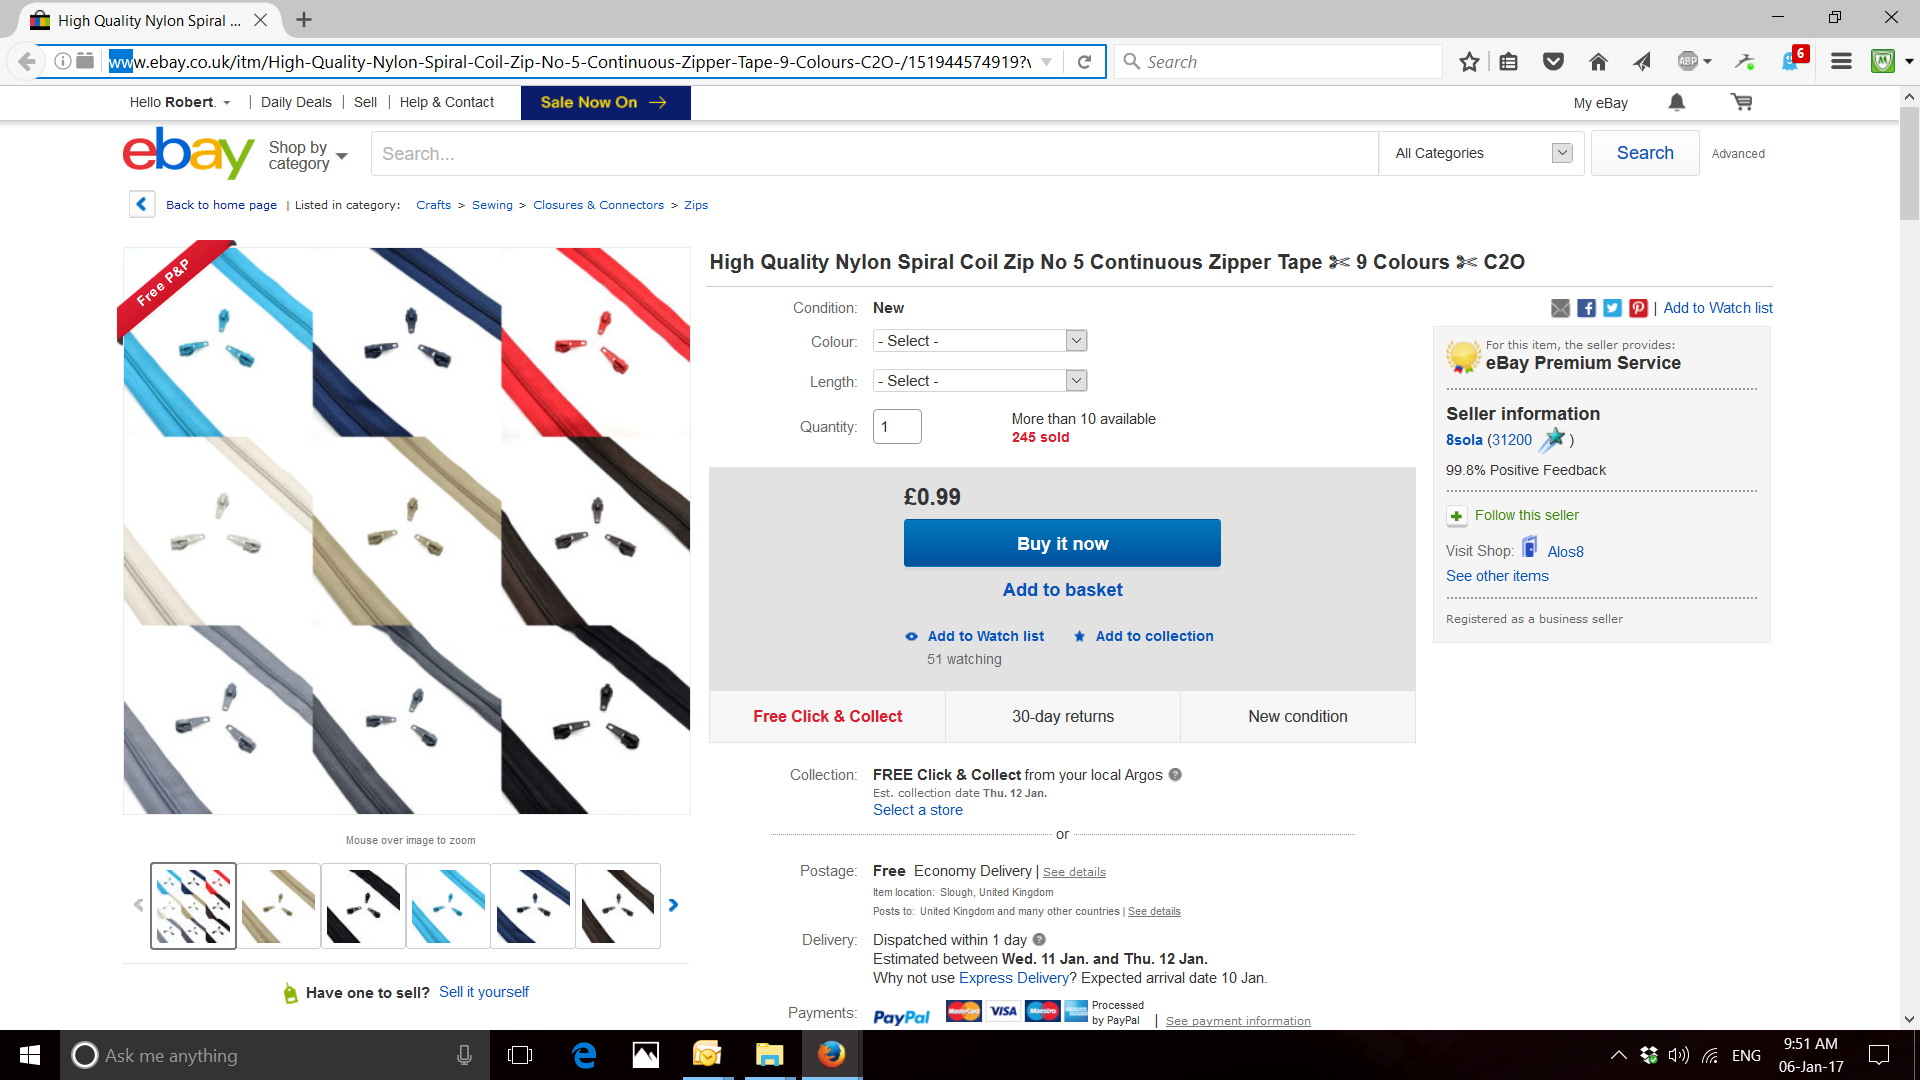
you need a No: 5 zip , this is the one I bought
__________________
www.midlandsnanomeets.co.uk Robs Car Gallery Coven near Wolverhampton WV9 2000 Cowley Built Rover 75 2.0 V6 Club SE/ Atlantic Blue/ Sandstone/Walnut (daily driver) 2003 Land Rover Freelander 1 TD4 HSE Helsinki Blue/Black Leather (swmbo daily driver) |
|
|
|
|
8th January 2017, 14:12
|
#18 |
|
I really should get out more.......
MG ZT-T CDTI Auto Join Date: Feb 2014
Location: Newton Abbot
Posts: 2,624
Thanks: 1,342
Thanked 518 Times in 425 Posts
|
A definitive guide on how to remove the seat, how happy I am!
My buttons are both stuck down and I have been struggling as to what to do, I even considered using a crowbar out of desperation but thankfully decided it was better to walk away and have a brew. Thank you so much for doing this trebor. I would give you a hug if I could......
__________________
Rover 75 and MG ZT: The Complete Story |
|
|
|
|
14th December 2023, 19:05
|
#19 |
|
Regular poster
MG ZT MK1 135 CDTi + Join Date: Dec 2014
Location: Birkenhead
Posts: 38
Thanks: 10
Thanked 1 Time in 1 Post
|
Did a bit of work on this as it's been an issue for ten years that I've owned the car. I totally disassembled the seat to see how the mechanism actually works in-situ.
I can confirm, 95% of the issue is the seat simply not sitting into the pivots at the bottom correctly. The metal brackets that Trebor made is going to be the main fix. Along the way, I did find some interesting things though. The reason the mechanism appears to slip off the clip is because the metal springs can 'slip' out of their default position when excessive force is used (due to pivot alignment issue). I've found that those springs can be reseated with a pull outwards, as others have noted. However, if something where to fill the cavity that the retaining spring falls in to, the clip will no longer be able to fall out of alignment. I've attached a crude picture of an option that I didn't use in the end (drilling screws to keep it from popping out). I found that installing a thick bolt from the rear (parallel) into the cavity was a great solution as it left no space for the retaining spring to pop out of. The bolt must have a shallow head though in order to allow for the clearance of the seat to close. To be fair, dropping a pencil in the cavity would probably work -- anything that acts as a spacer. Additionally, I found a bit of spray grease where the push bar lives made it so much easier to operate so it's worth doing that before reinserting the bars into their correct position -- they now pop up and go down as they're supposed to. Now that the brackets keep the pivot in place and the push bars/springs are reset, greased and can't pop out of position due to filling the cavity with a bolt. The whole mechanism works like a dream for the first time! For those who can't get their seat mechanism open, I offer an alternative solution. Open the ski hatch and undo the zip for the seat trim. (This will require re-zipping, or... you can just close it back up and pretend it was never there). If you get your hand on the inside of the foam and on inside of the frame (towards the front), you can hunt around inside the seat and manually pull the latch down with your fingers which is very easy in theory-- warning, this does require significant strength wrestling with the foam. A long bar to keep the foam pulled out enough to make space for your hand and a torch make this job much easier. I also found that this FixnZip tool worked the best for me for redoing the zips, I've tried a few things but this is by far the easiest. Just loosen it, put it over the zip and crank it right down then zip! https://www.amazon.co.uk/gp/product/B009MRFPKM Last edited by veasmkii; 14th December 2023 at 19:32.. |
|
|
|
 |
|
|


 Linear Mode

