
|
|
|
|
|
|
||
|
|
||
 13th September 2012, 07:05
|
#1 |
|
I really should get out more.......
P6B, L550, Imp, F56, Commando Join Date: Nov 2006
Location: Aberdeenshire
Posts: 2,886
Thanks: 352
Thanked 677 Times in 440 Posts
|
Outline of how to reuse your existing conrod and fit a new piston.
The Conrod LFF000410 and Piston in this particular example is from a 1.8 Turbo engine, this model has a slightly shorter conrod and a different piston compared to the standard NASP models. Given that there are no circlip retainers to hold the gudgeon pin into the piston, the k-series gudgeon pin is a tight fit in the conrod in order to limit movement of the pin. Unless the correct hydraulic press or tooling is available when removing the gudgeon pin the piston and/or conrod will be irreparably damaged. In most cases it probably does not matter if the piston gets damaged as it may be changed out anyway in the majority of cases. Yenmak liners and pistons were used on this occasion, but I have carried out the same process with Goetze liners and AE/Nurall OE pistons too. The quality of the Yenmak parts are every bit as good as the OE supplied in my opinion. 1. First step is to carefully cut the piston crown and sides in half with a hacksaw avoiding marking the top of the conrod with the saw blade and inducing stress cracks. 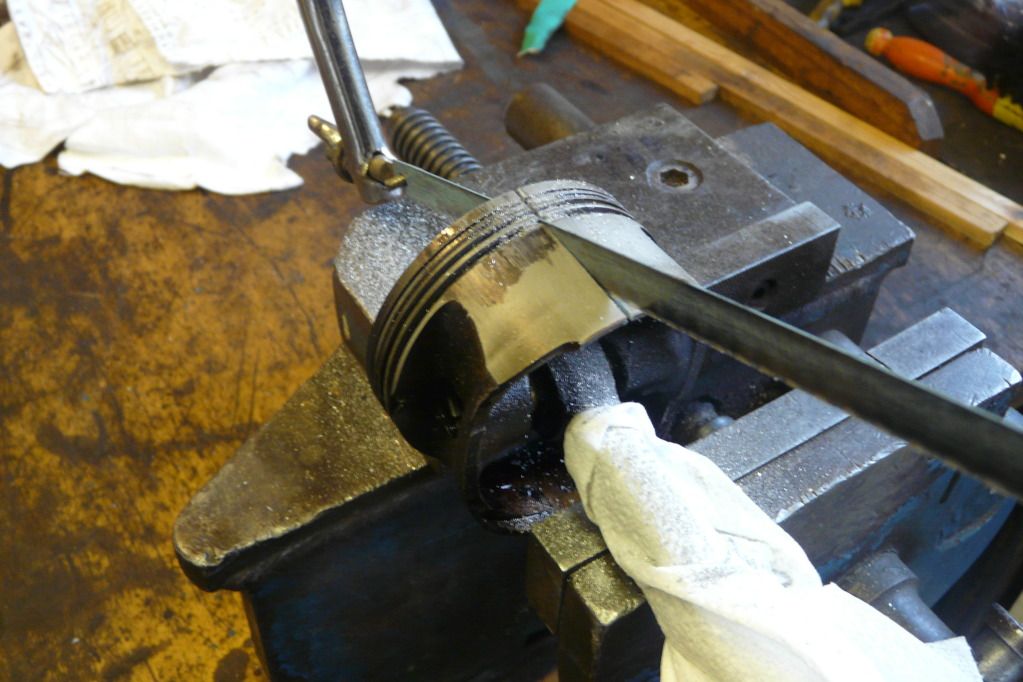 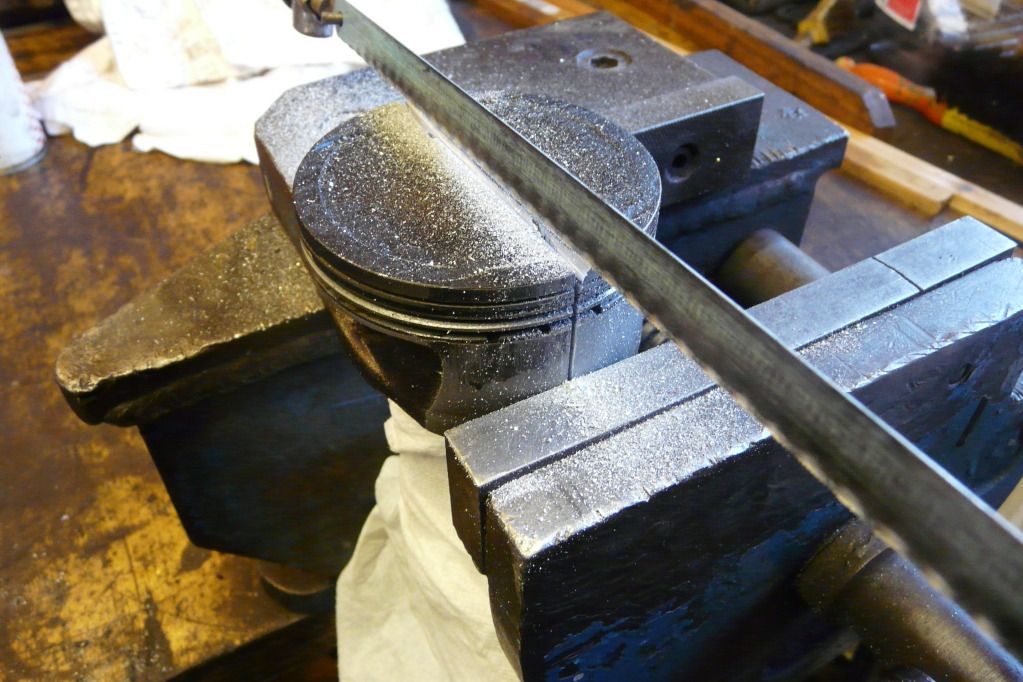 2. Remove cut halves exposing gudgeon pin. 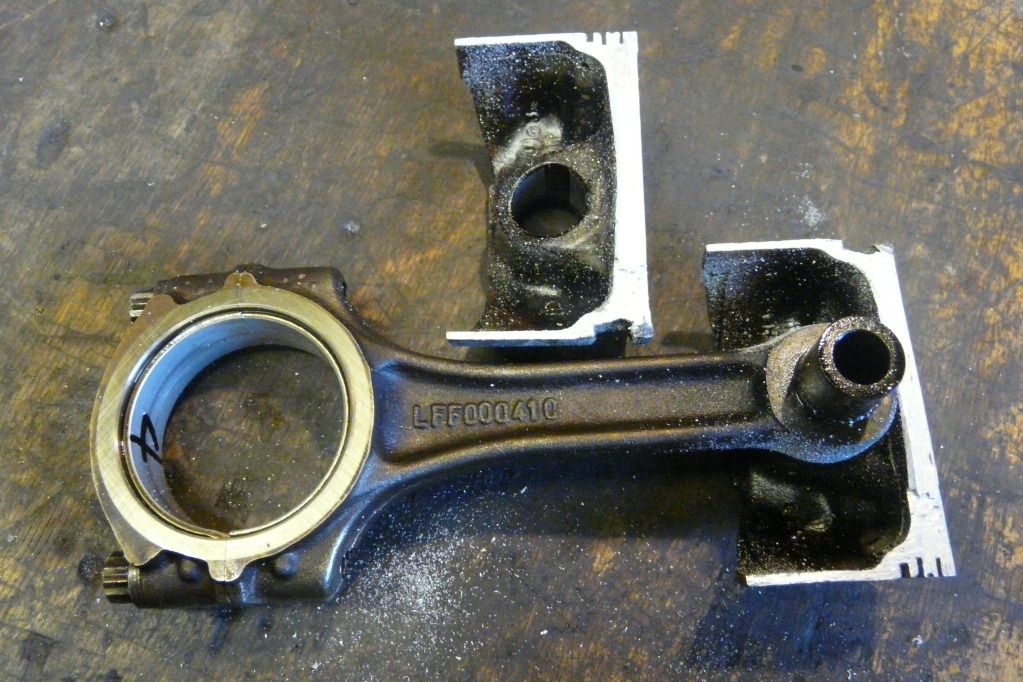 3. Using a deep 21mm socket I pressed the gudgeon pin out with my trusty vice and a little persuasion from a 1 3/4lb hammer. 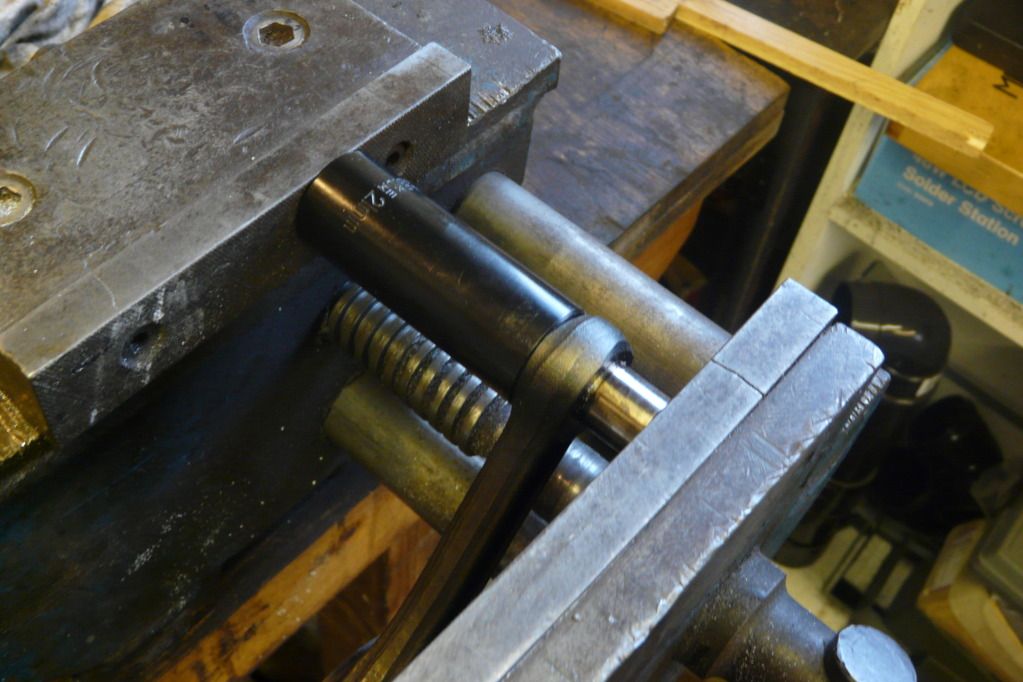 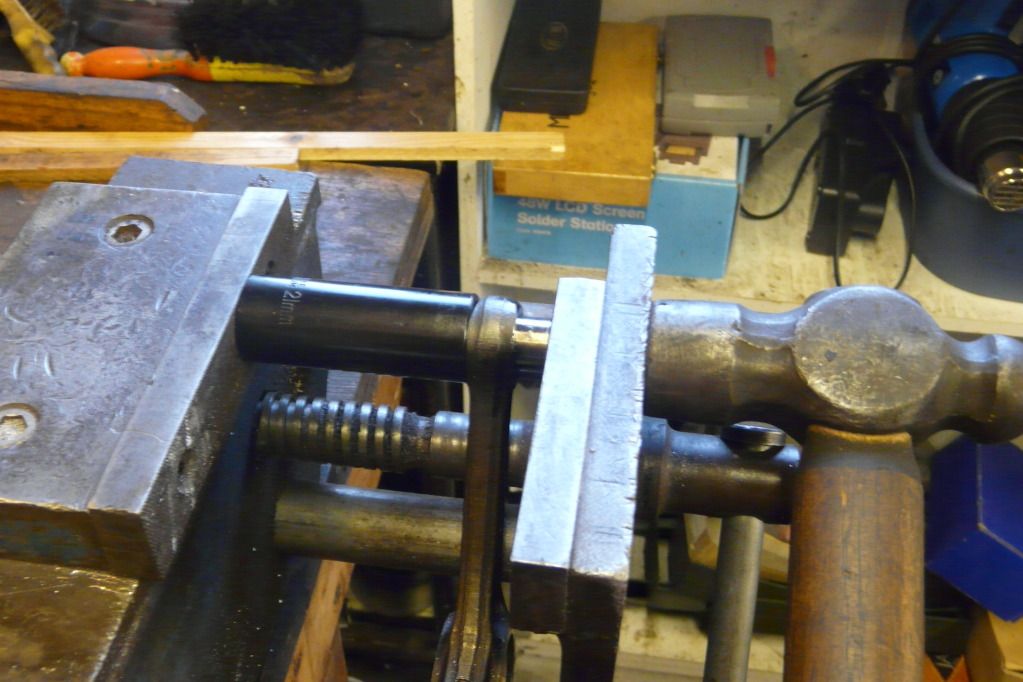 4. Eventually the pin will require another socket to push the pin out fully. 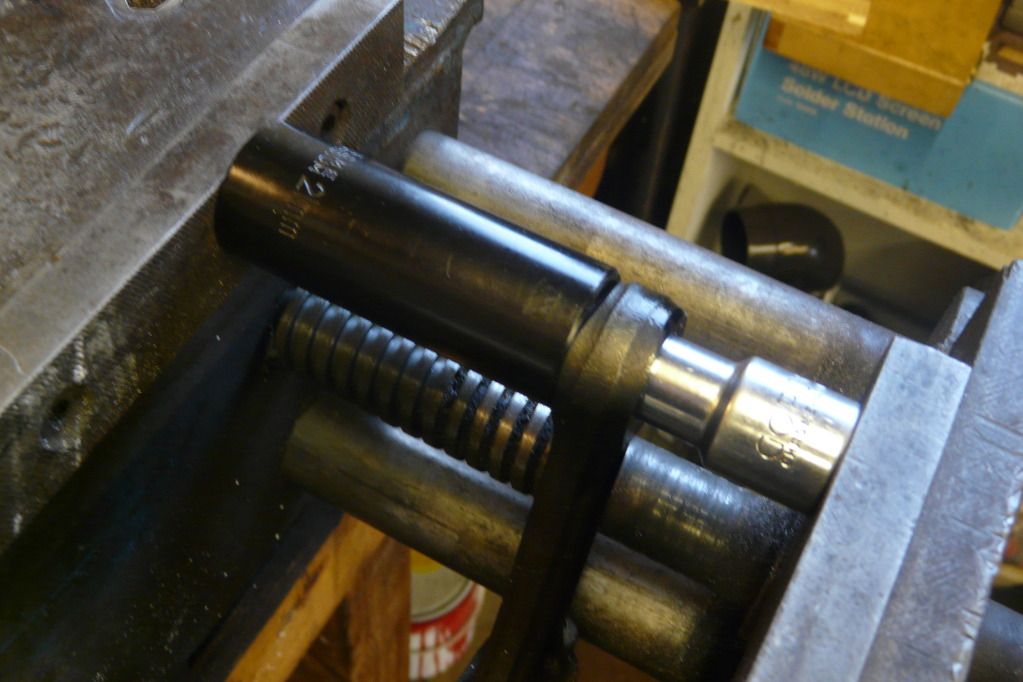 5. Clean out the conrod small end and observe for any nicks or damages that may hinder the fitting of the new gudgeon pin. 6. I am led to believe that the factory rods were induction heated in an automated process. However for me this means I have to heat the small end up just enough until the temper colour starts to appear and no more than that. Any higher a temperature and you risk annealing the conrod. 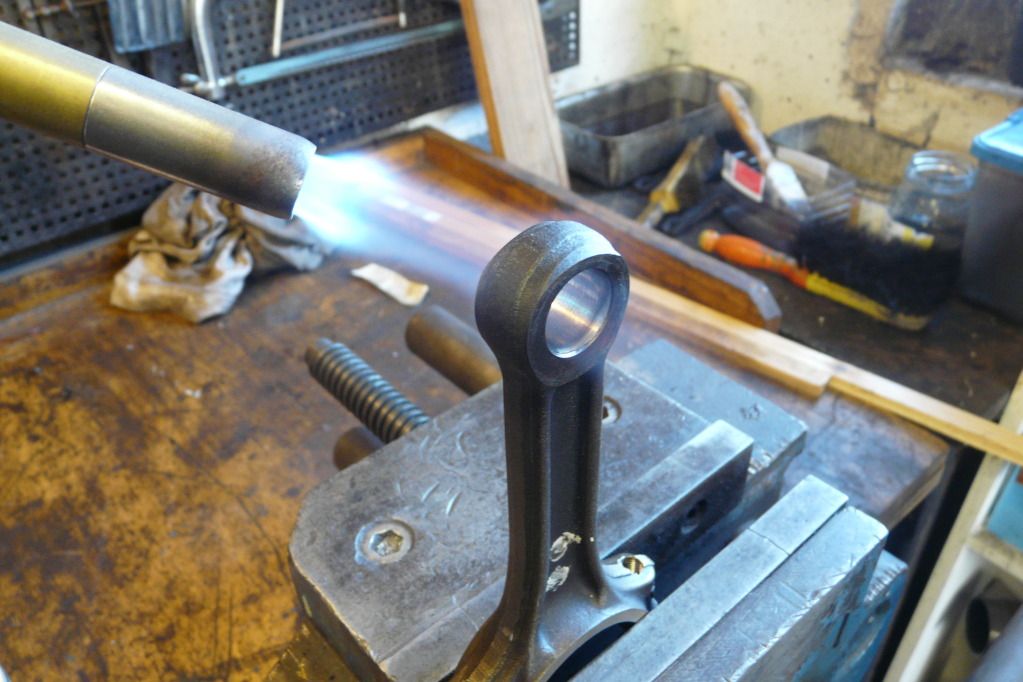 7. Place the piston quickly over the top of the hot conrod and insert the pre-oiled gudgeon pin inserting quickly in to the small end and ensure that the pin is through far enough. You only get one chance at this so ensure that everything is in place. Note that I used a 6mm anchor bolt fixing to hold the gudgeon pin more securely. Note the direction of the arrow on the piston crown needs to point to the front of the engine. Also note that each conrod is numbered at the big end for each cylinder and these numbers also face the front of the engine. 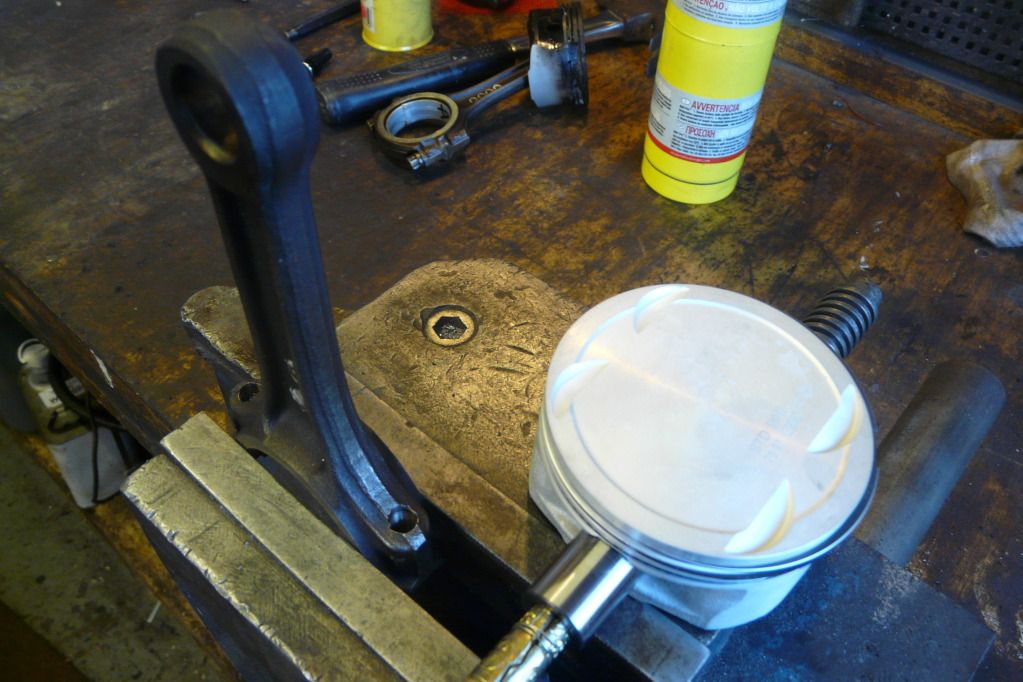 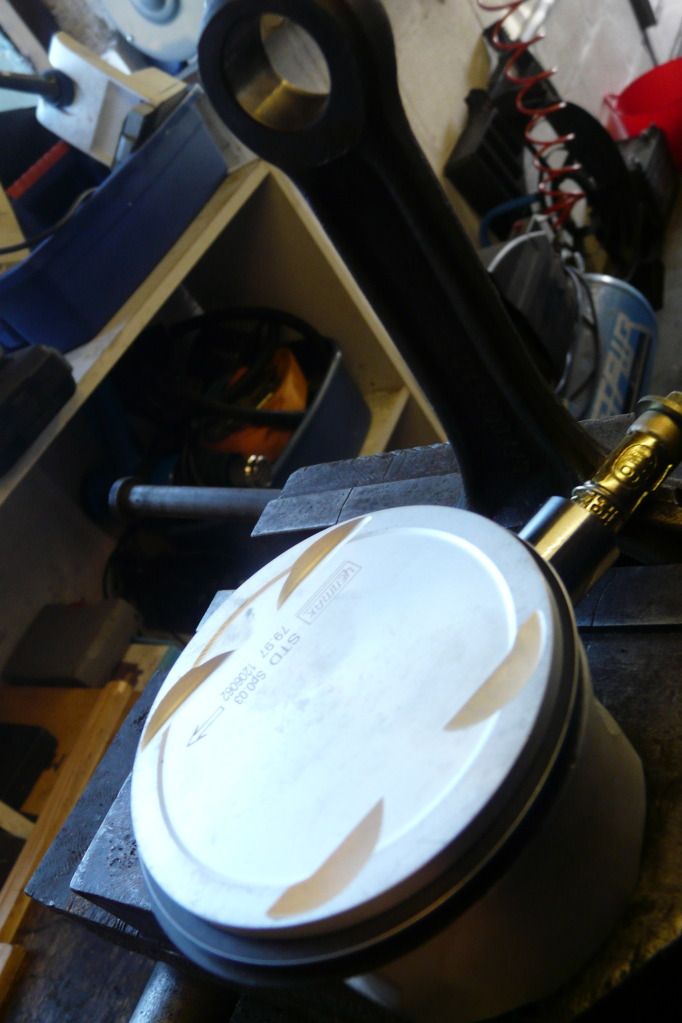 Note the original damaged piston 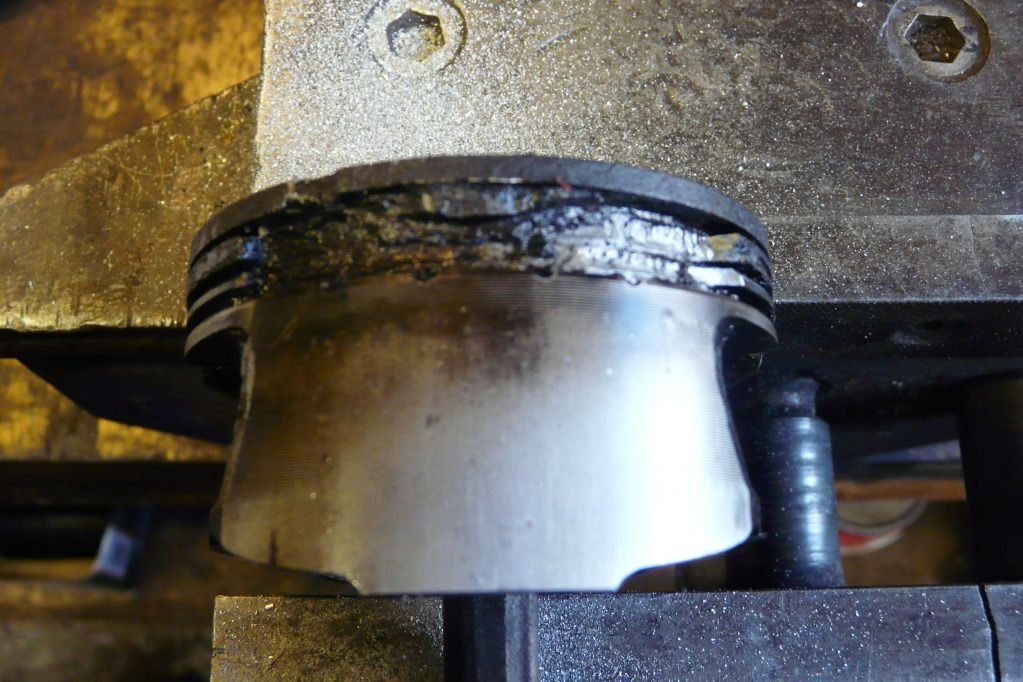 |

|

|
|
|


 Threaded Mode