Quote:
Originally Posted by Gate Keeper

Good morning Jeff, nice photos. Did you use any skin lighting/exposure techniques to bring out the features in the portraits? Outside of a studio setting, I find it challenging sometimes get the facial features right. I will look for an example, different portrait - a garden visitor. Had I used a flash, the monkey would have legged it.
 |
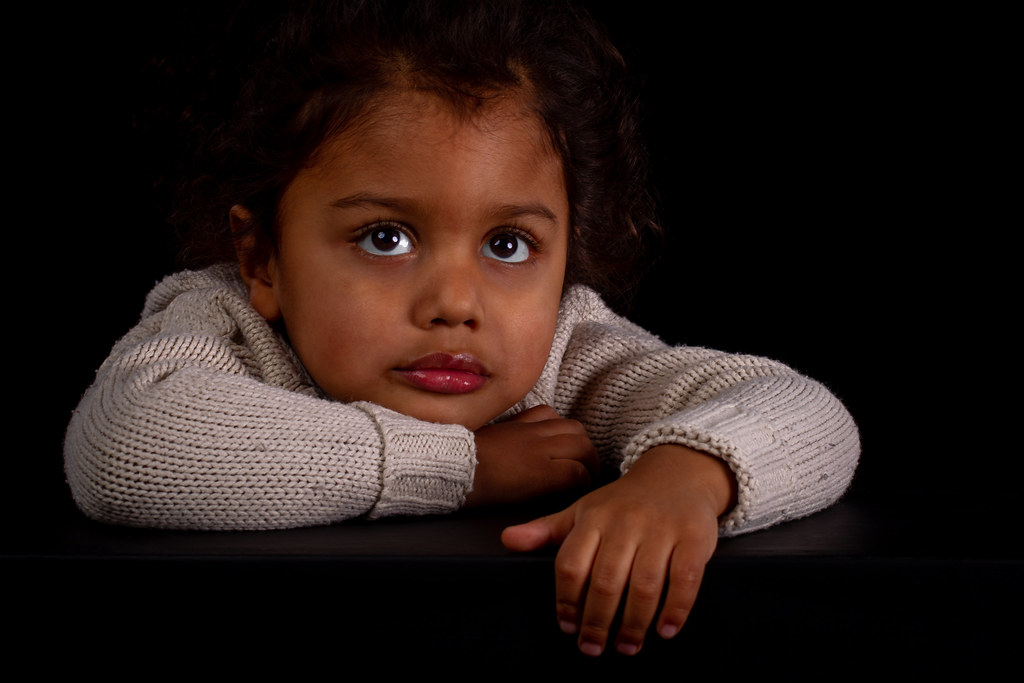
Hi Phil,
The workshop I was doing was using various different lighting setups to achieve different looks.
This involved anything from one studio head to three or more, different modifiers such as shoot through umbrellas, Soft boxes, snoots , beauty dishes etc.
Different backdrops and how to turn grey backdrops into pure white, black or colours using different lighting, positioning of subject relevant to backdrop etc.
We were experimenting between soft or hard lighting to removing shadows or exaggerating shadow details.
The photos I posted here were all taken using three studio lights (600watt Bowens).
Our main light was in a 100cm round soft box in front and slightly left of the subject and positioned about 7ft angled down so the centre was in line with the model(s) face.
It had a grid on the front which stops light spill.
This studio head was to provide the lighting of the subject and was aided by a reflector opposite to fill in shadows. The head was set to about half power.
There are two lights behind and to the left and right of the subject.
These were rectangular shaped and were at roughly the height of the subject and angled toward the subjects back.
They were set at a low power (less than quarter output) and their purpose was solely to rim light the back of the subject so that their black hair/clothing etc was separated from the black background.
The shots were taken in manual with the camera set to the Studio Head max sync speed of 1/125 of a second. Iso was set to its lowest setting (iso 50 on my body) and aperture set to 7.1.
The camera had a wireless trigger on the hotshoe to enable firing of the studio heads.
I processed the images in Lightroom for most of the editing. Cropping slightly and adjusting exposure, highlights and black levels. I used the iris enhance tool for the pupils and the brush tool and de saturate on the whites of the eye. A little use of the brush tool and teeth whitening was used where needed.
Final Lightroom adjustment was to sharpen the images using masking so only the edges were sharpened. Then the images were exported from Lightroom into Photoshop to use the clone stamp tool and content aware to remove any dust, fluff, stray hair etc from the images.
Hope that gives some ideas as to how the shoot was done and post production afterwards

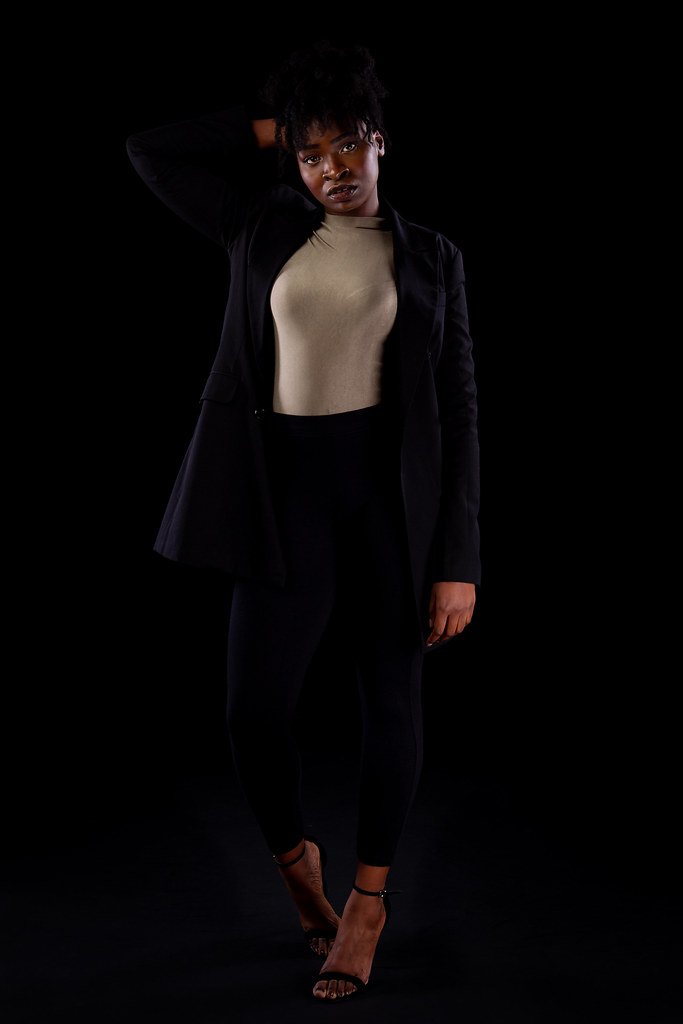
A couple more shots from yesterday.
 CC9J5997-Edit
 by
Jeff Cranwell, on Flickr
 CC9J6037
 by
Jeff Cranwell, on Flickr
 CC9J6000
 by
Jeff Cranwell, on Flickr
 CC9J5979-Edit
 by
Jeff Cranwell, on Flickr