Front and rear sub frames
So had some time to spend on refurbishing the sub frames.
Previously the rear had been taken back to bare and the metal neutralised. So time for some work on the front.
Taken back to bare and all the corrosion attacked.
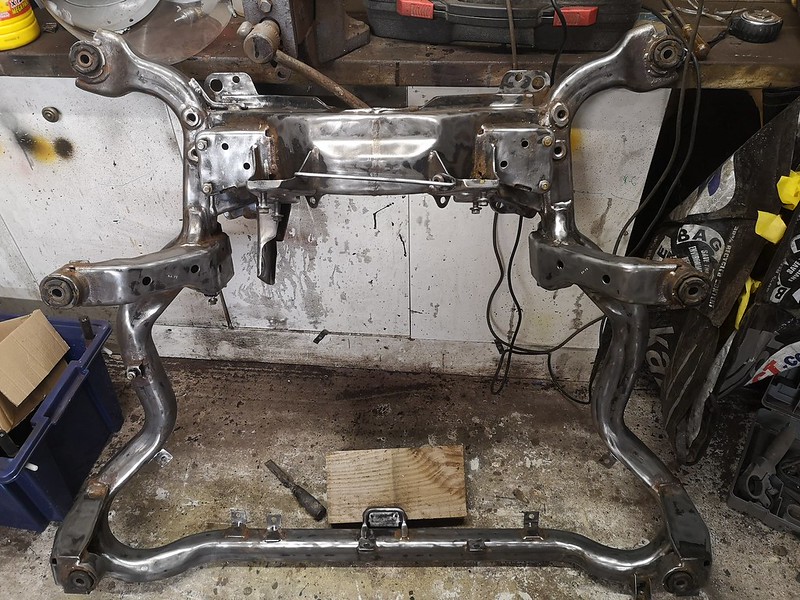 IMG_20190914_195317
 by
Jon Christie, on Flickr
 IMG_20190914_195325
 by
Jon Christie, on Flickr
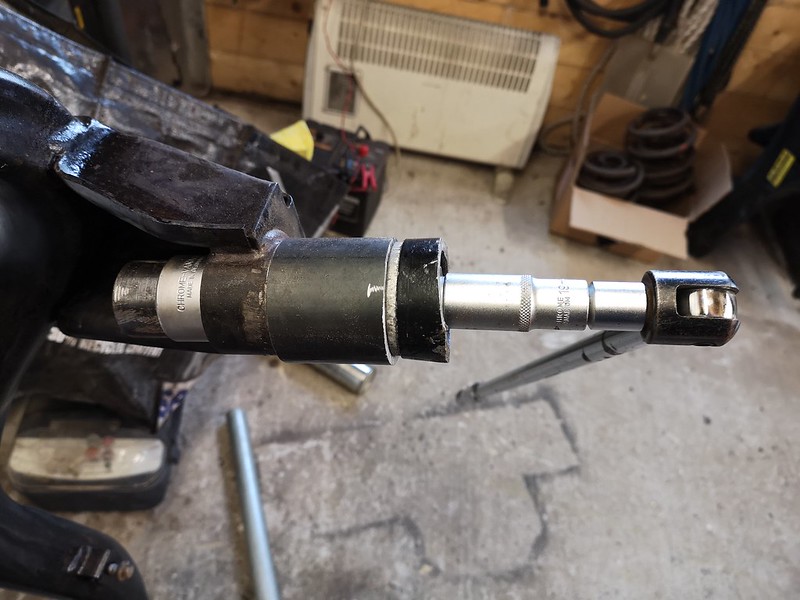
Next the old bushes are pressed out. I used the good old fashioned method for these but I have to say it was on the edge of what an M12 thread could take.
So to press out firstly the flanges had to be bent back to give me a landing for the back tube
 IMG_20191007_145957
 by
Jon Christie, on Flickr
Then using this set up for a M12 stud bar and nut, 60mm dia tube with 10mm wall thickness as the backing tube, a 32 mm socket as the pressing tube to push the bushes out.
Laid out on the deck in bits
 IMG_20191008_124552
 by
Jon Christie, on Flickr
and set up on the bush
 IMG_20191008_120432
 by
Jon Christie, on Flickr
I used a breaker bar to turn the nut. I use an old old backing plate I made up out of 10mm think steel with a 12mm hole through it on the the back of the backing tube (60mm for these)
The bush moving
 IMG_20191007_150008
 by
Jon Christie, on Flickr
and out
 IMG_20191008_120514
 by
Jon Christie, on Flickr
I did have to use heat from a propane torch on a couple to get the bushes moving and the M12 threads were shot after a couple of bushes so the torque required to move the bushes is on the edge of what an M12 can deliver

If you use this method dont even think about using cheap thread bar from DIY stores

and the bush gone
 IMG_20191008_124211
 by
Jon Christie, on Flickr
Old bushes and new bushed sat side by side with the news one ready to be pressed in.
 IMG_20191008_154026
 by
Jon Christie, on Flickr
and the front subframe neutralised ready to receive the bushes
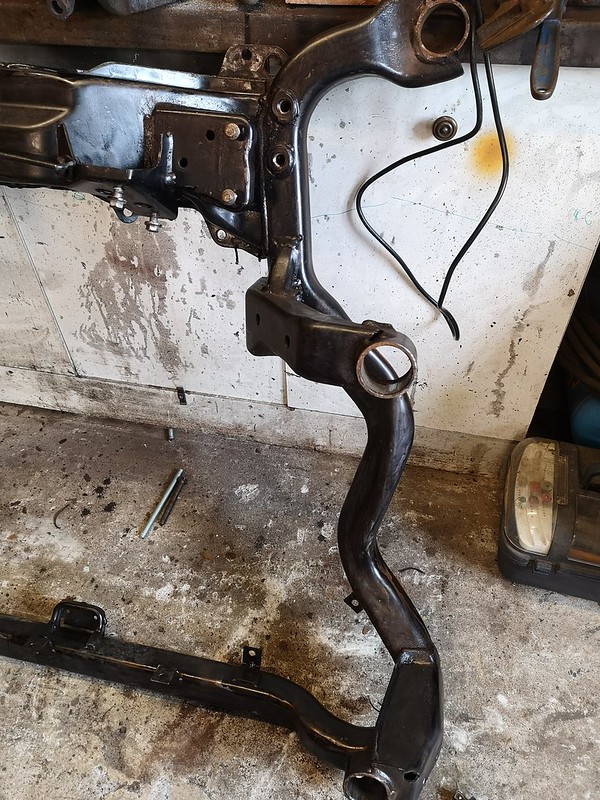 IMG_20191008_154034
 by
Jon Christie, on Flickr
 IMG_20191008_154044
 by
Jon Christie, on Flickr
 IMG_20191008_193938
 by
Jon Christie, on Flickr
Then the new bushes pressed in using the same method as removal. The black stuff is a cavity wax which.1 helps the metal to slide 2. Preserves the internal faces.
 IMG_20191009_154648
 by
Jon Christie, on Flickr
the hardest bit of fitting is making sure bushes starts straight.
The bush fully pressed home..
 IMG_20191009_155255
 by
Jon Christie, on Flickr
 IMG_20191009_155258
 by
Jon Christie, on Flickr
and a full set

 IMG_20191009_165911
 by
Jon Christie, on Flickr
Next up was the task of priming the front sub frame.
As stated before I am using a corroless paint scheme for my chassis parts.
We use it in the marine industry and seems to keep corrosion at bay on ships in salt water so will be good on these parts. I have used it in the past to great affect (I even sprayed an entire underside of a car with it once).
QDR primer (rust stabiliser) applied. I didnt know whether to spray or roller the paint. I decided to roller as I could not be bothered with protecting the rest of the garage, This stuff does stink when applied and curing

 IMG_20191011_155610
 by
Jon Christie, on Flickr
 IMG_20191011_155405
 by
Jon Christie, on Flickr
I then did the same for the rear sub frame
 IMG_20191011_155257
 by
Jon Christie, on Flickr
 IMG_20191011_155328
 by
Jon Christie, on Flickr
 IMG_20191011_155333
 by
Jon Christie, on Flickr
Both sub frames ready for top coat black corroless which is glass reinforced impregnated for strength and will give a semi gloss finish